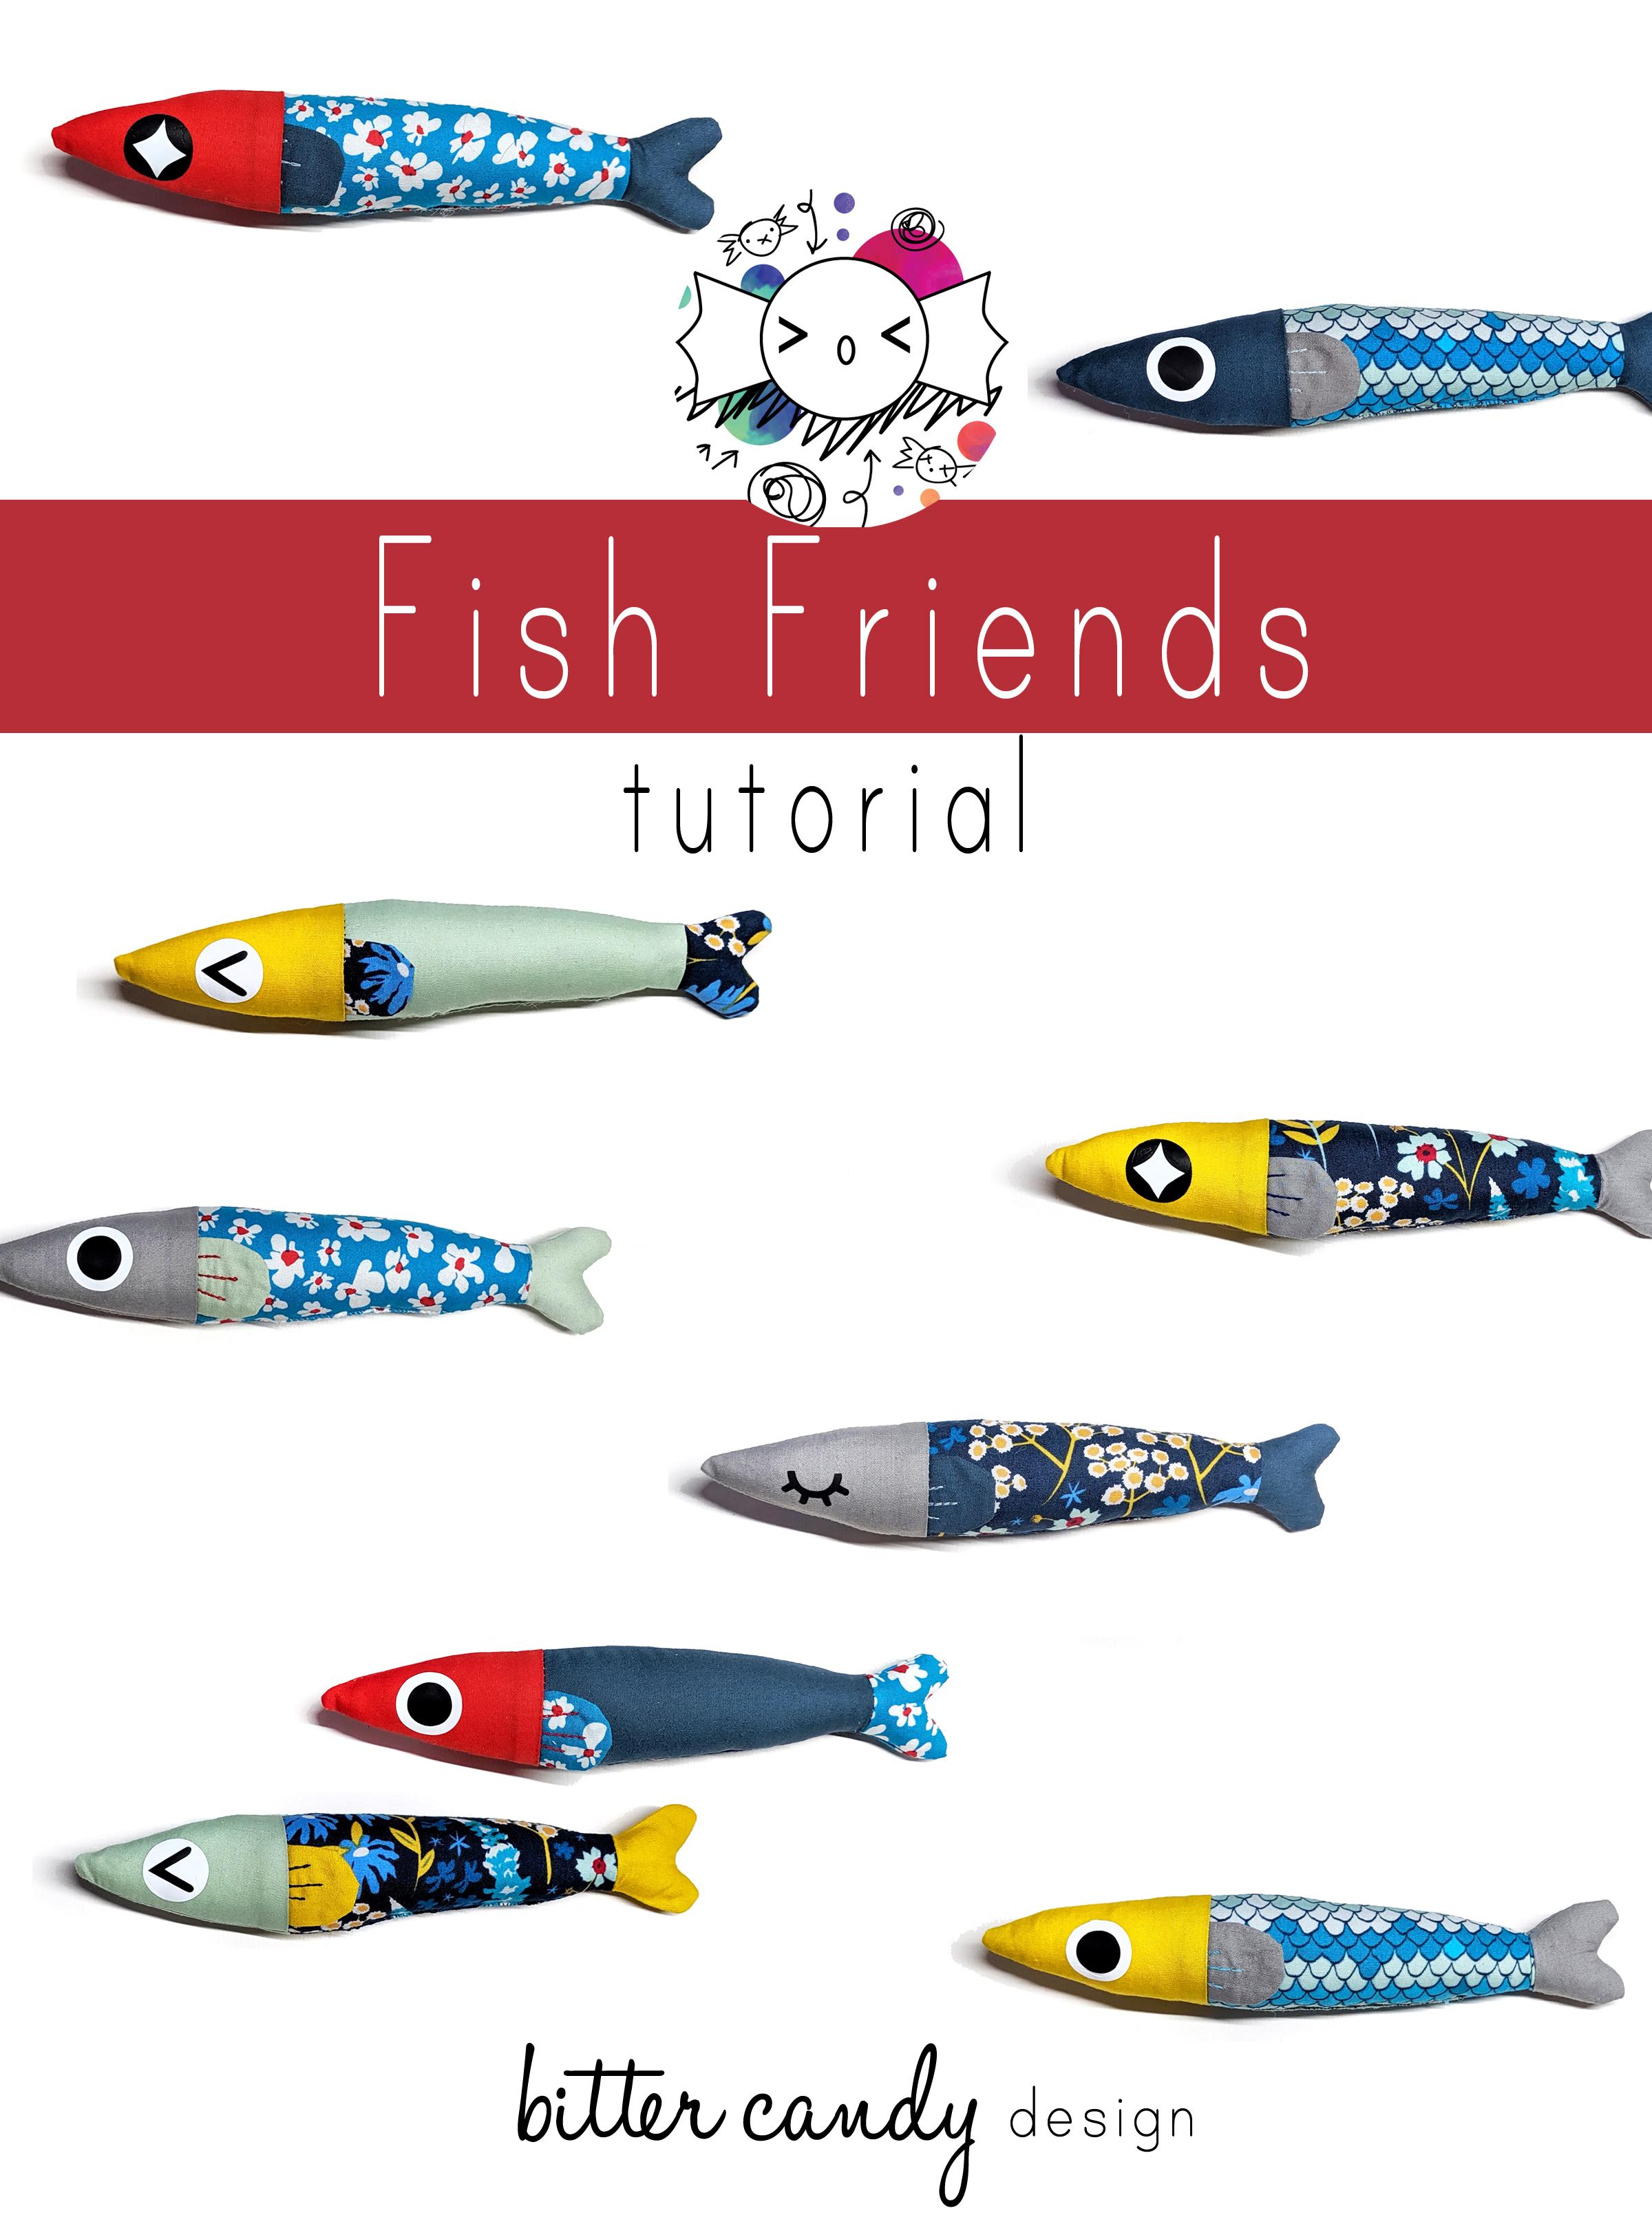
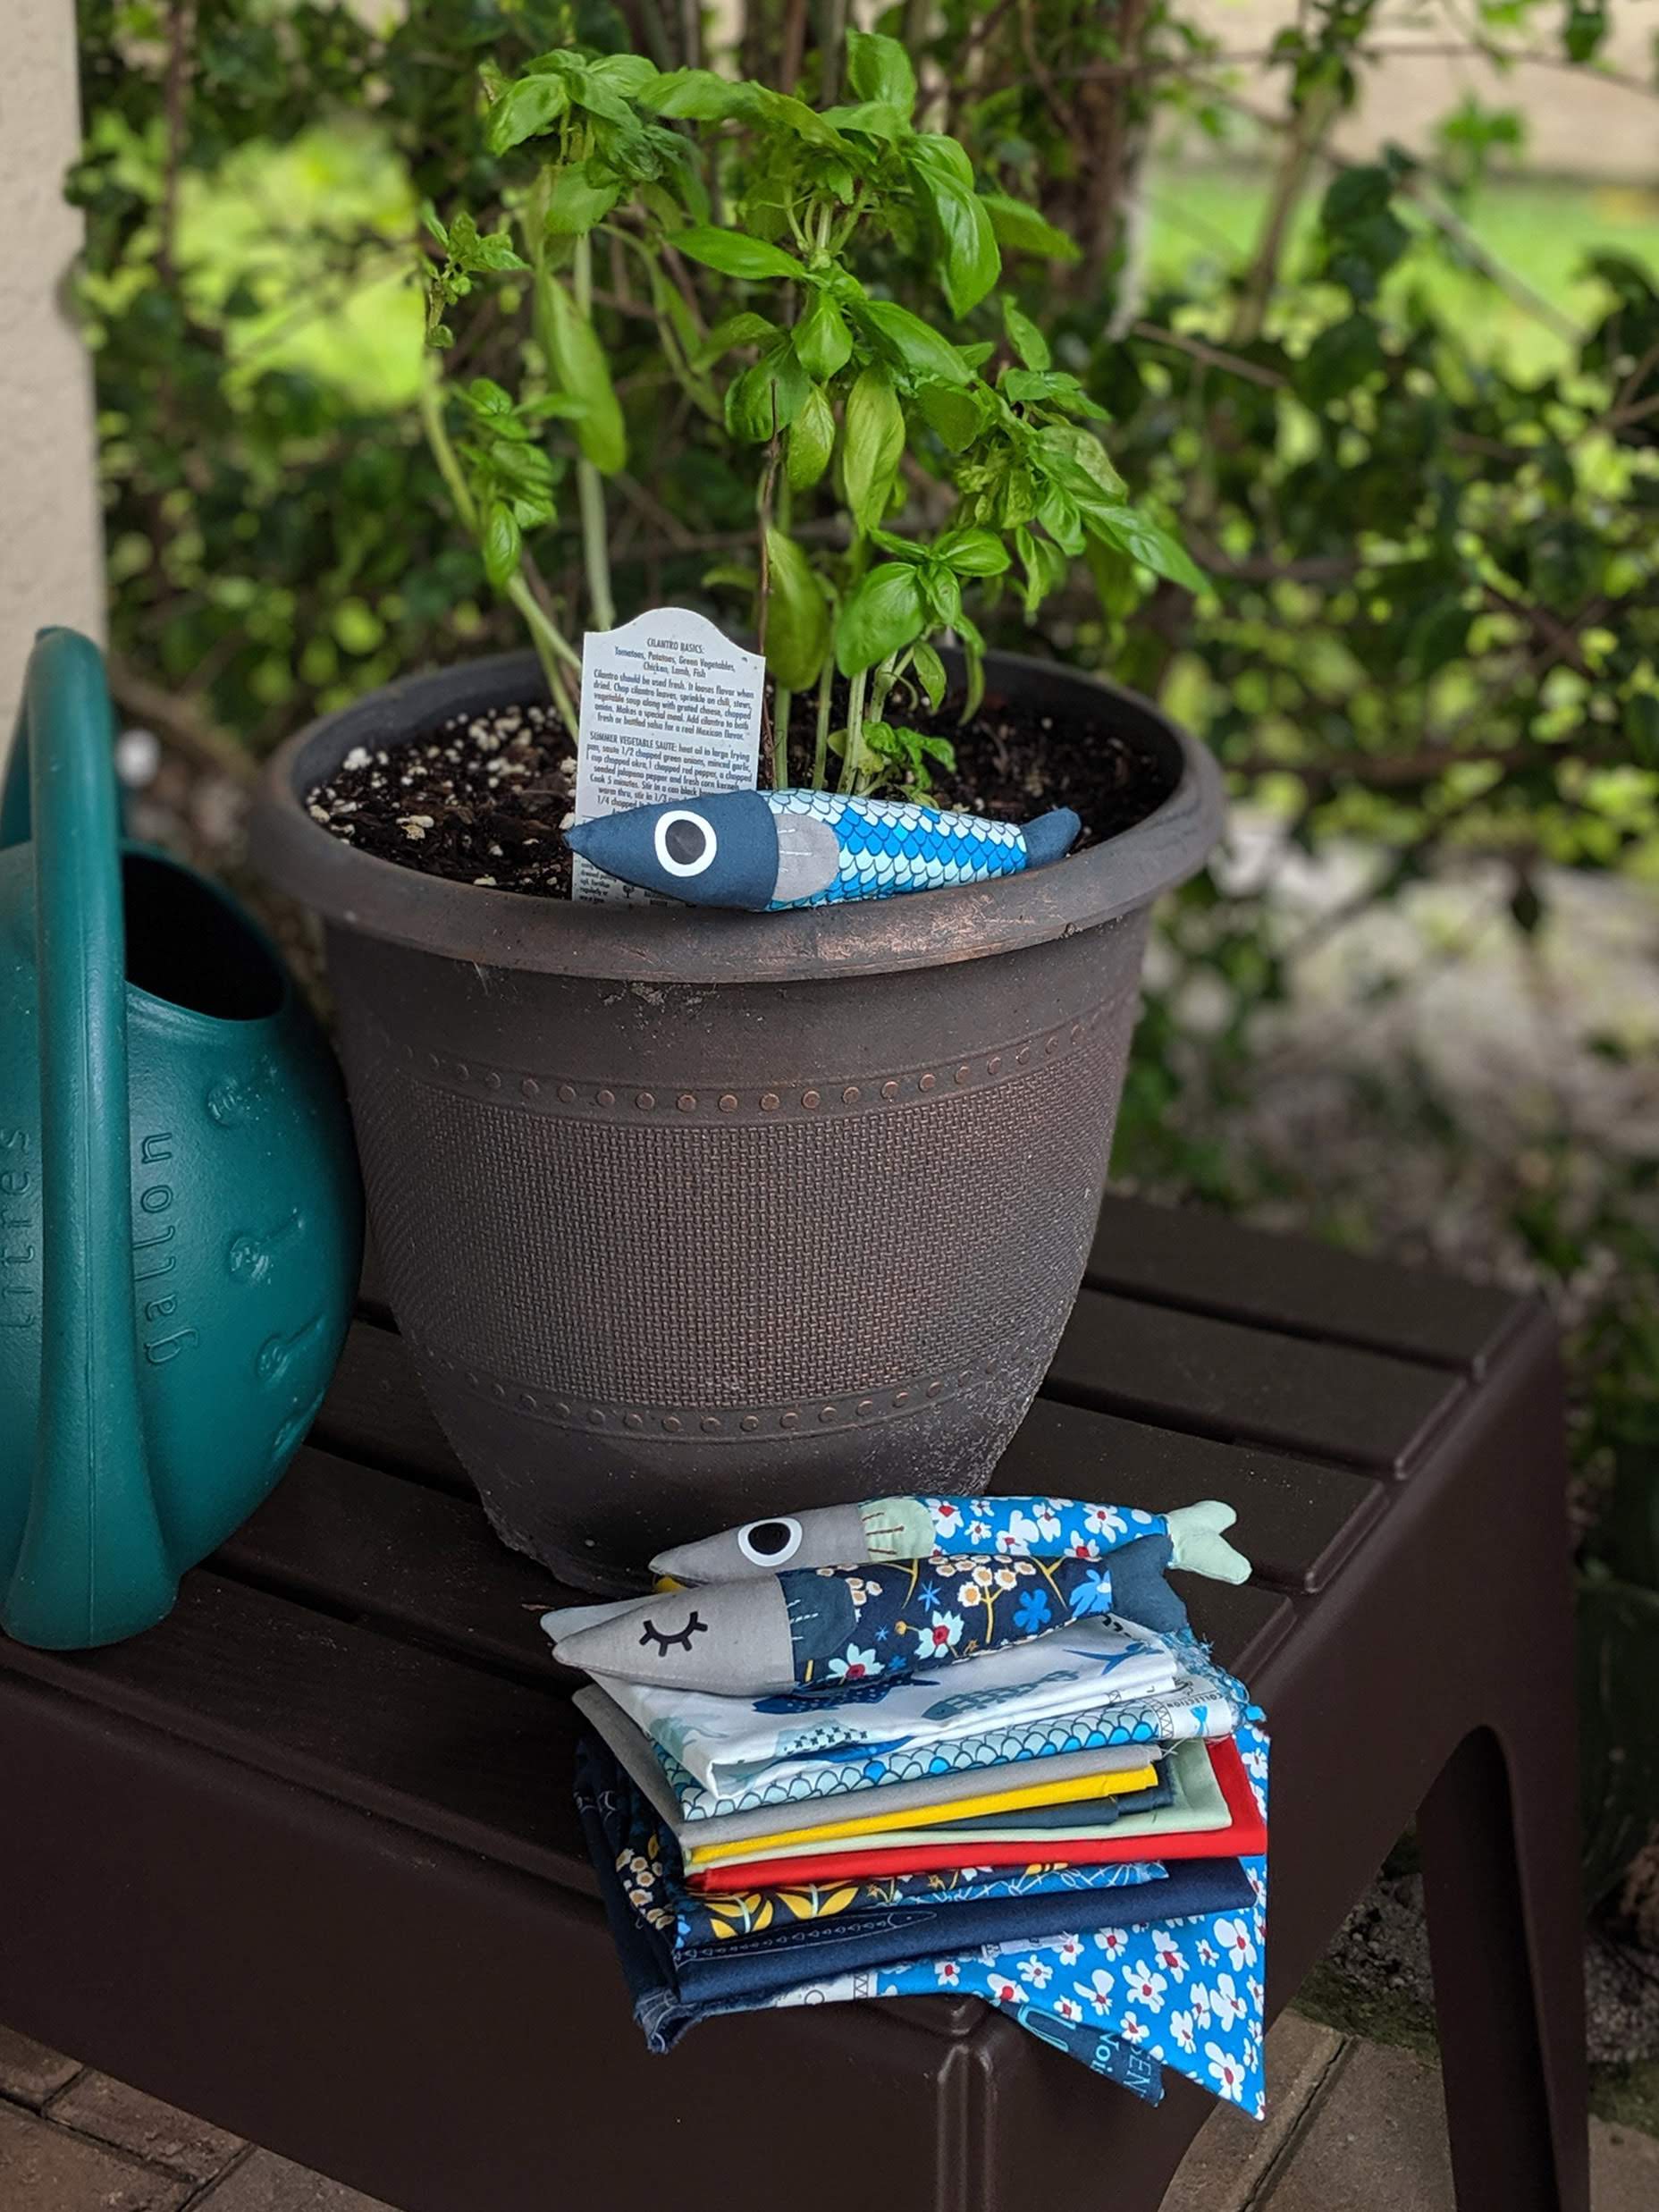
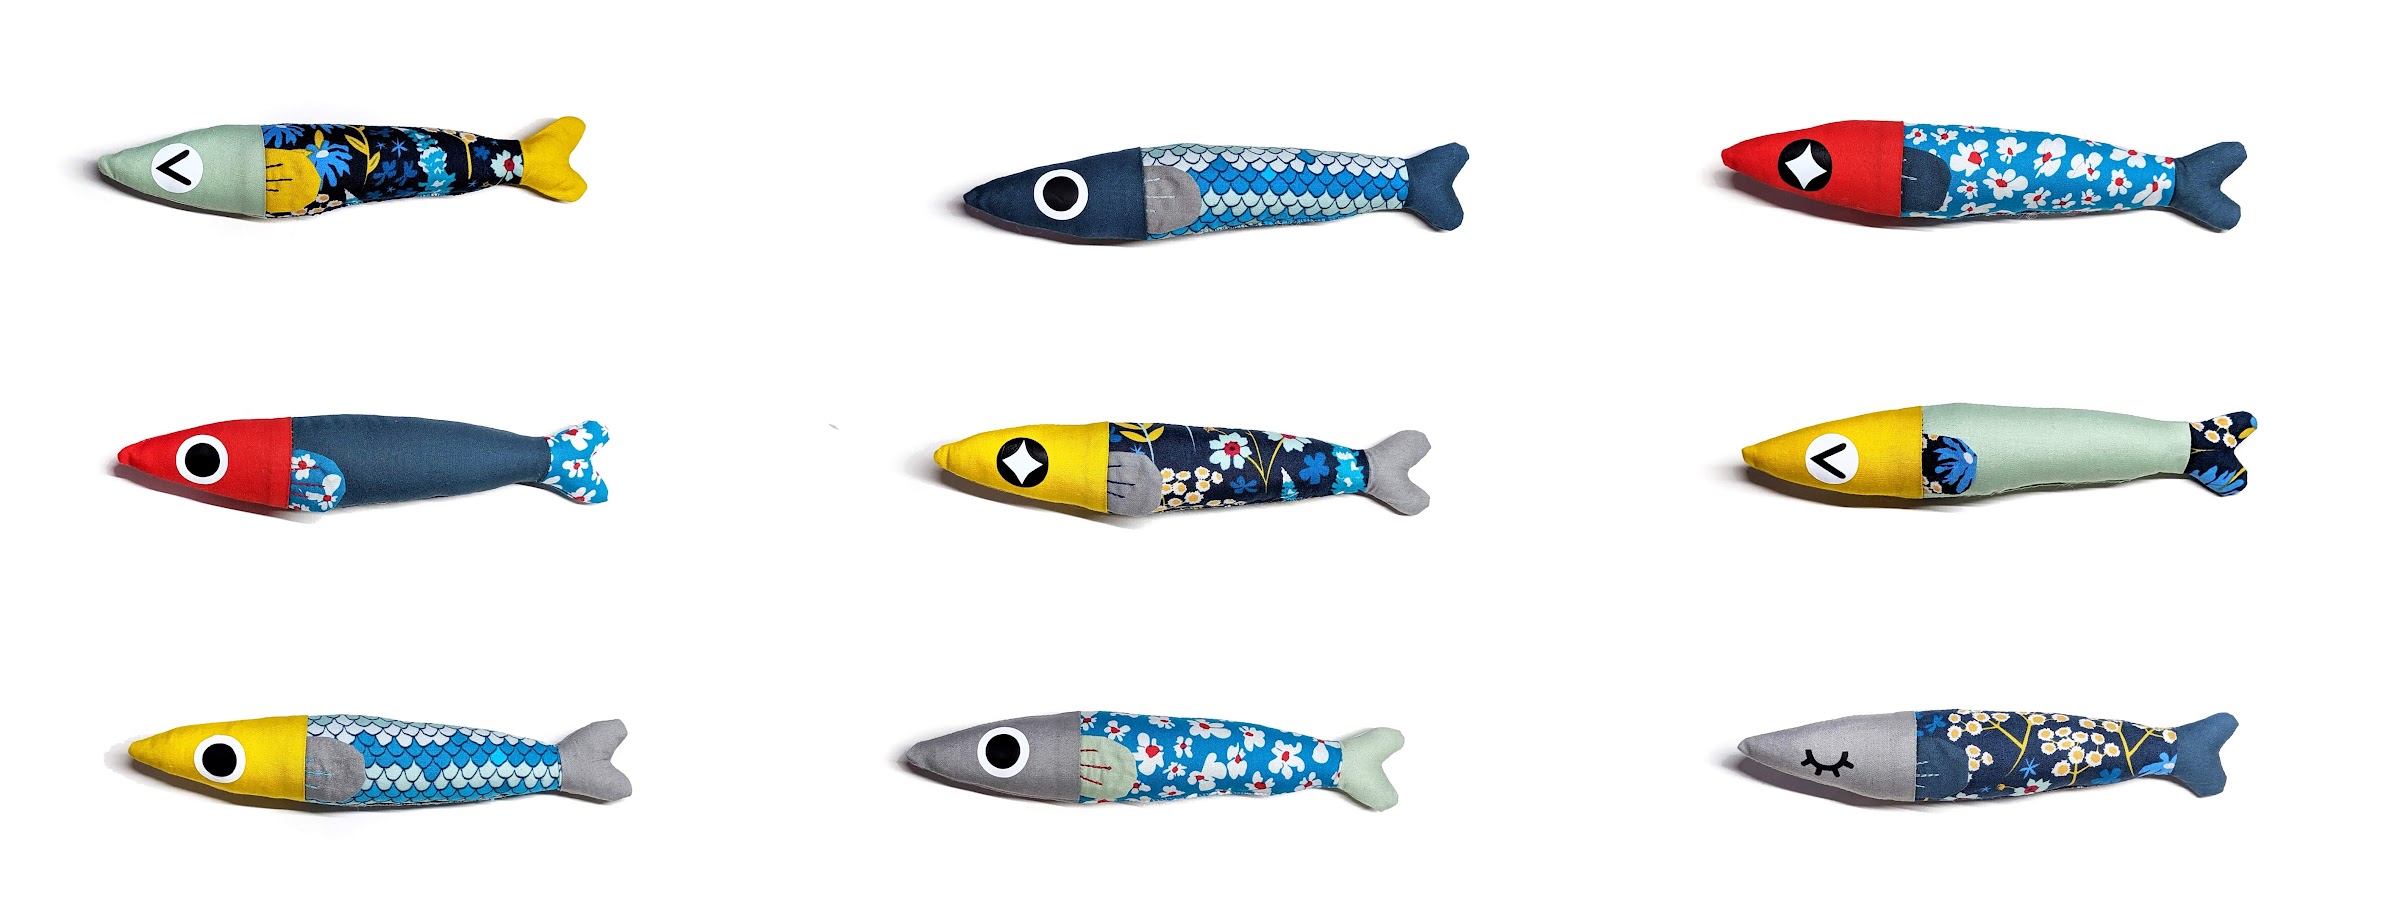
It’s all about the fish!
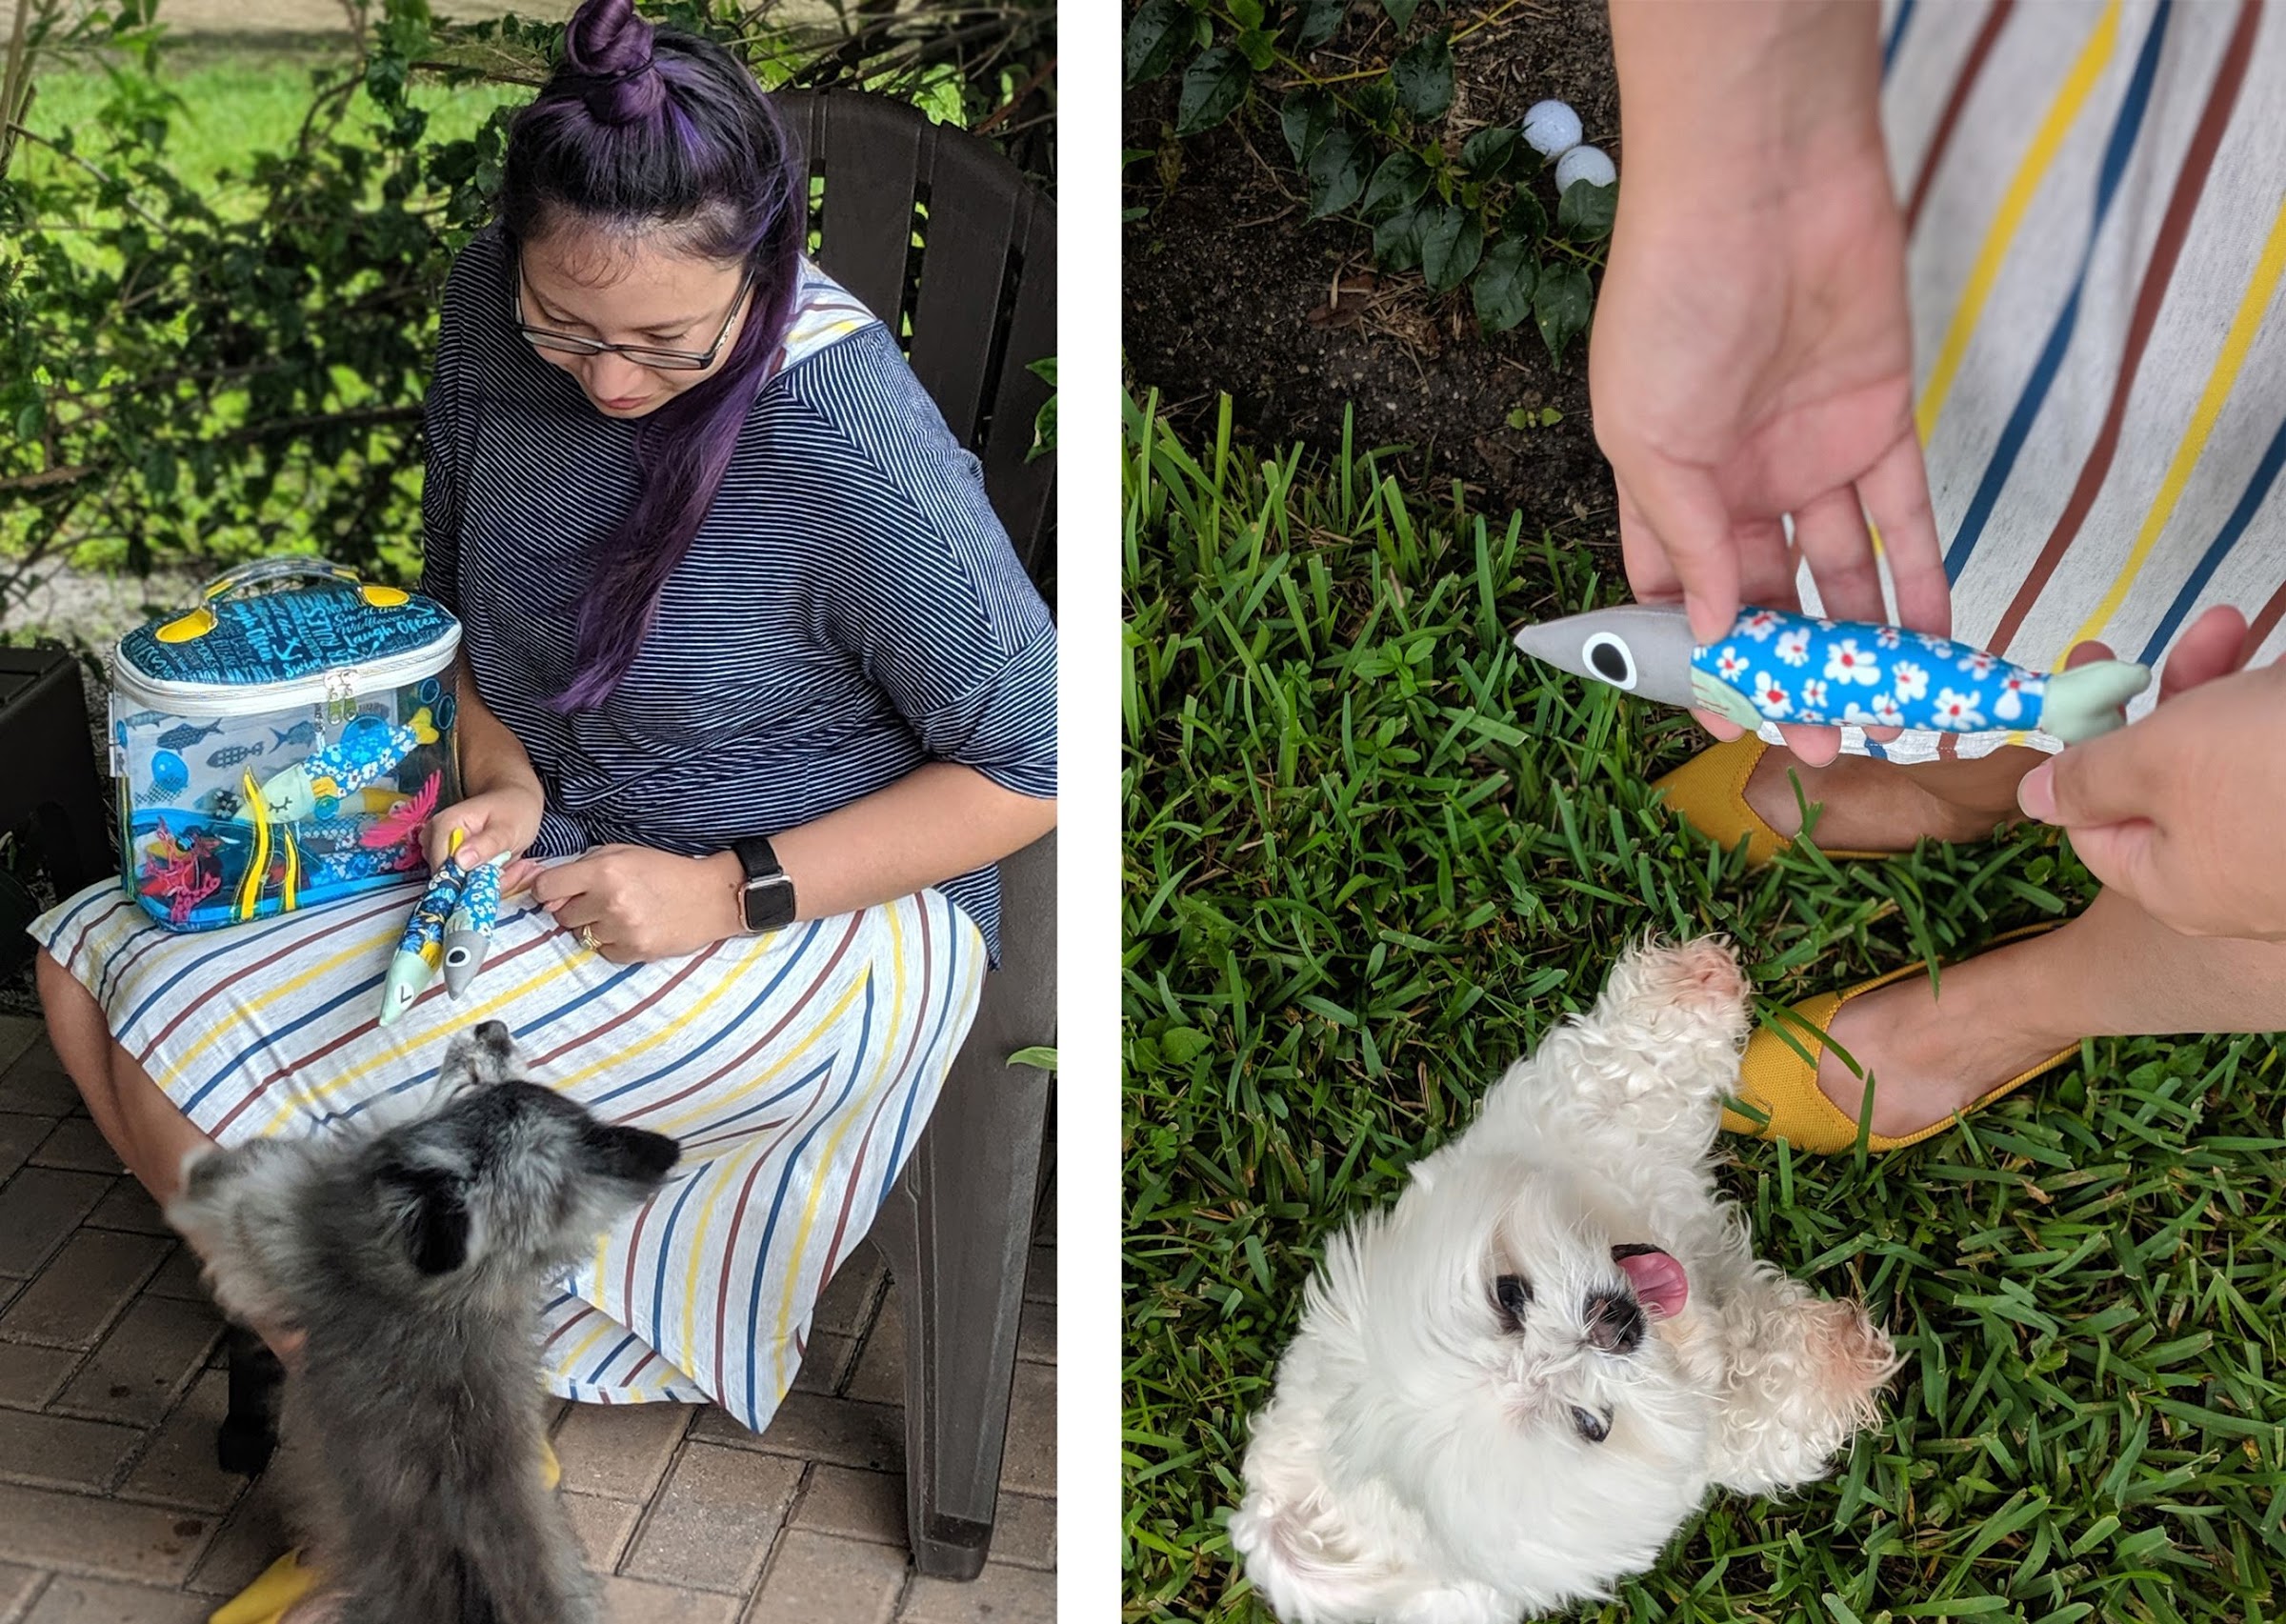
These little sardines are quick to sew up and are such a fun way to showcase small bits of fabric. Great for home decor, children’s toys, pattern weights, or even pet toys. And if you’re like me you’ll love adding this tutorial to your arsenal for using up all those collected scraps!
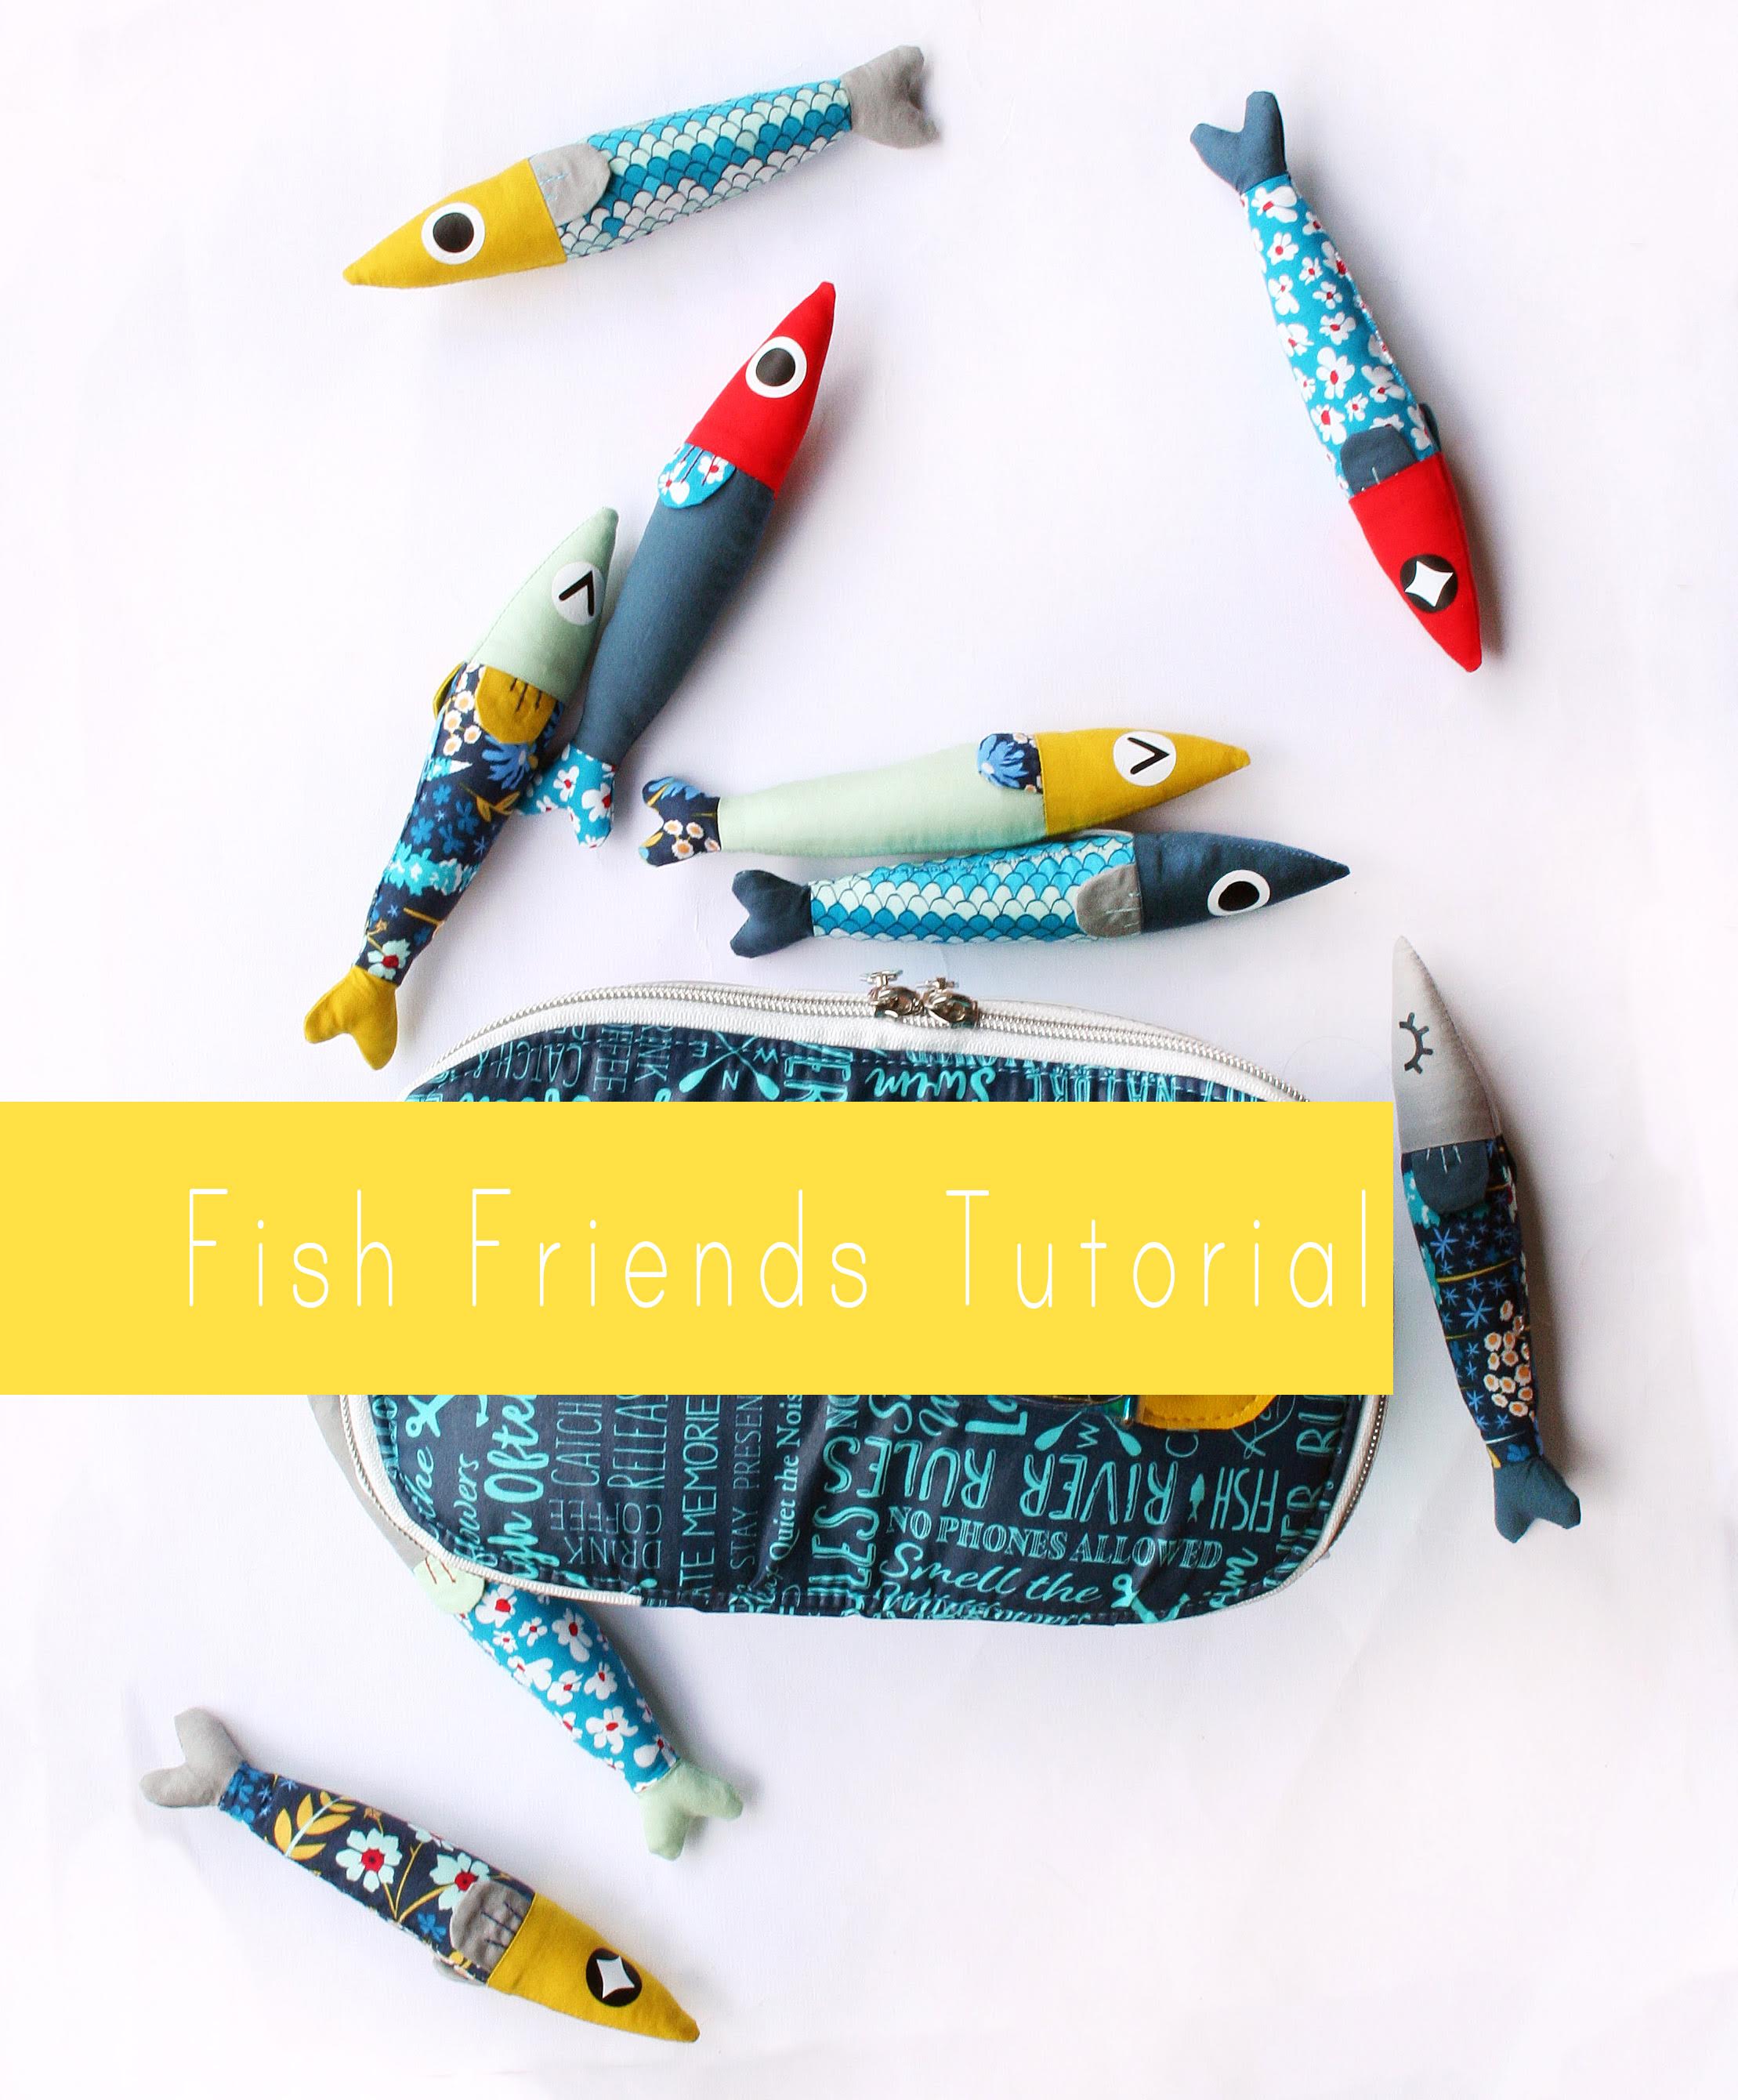
When making a beautiful ‘fish-bowl’ train case for Mister Domestic’s Catch & Release fabric party (check out that post here), I HAD to include fish. As sneak peeks landed on Instagram, I heard your cries that these cuties needed a pattern – so I obliged!
These quirky sardines brought together my final piece & can brighten your life too!
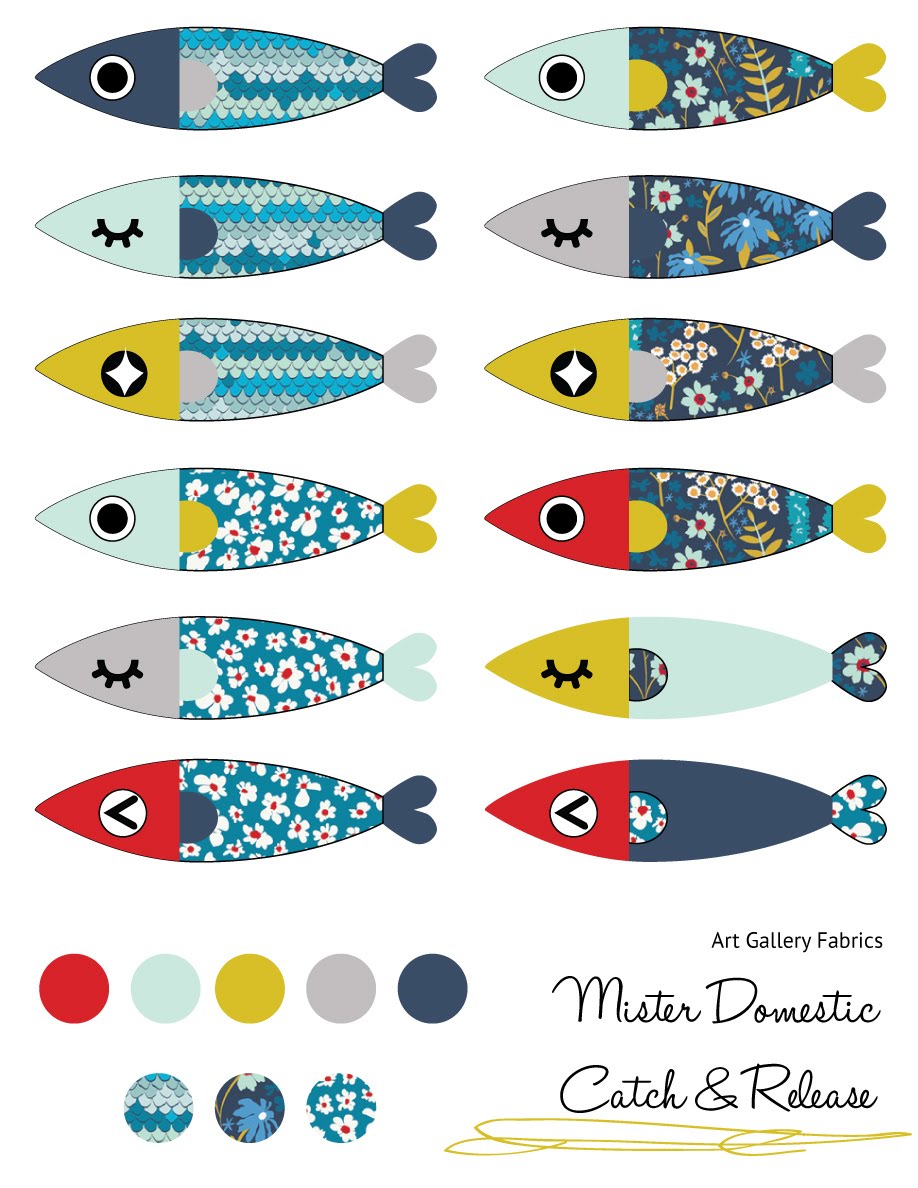
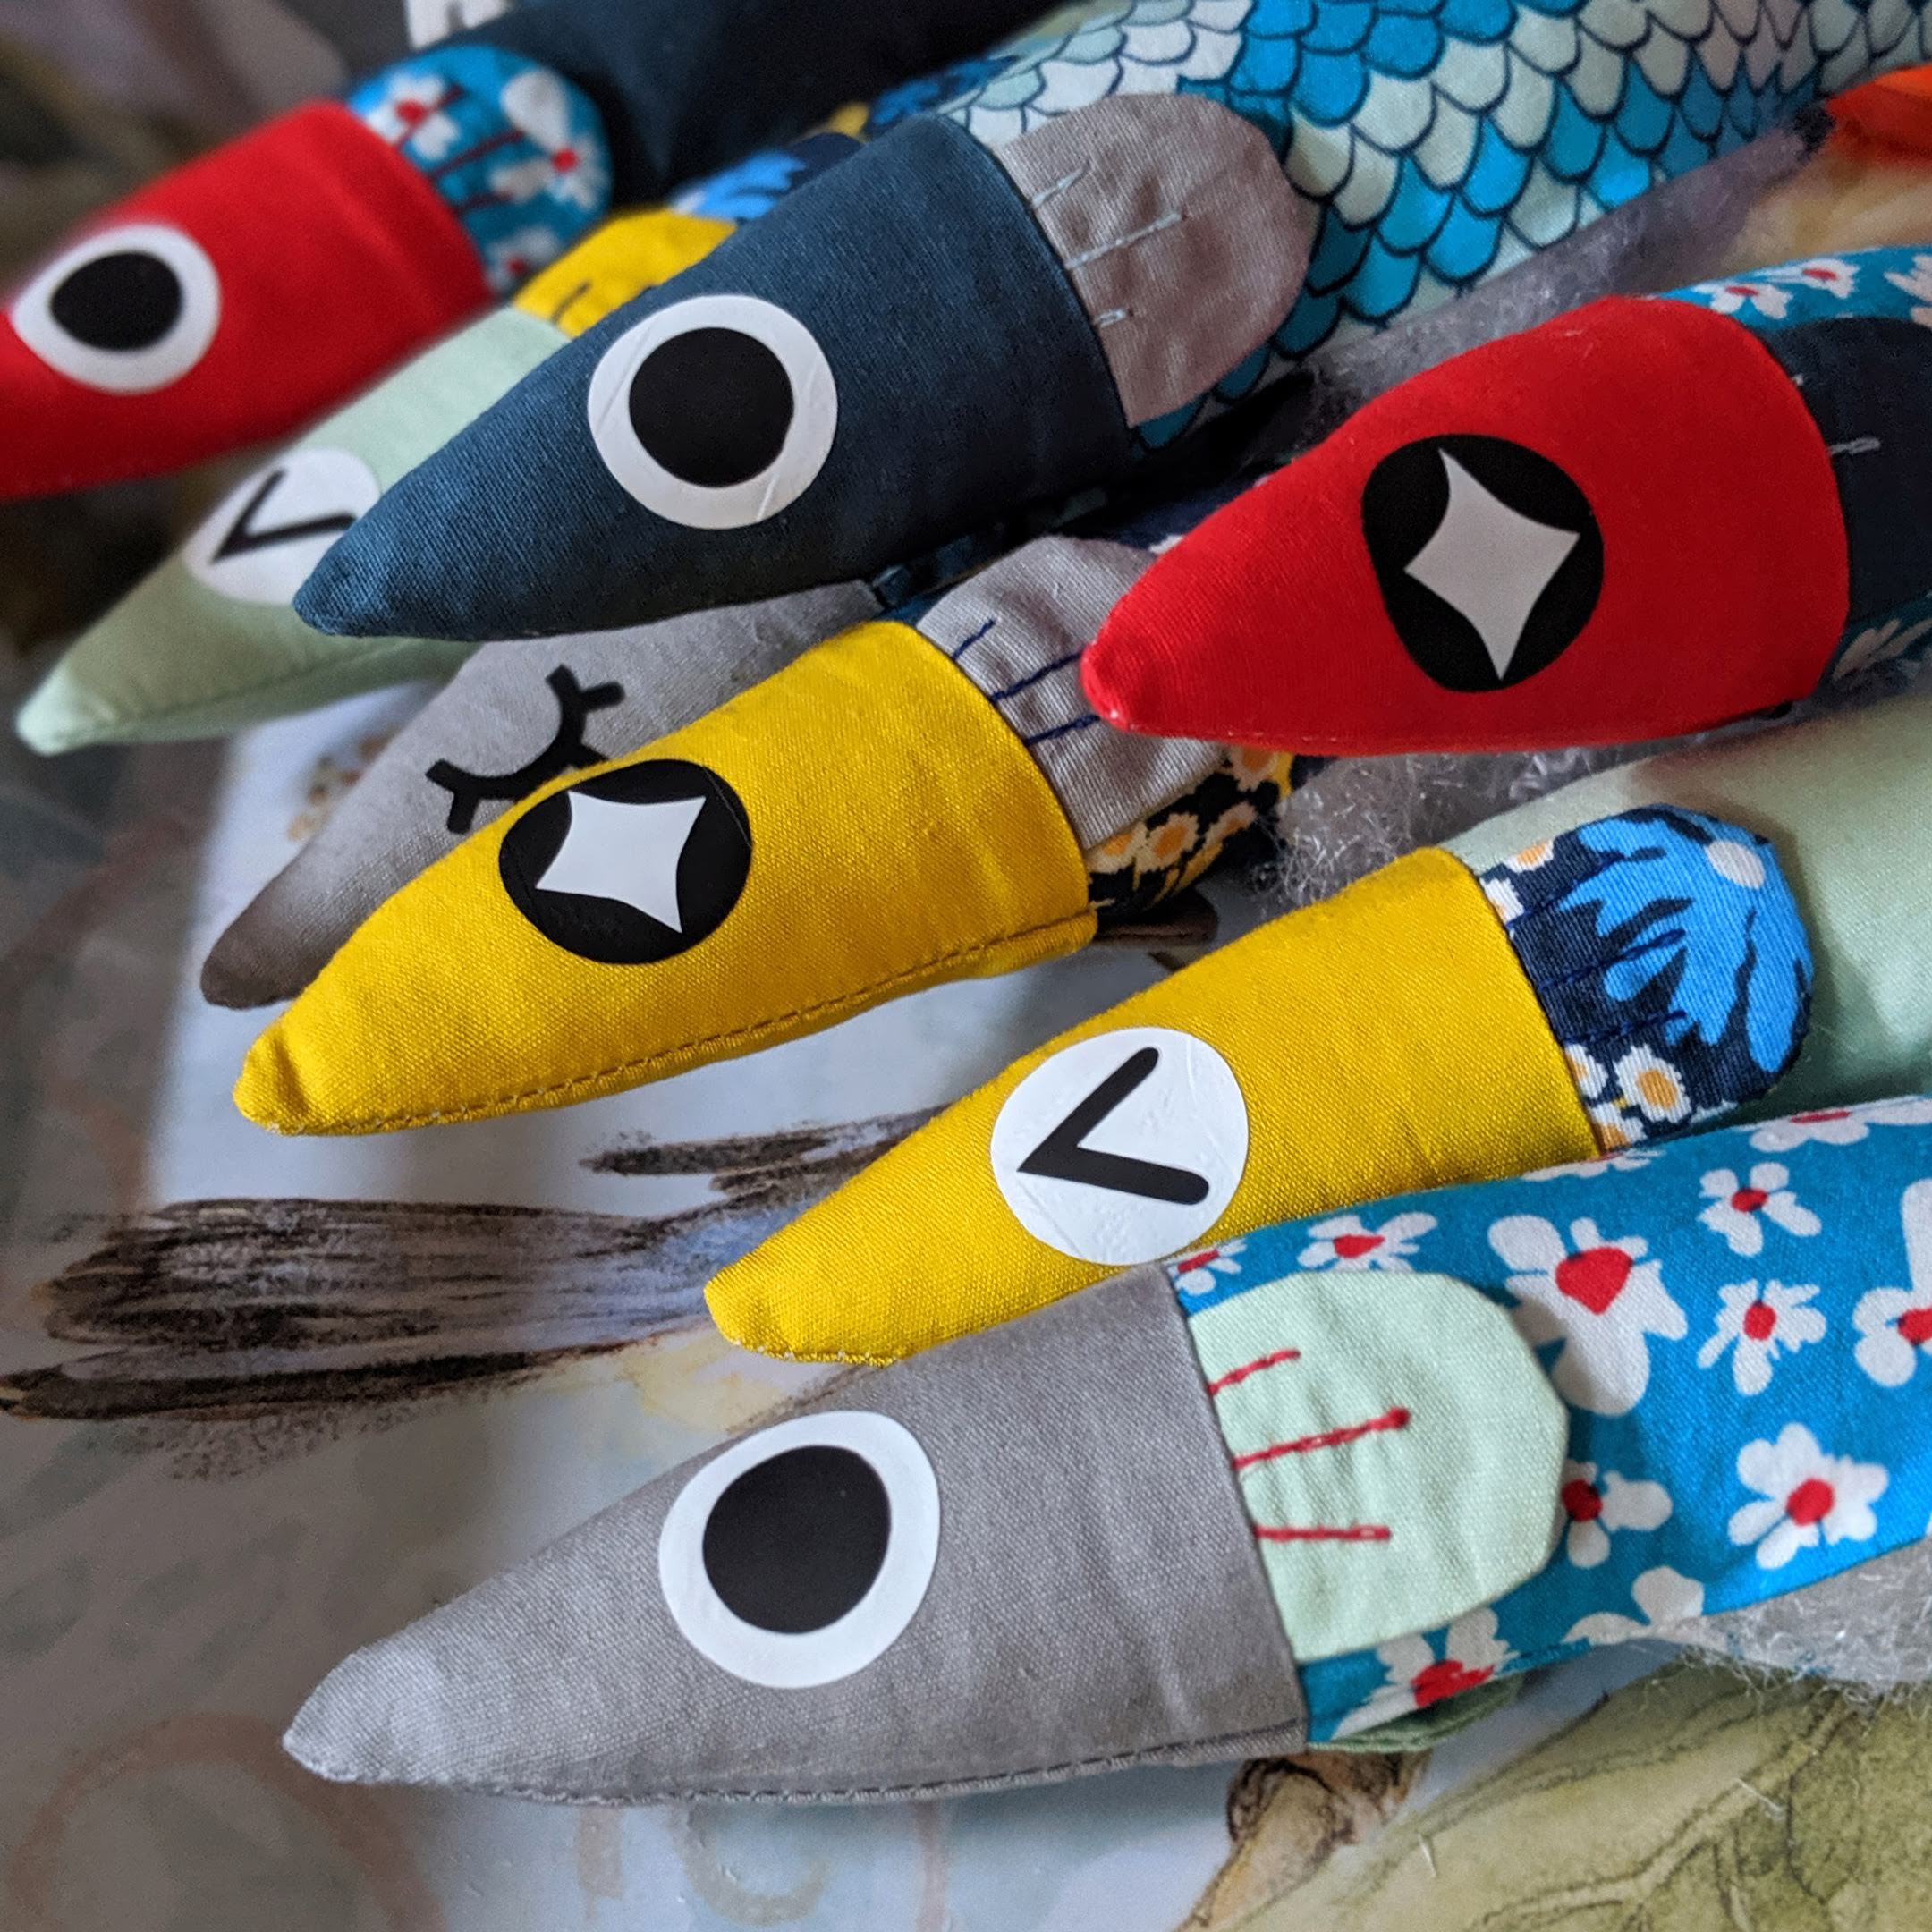
Included are multiple eye choices for whatever emotion you want your sardine friend to convey: wide eyed stare, ‘eek’ I’m scared, starry-eyed obsession , & the sleeping beauty. I used my Cricut Maker to precisely cut heat transfer vinyl that was then applied an iron (permanent adhesive vinyls works just as well!). Don’t have a cutting machine? These fish would be equally cute in embroidery, fabric safe markers, or even felt applique!
//Size: apprx 6.75″ long
//Materials & Supplies//
–PDF pattern pieces file + SVG file
*subscription required to gain access code to the free file. you can subscribe below 🙂
-cotton fabric scraps (3, 6″x6″ squares of fabric is plenty for 1 fish!)
-stuffing (polyfil, wool, crushed walnut, etc)
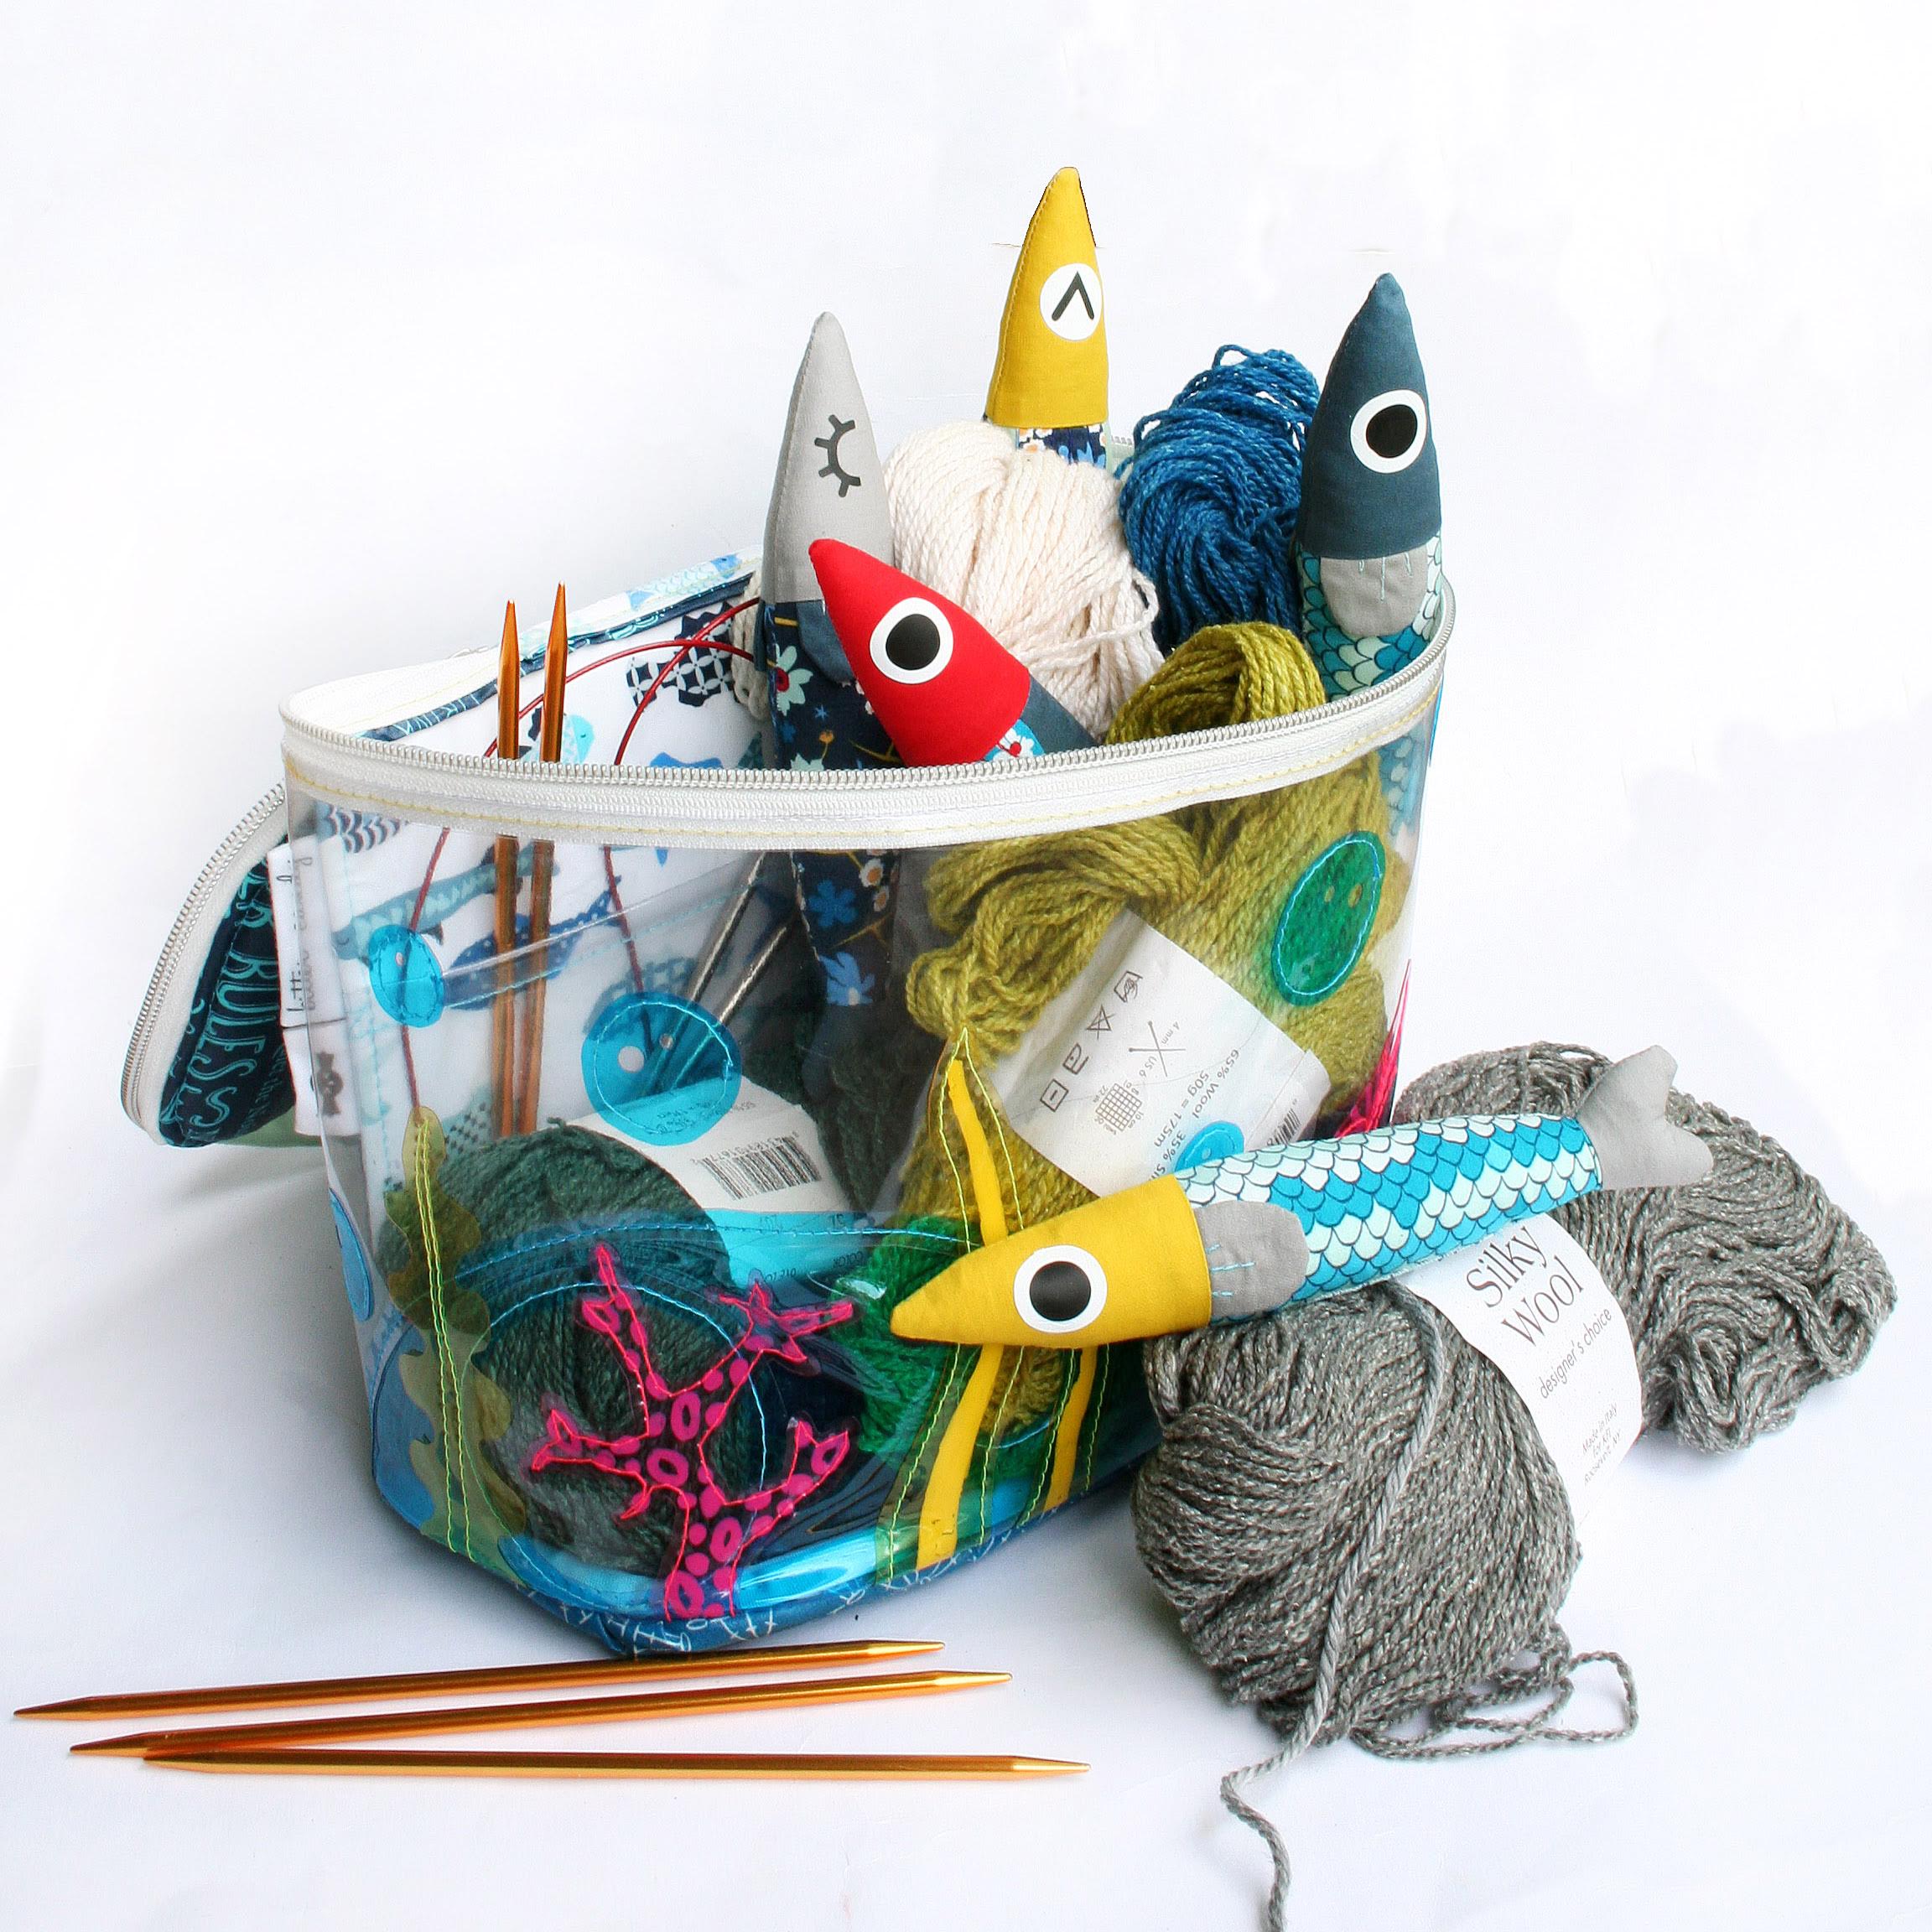
*experiment with different fillings to change its purpose. Fluffy fleece for décor, children or pet toys; ground walnut as a pattern weight or pin cushion; etc
-HTV or 651 vinyl in black and white, Cricut Maker + tools
*or embroidery supplies, fabric pens, felt scraps, etc
-needle & thread
// ¼” Seam Allowance
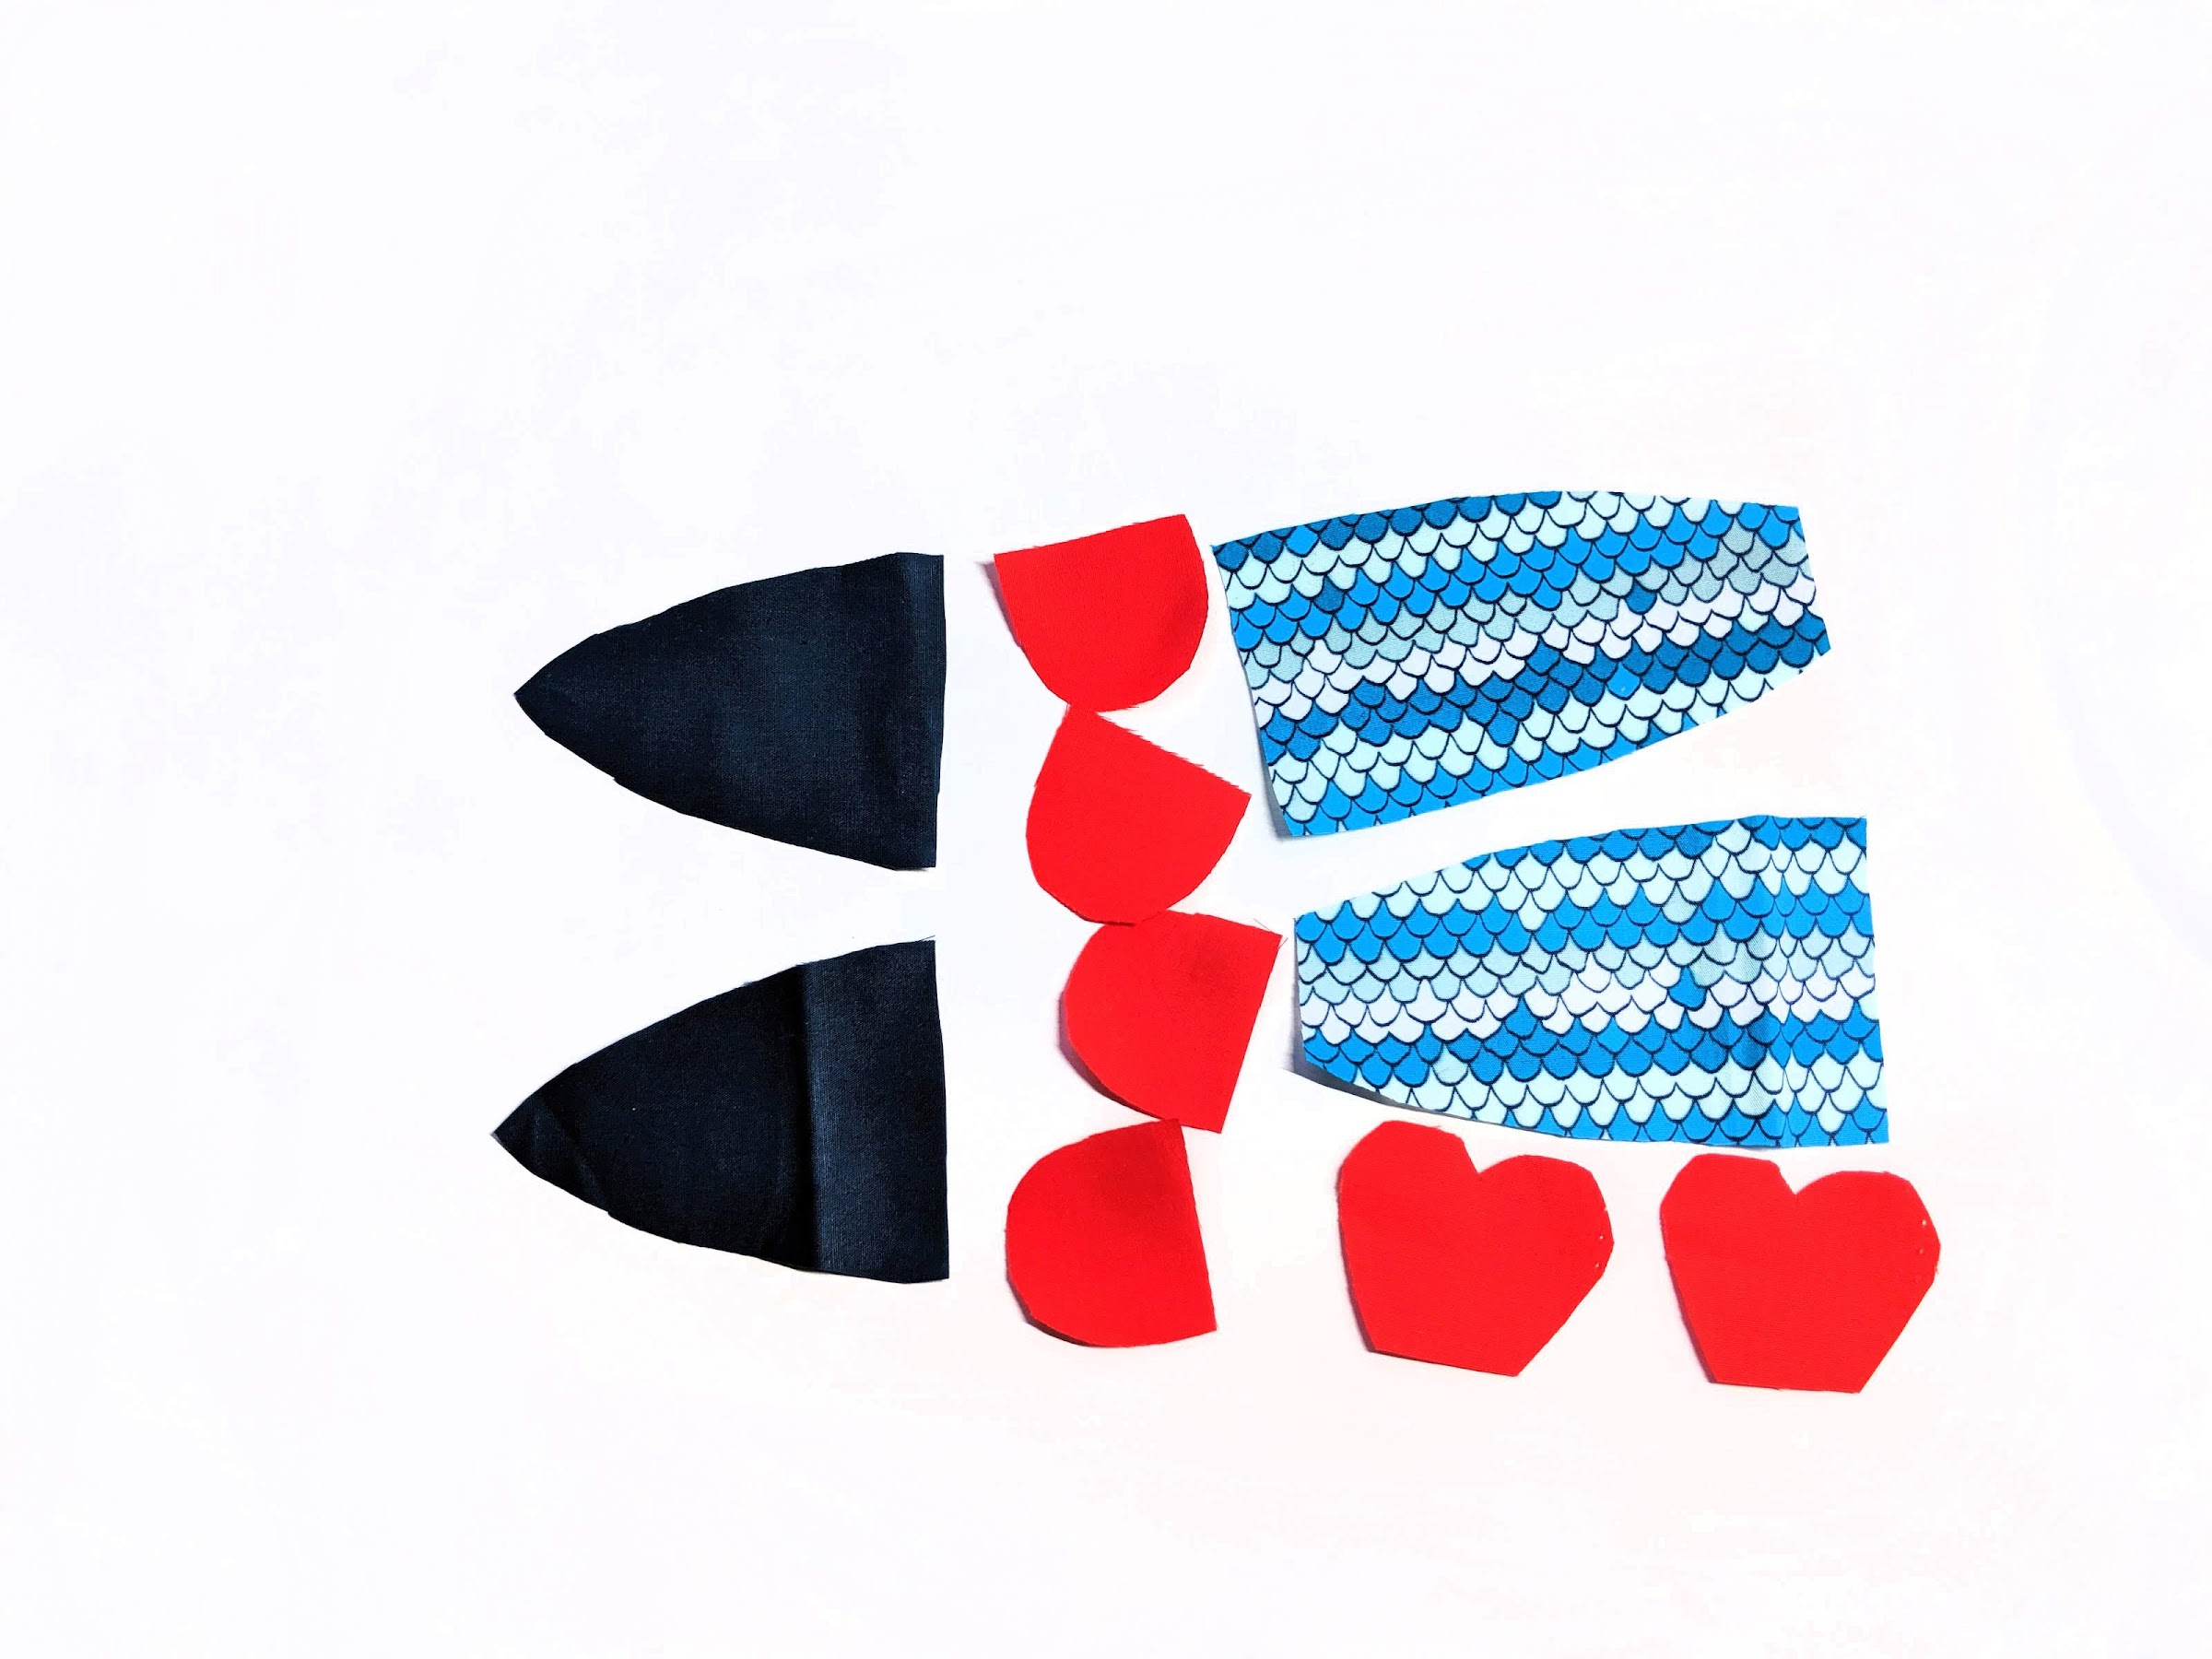
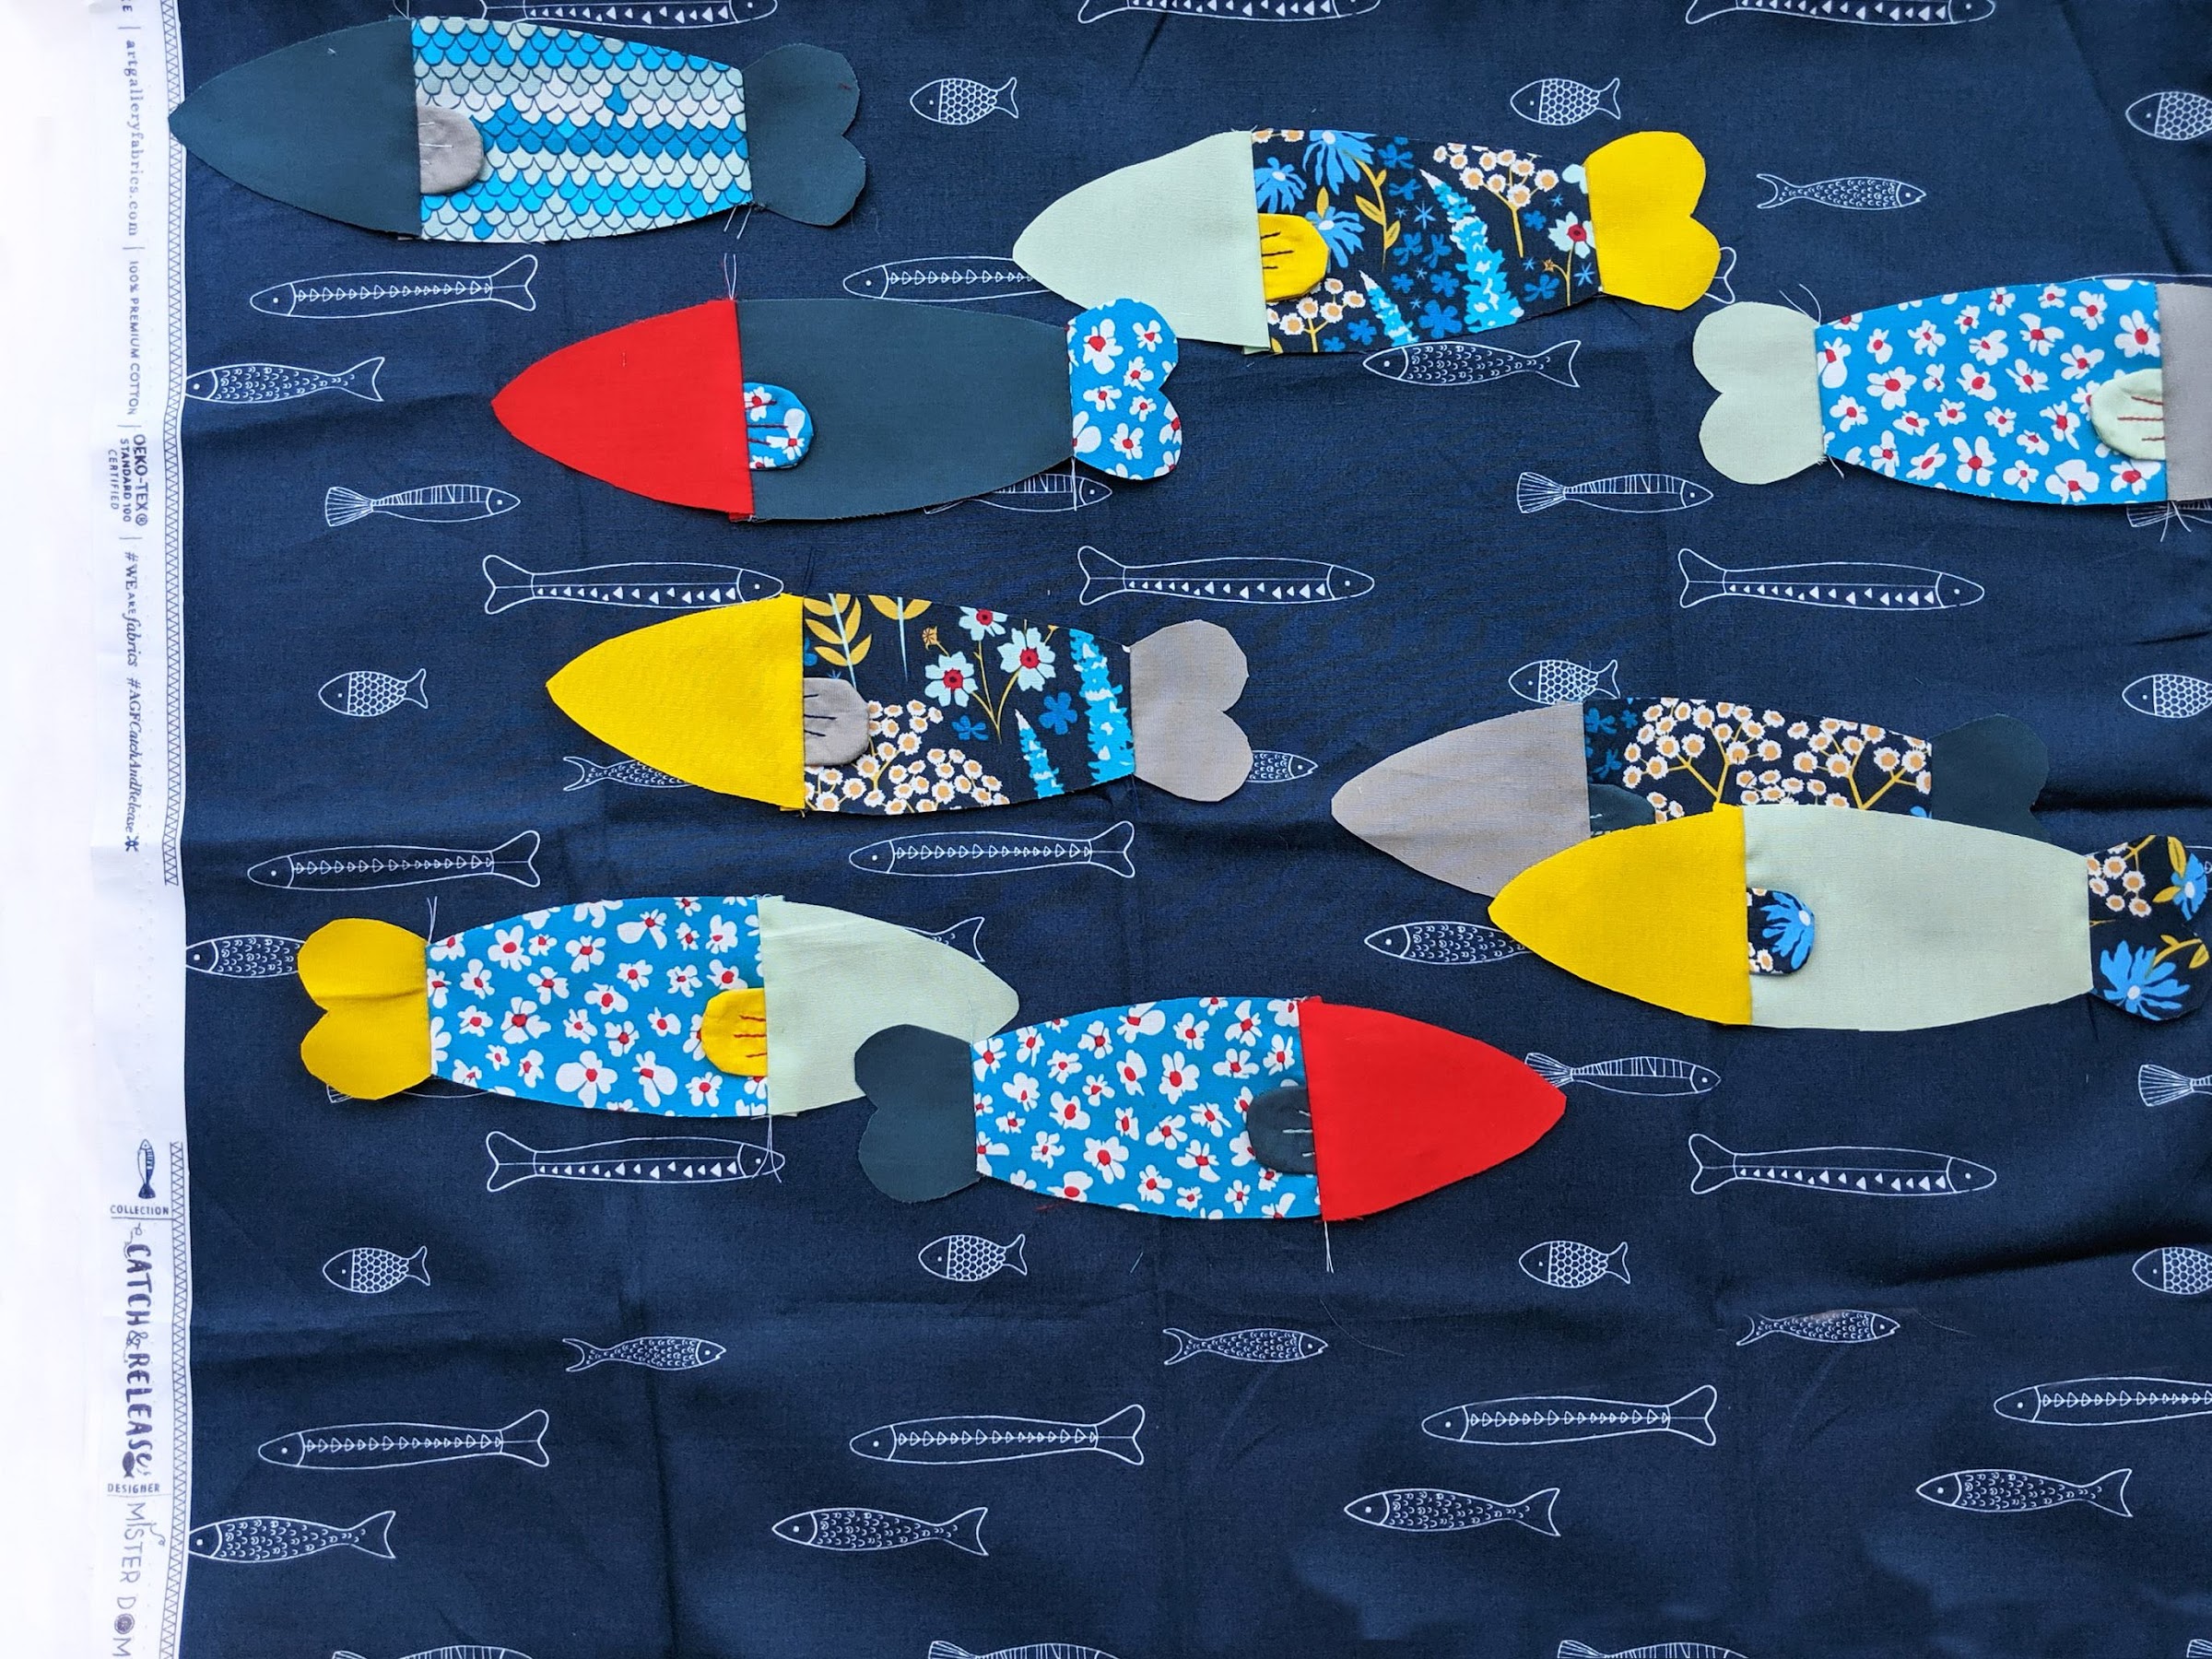
1. Cut fabric pieces, be sure to cut mirror versions for each piece as indicated on the pattern pieces file.
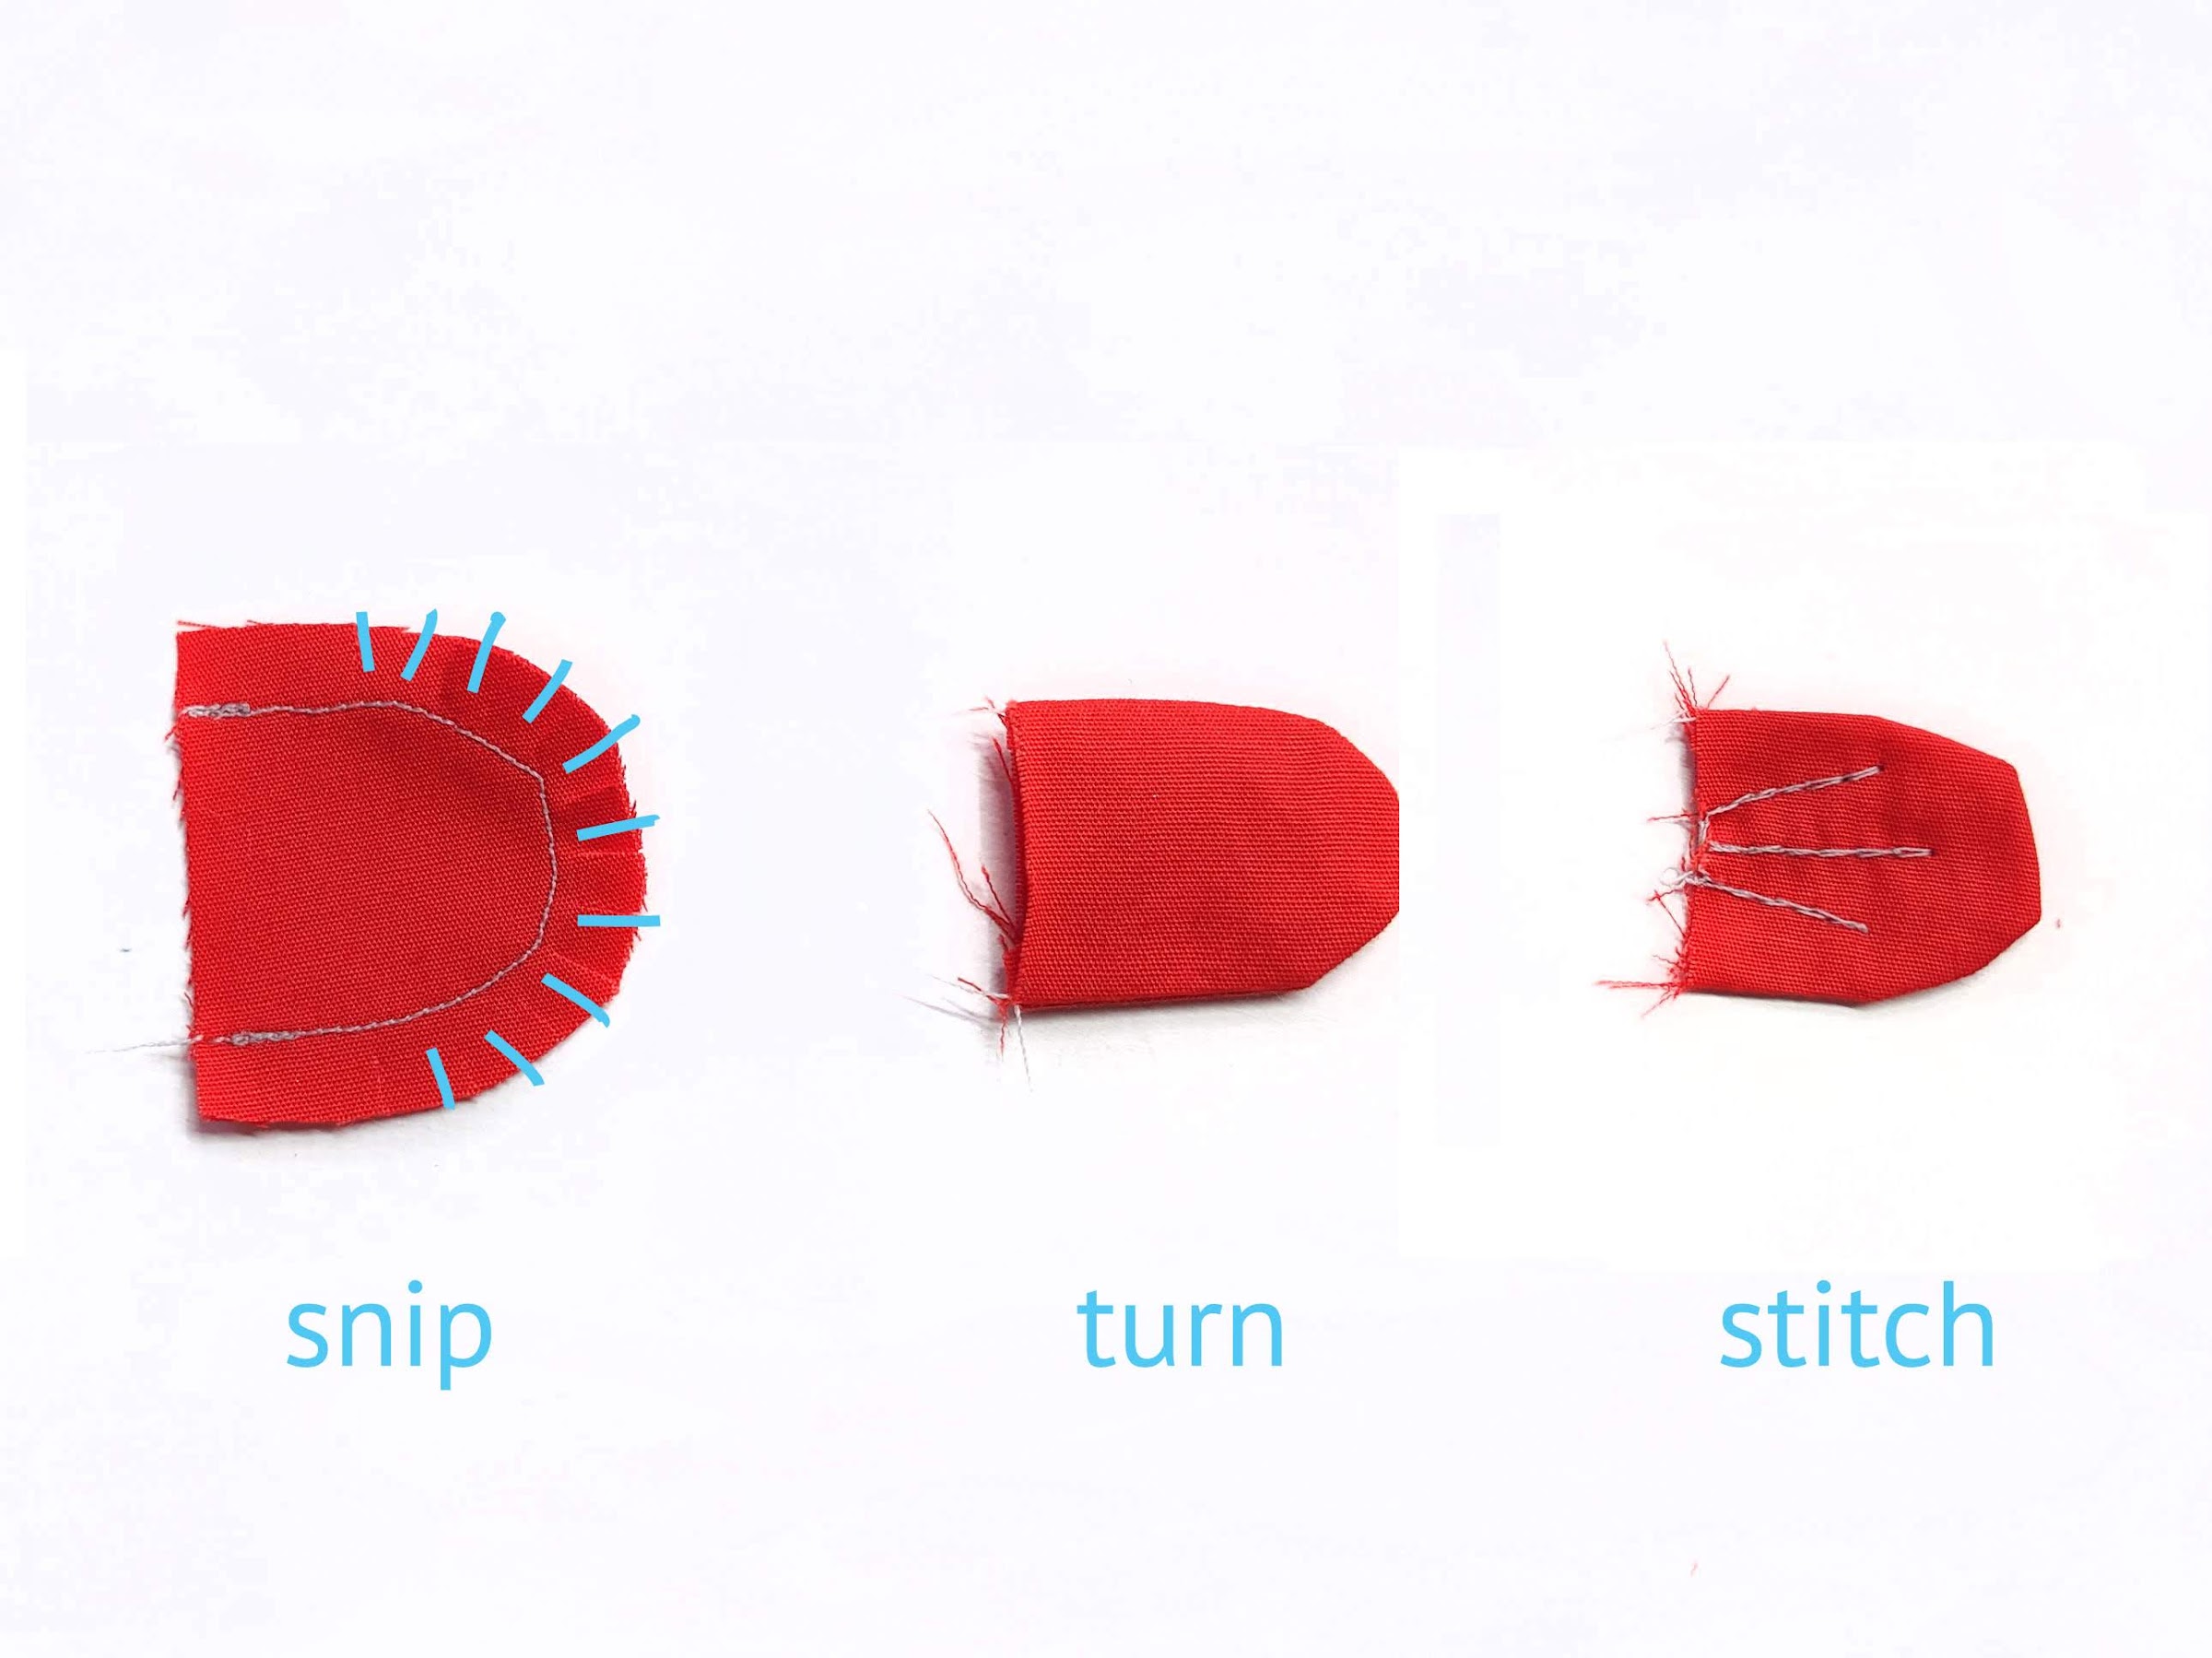
2. Put two fins right sides together along the curve & sew. Snip along the curve (do not cut the stitching). Turn right sides out & topstitch fin lines.
Repeat with two remaining fins.
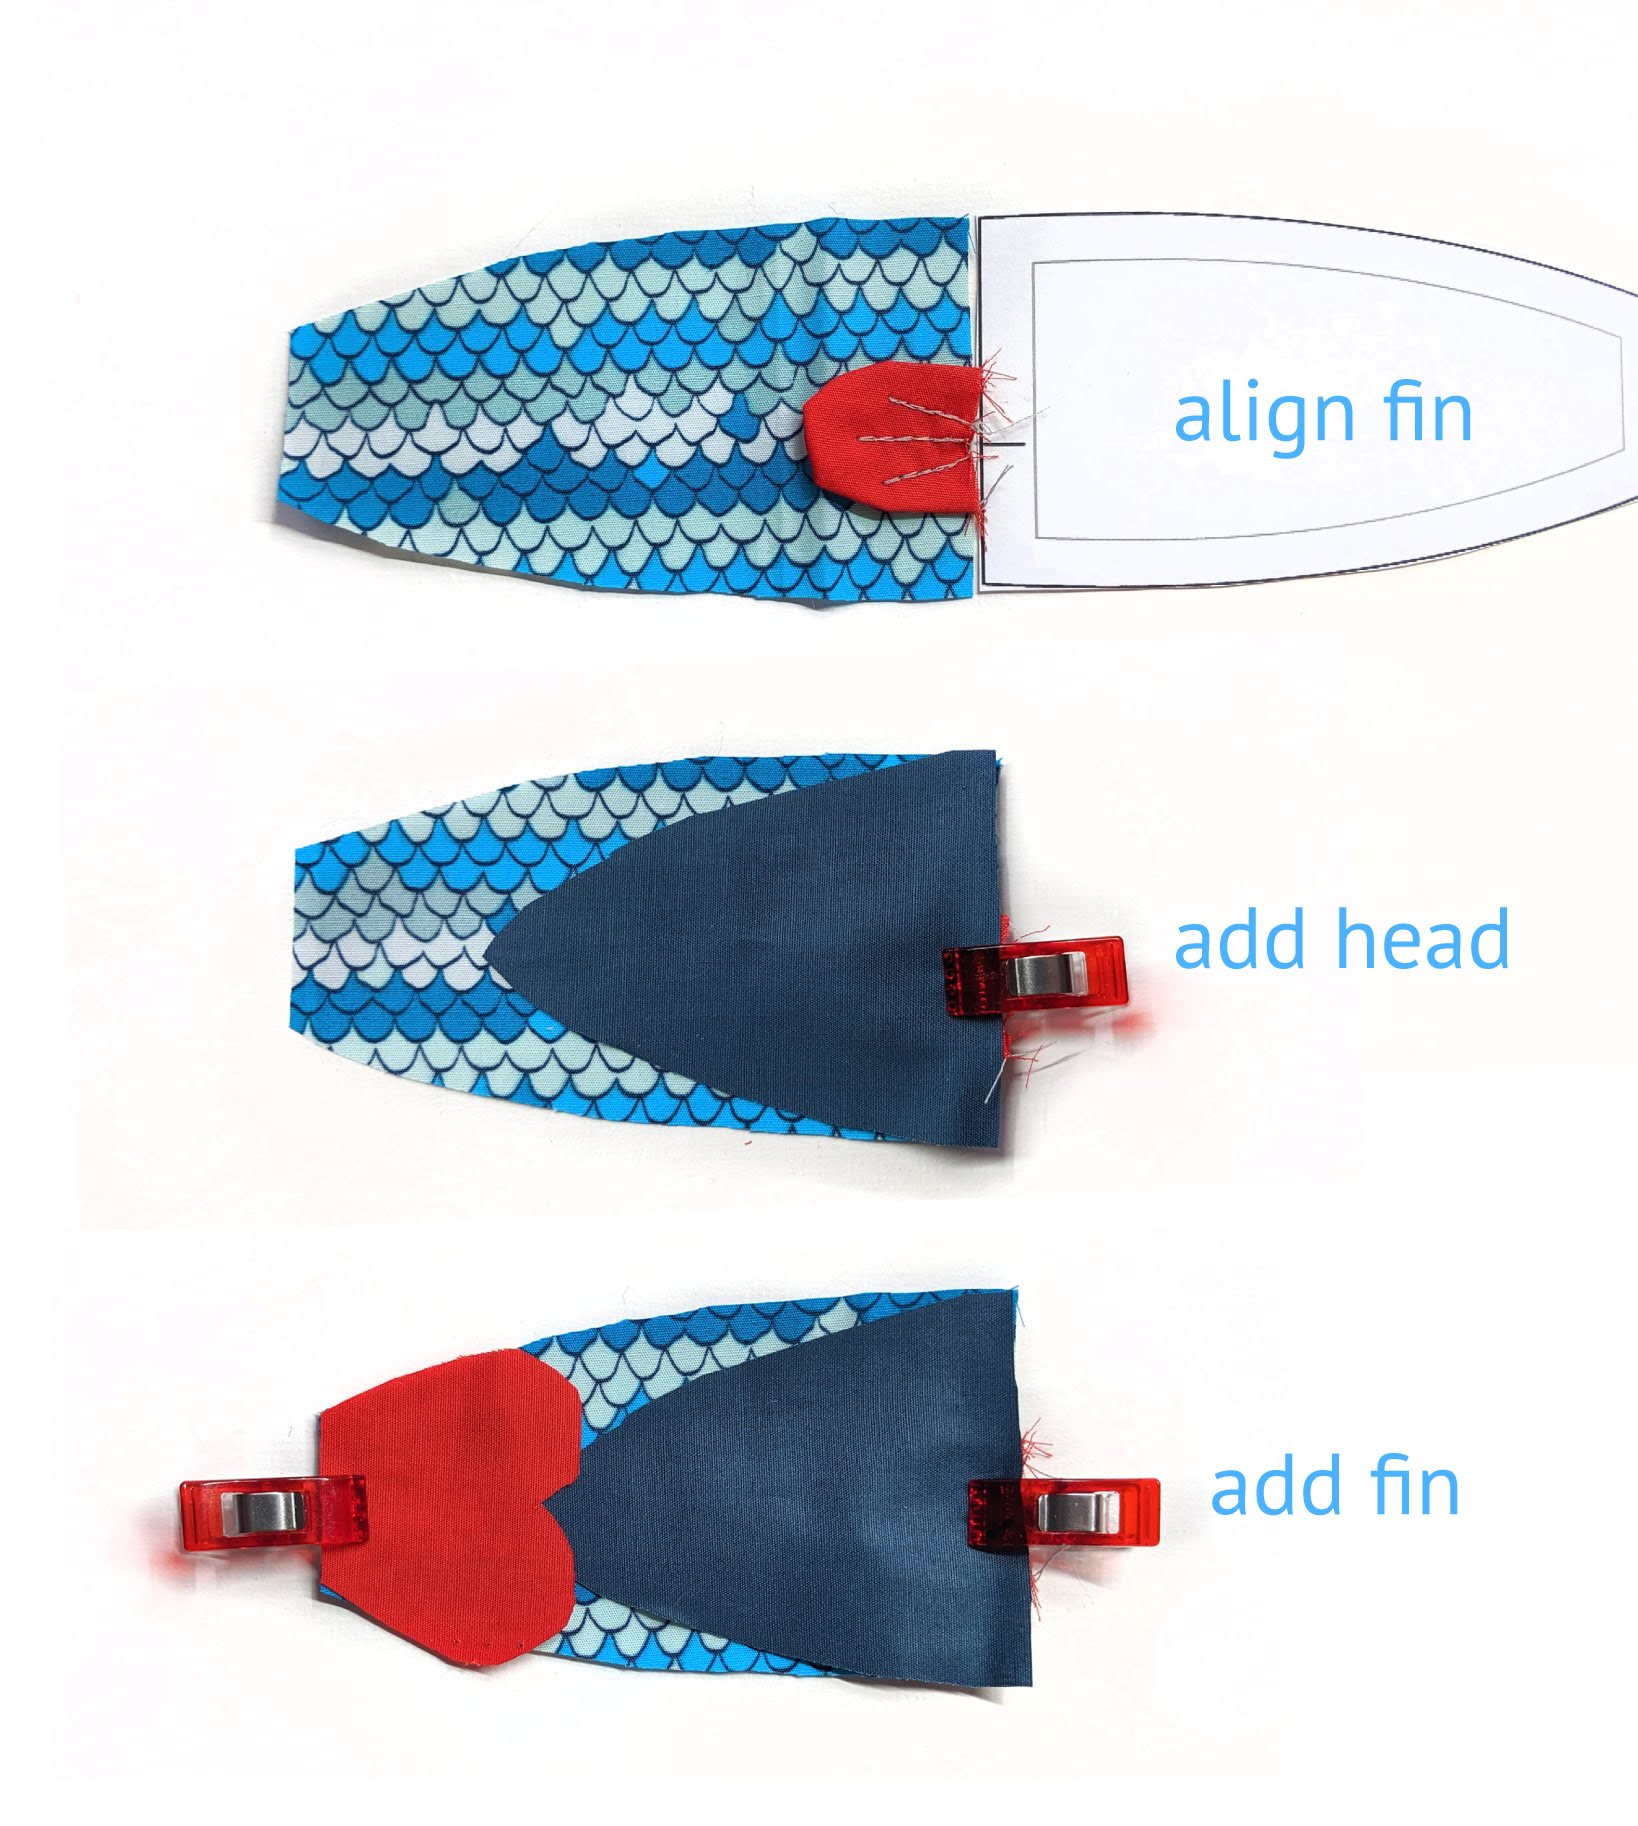
3. Center fin on the body at the marked line from body pattern piece, matching raw edges. Lay one head piece on top right sides together and clip in place.
Take one tail piece and lay right sides together with short end of the body piece and clip in place.
Repeat with remaining pieces.
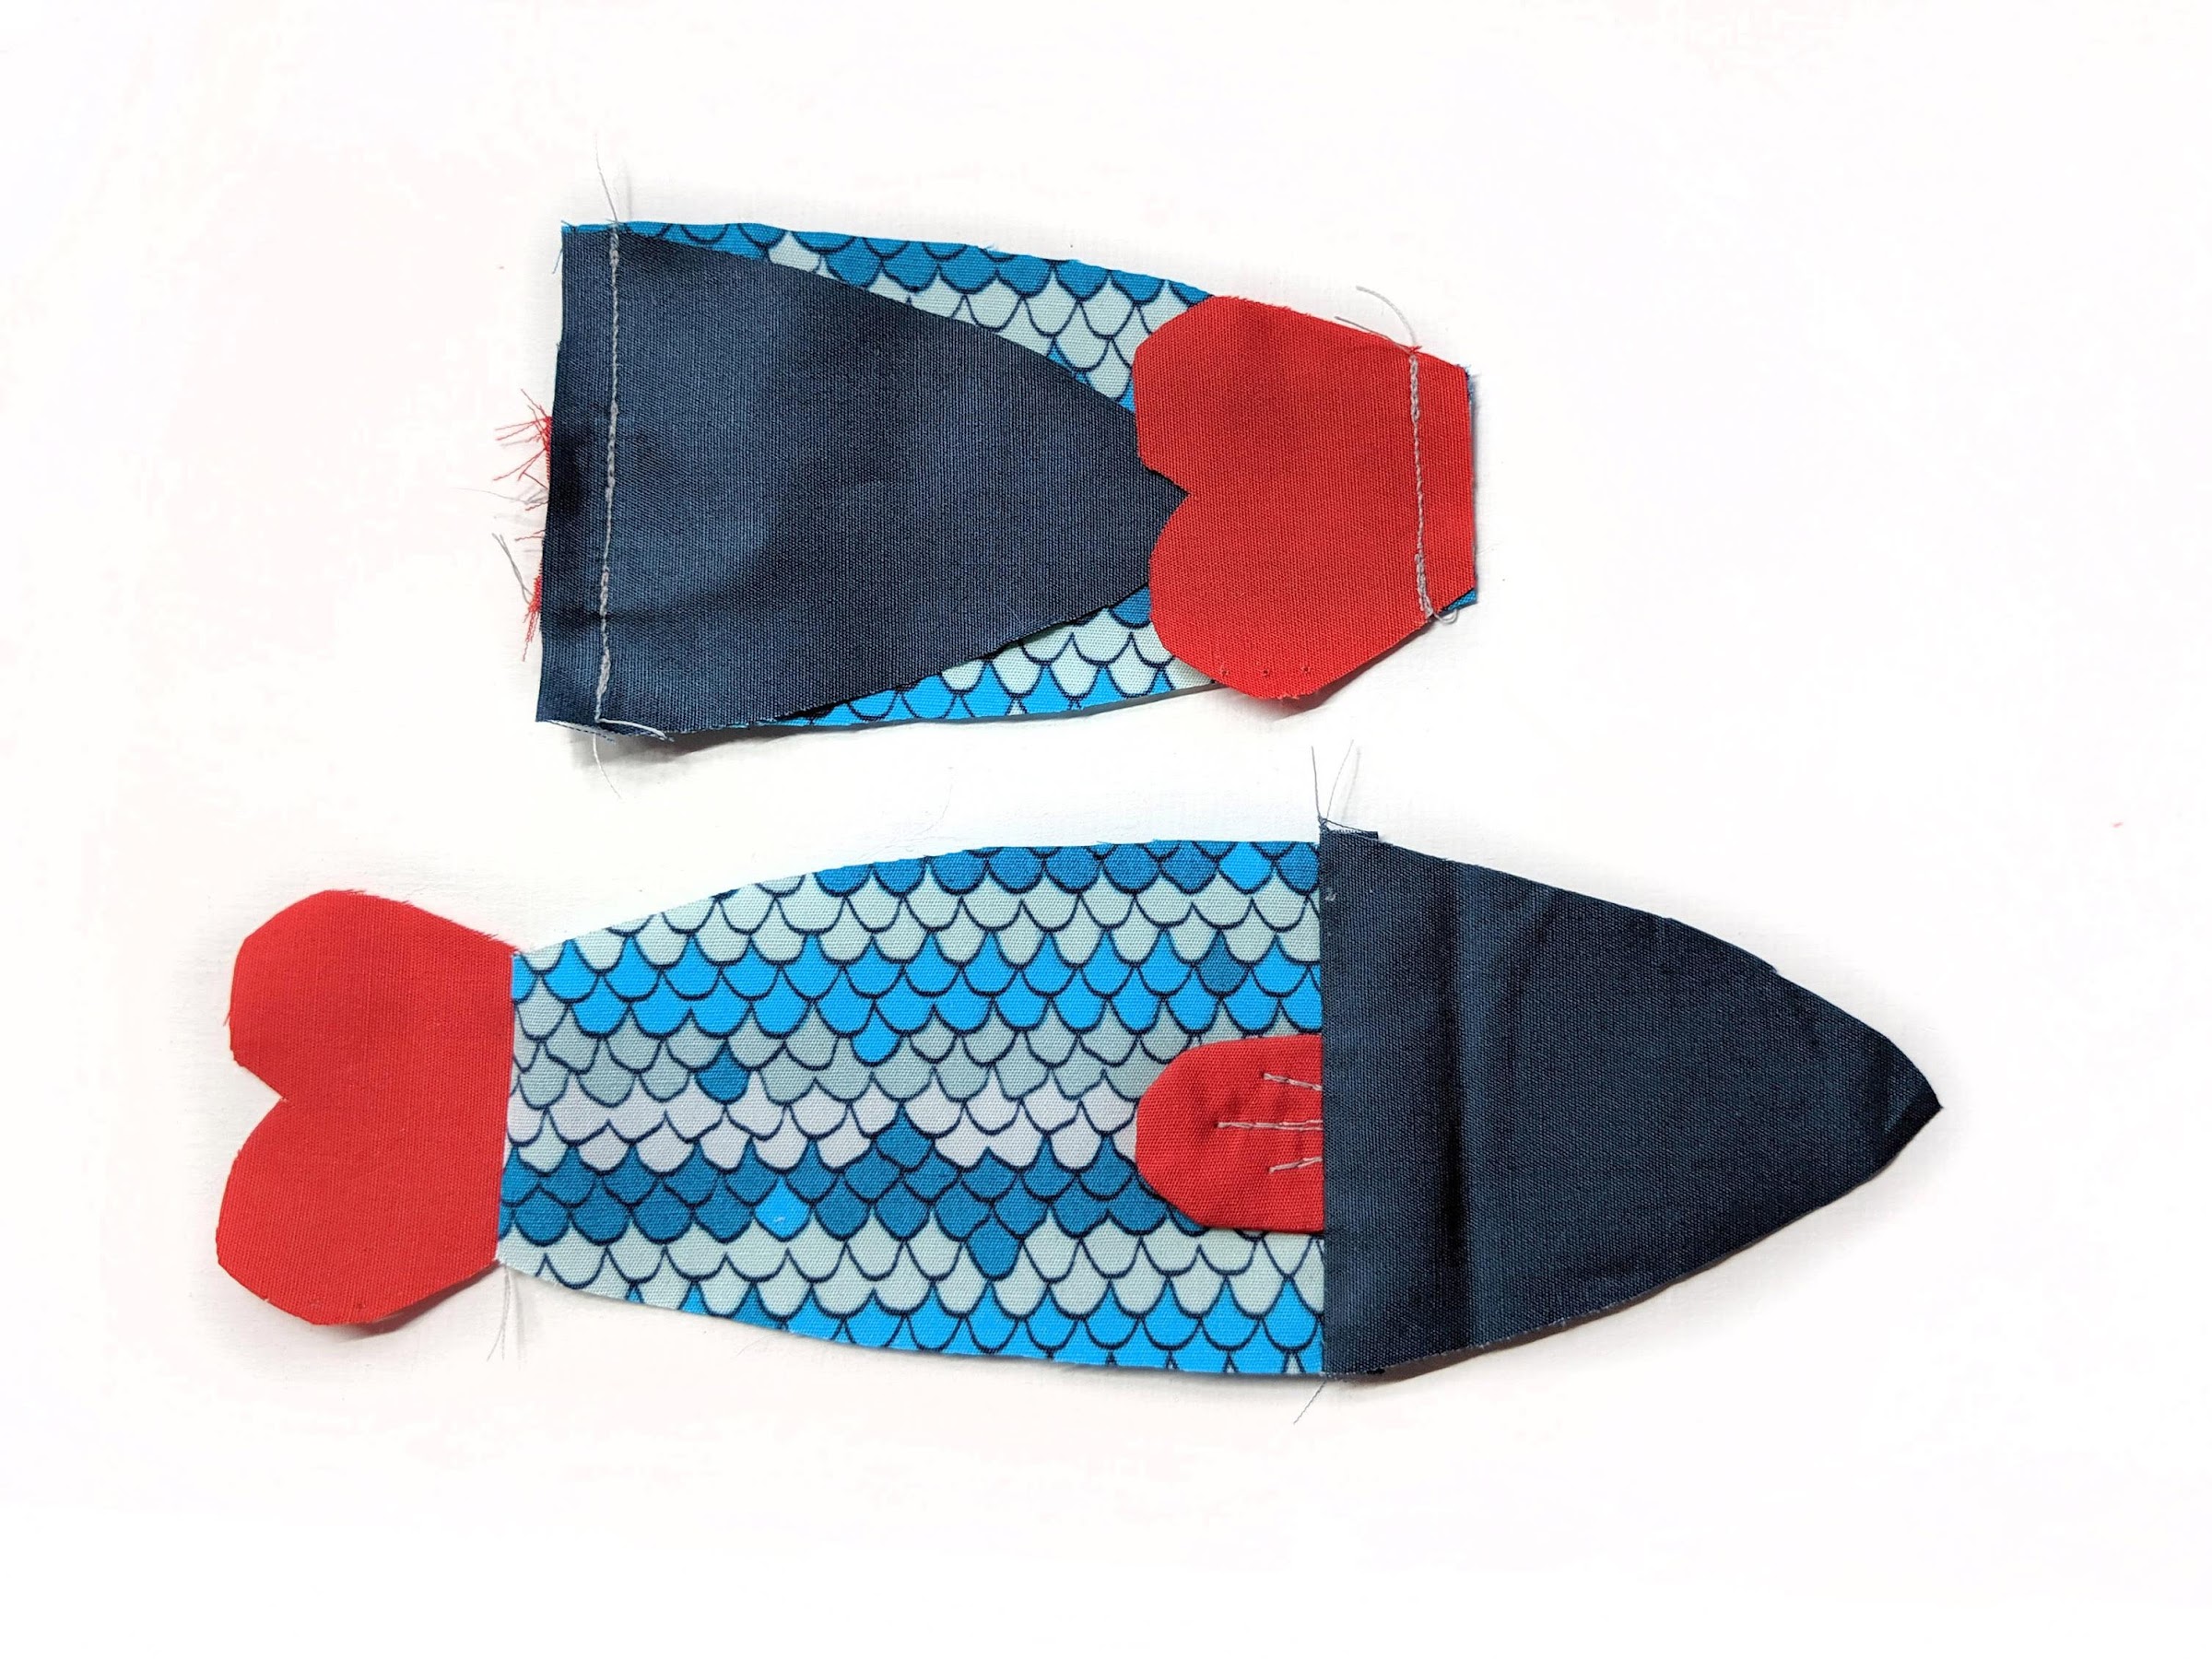
4. Sew the clipped areas. Open & finger press flat.
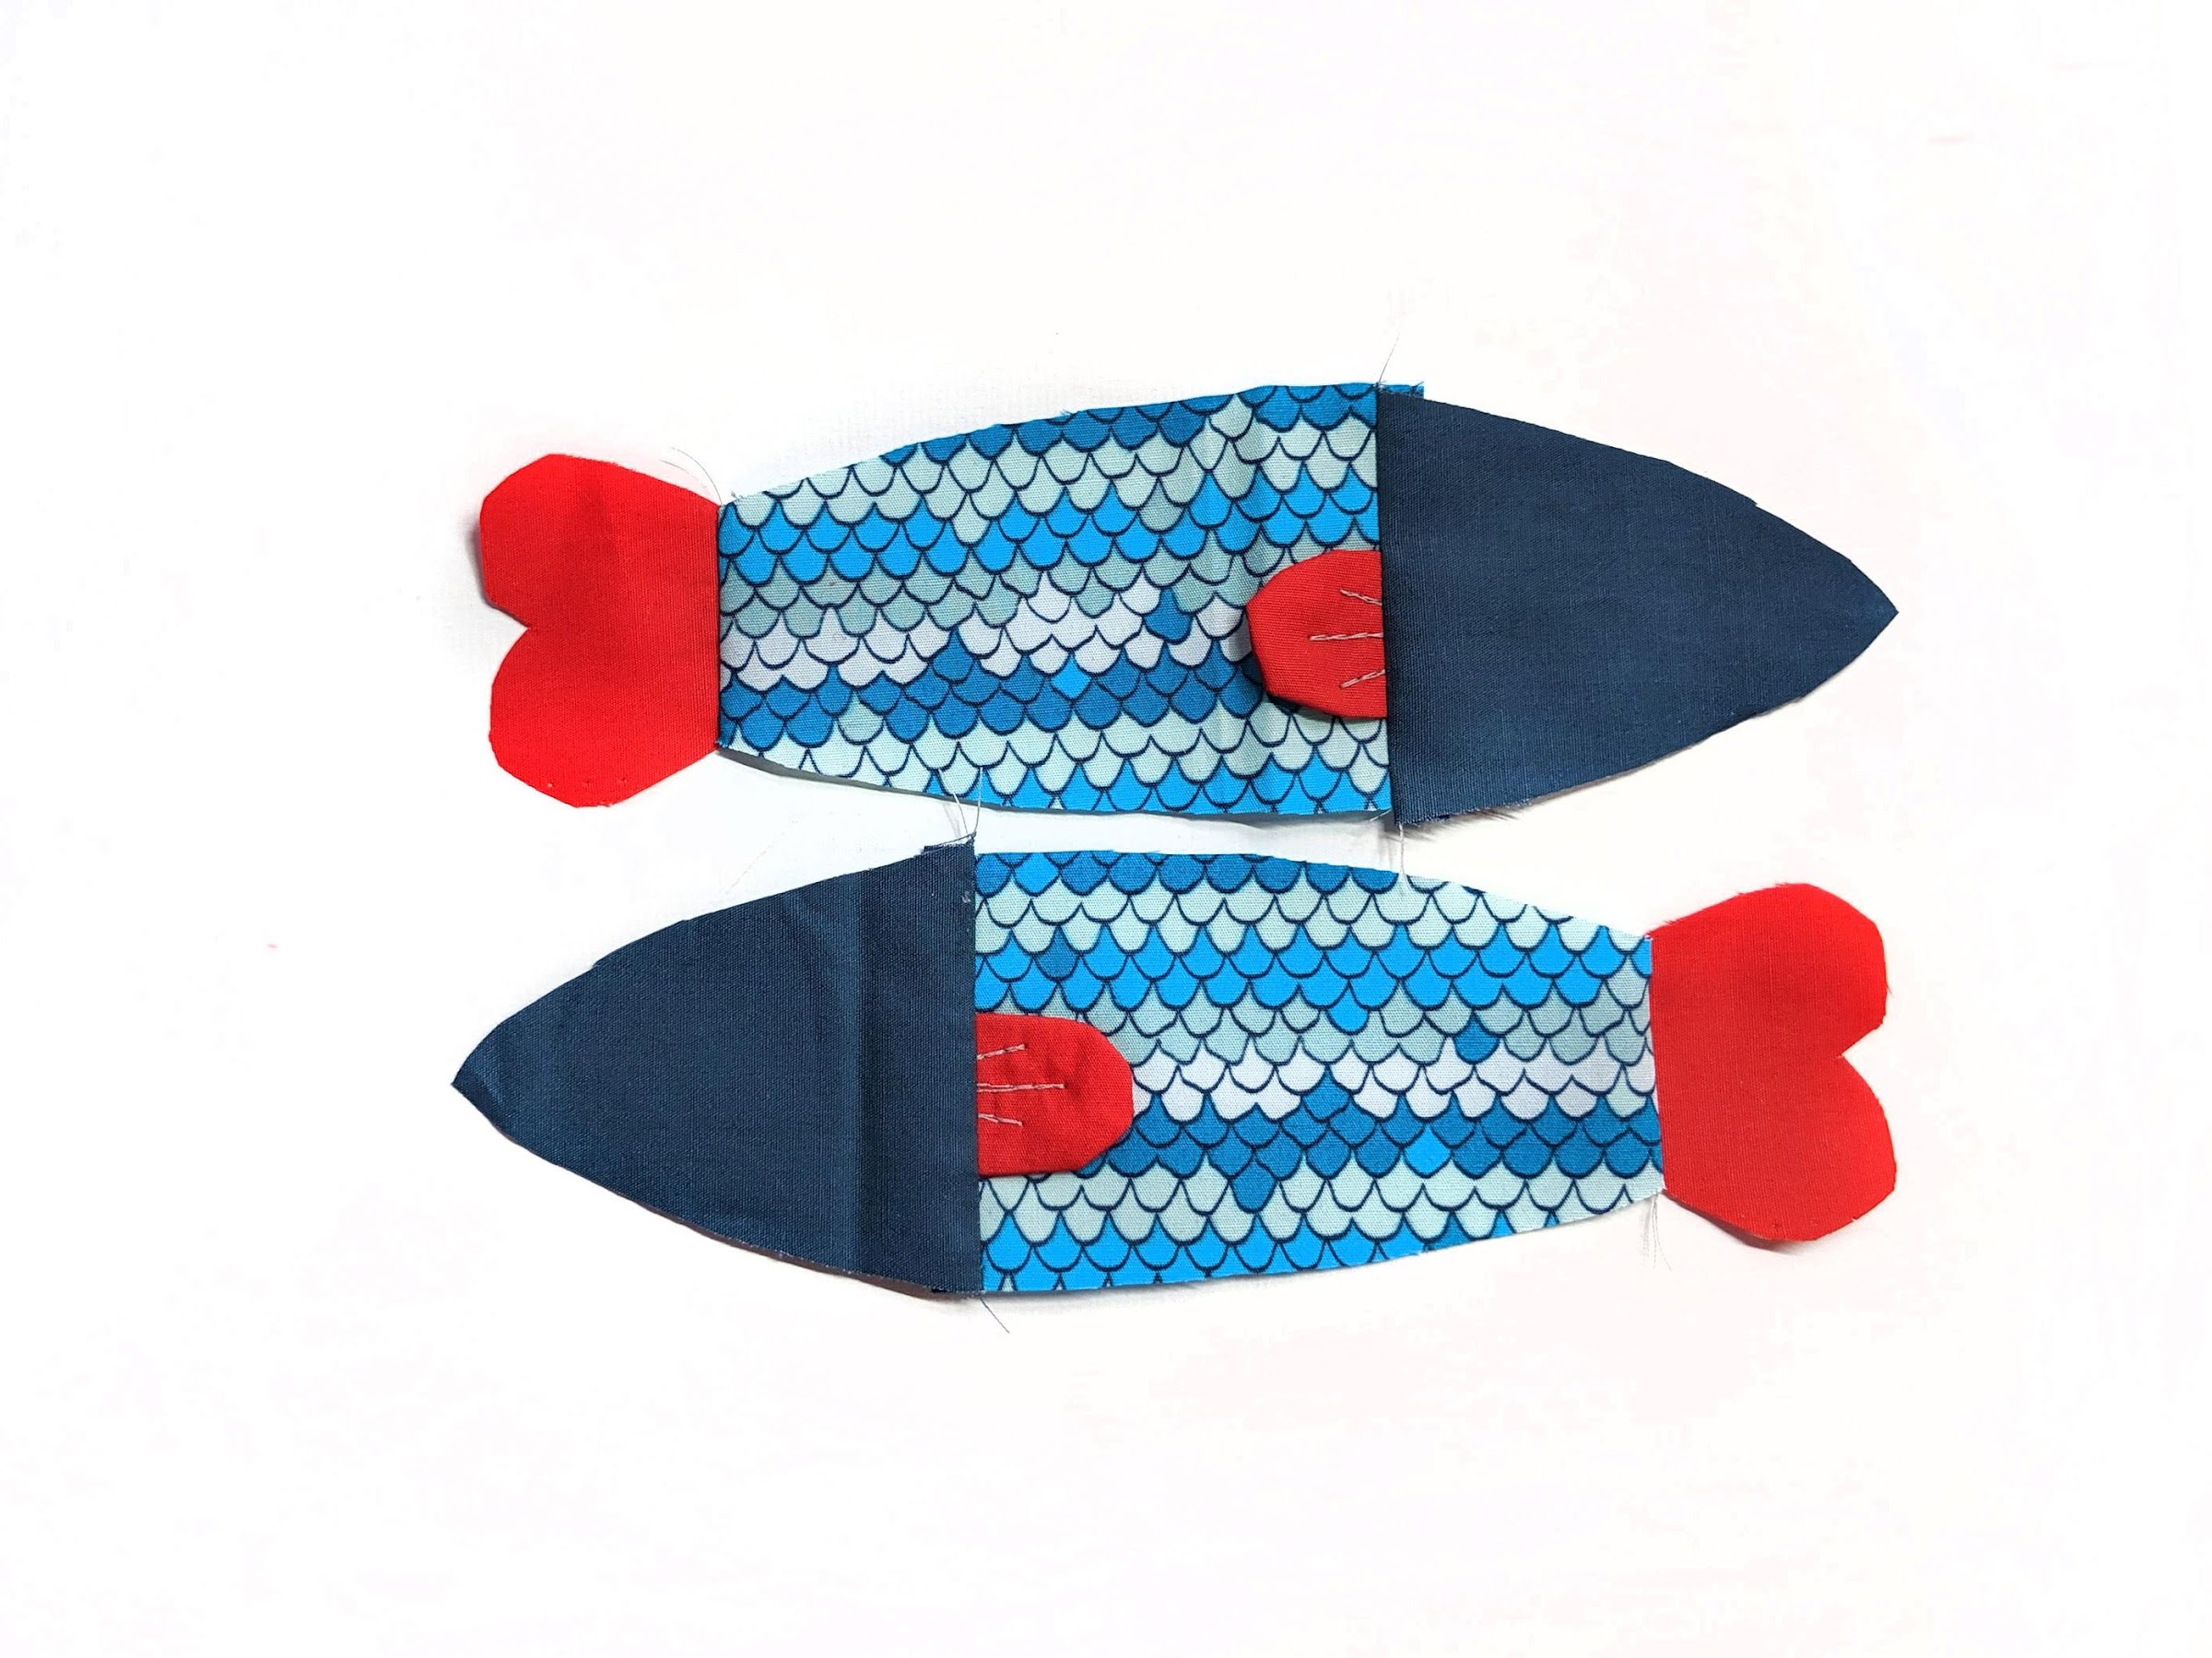
5. Now you should have both sides of your fish complete!
*NOTE- not using vinyl for the eyes? Then go ahead and embroider, fabric paint, or use your choice of medium to add an eye to each side of your fish.
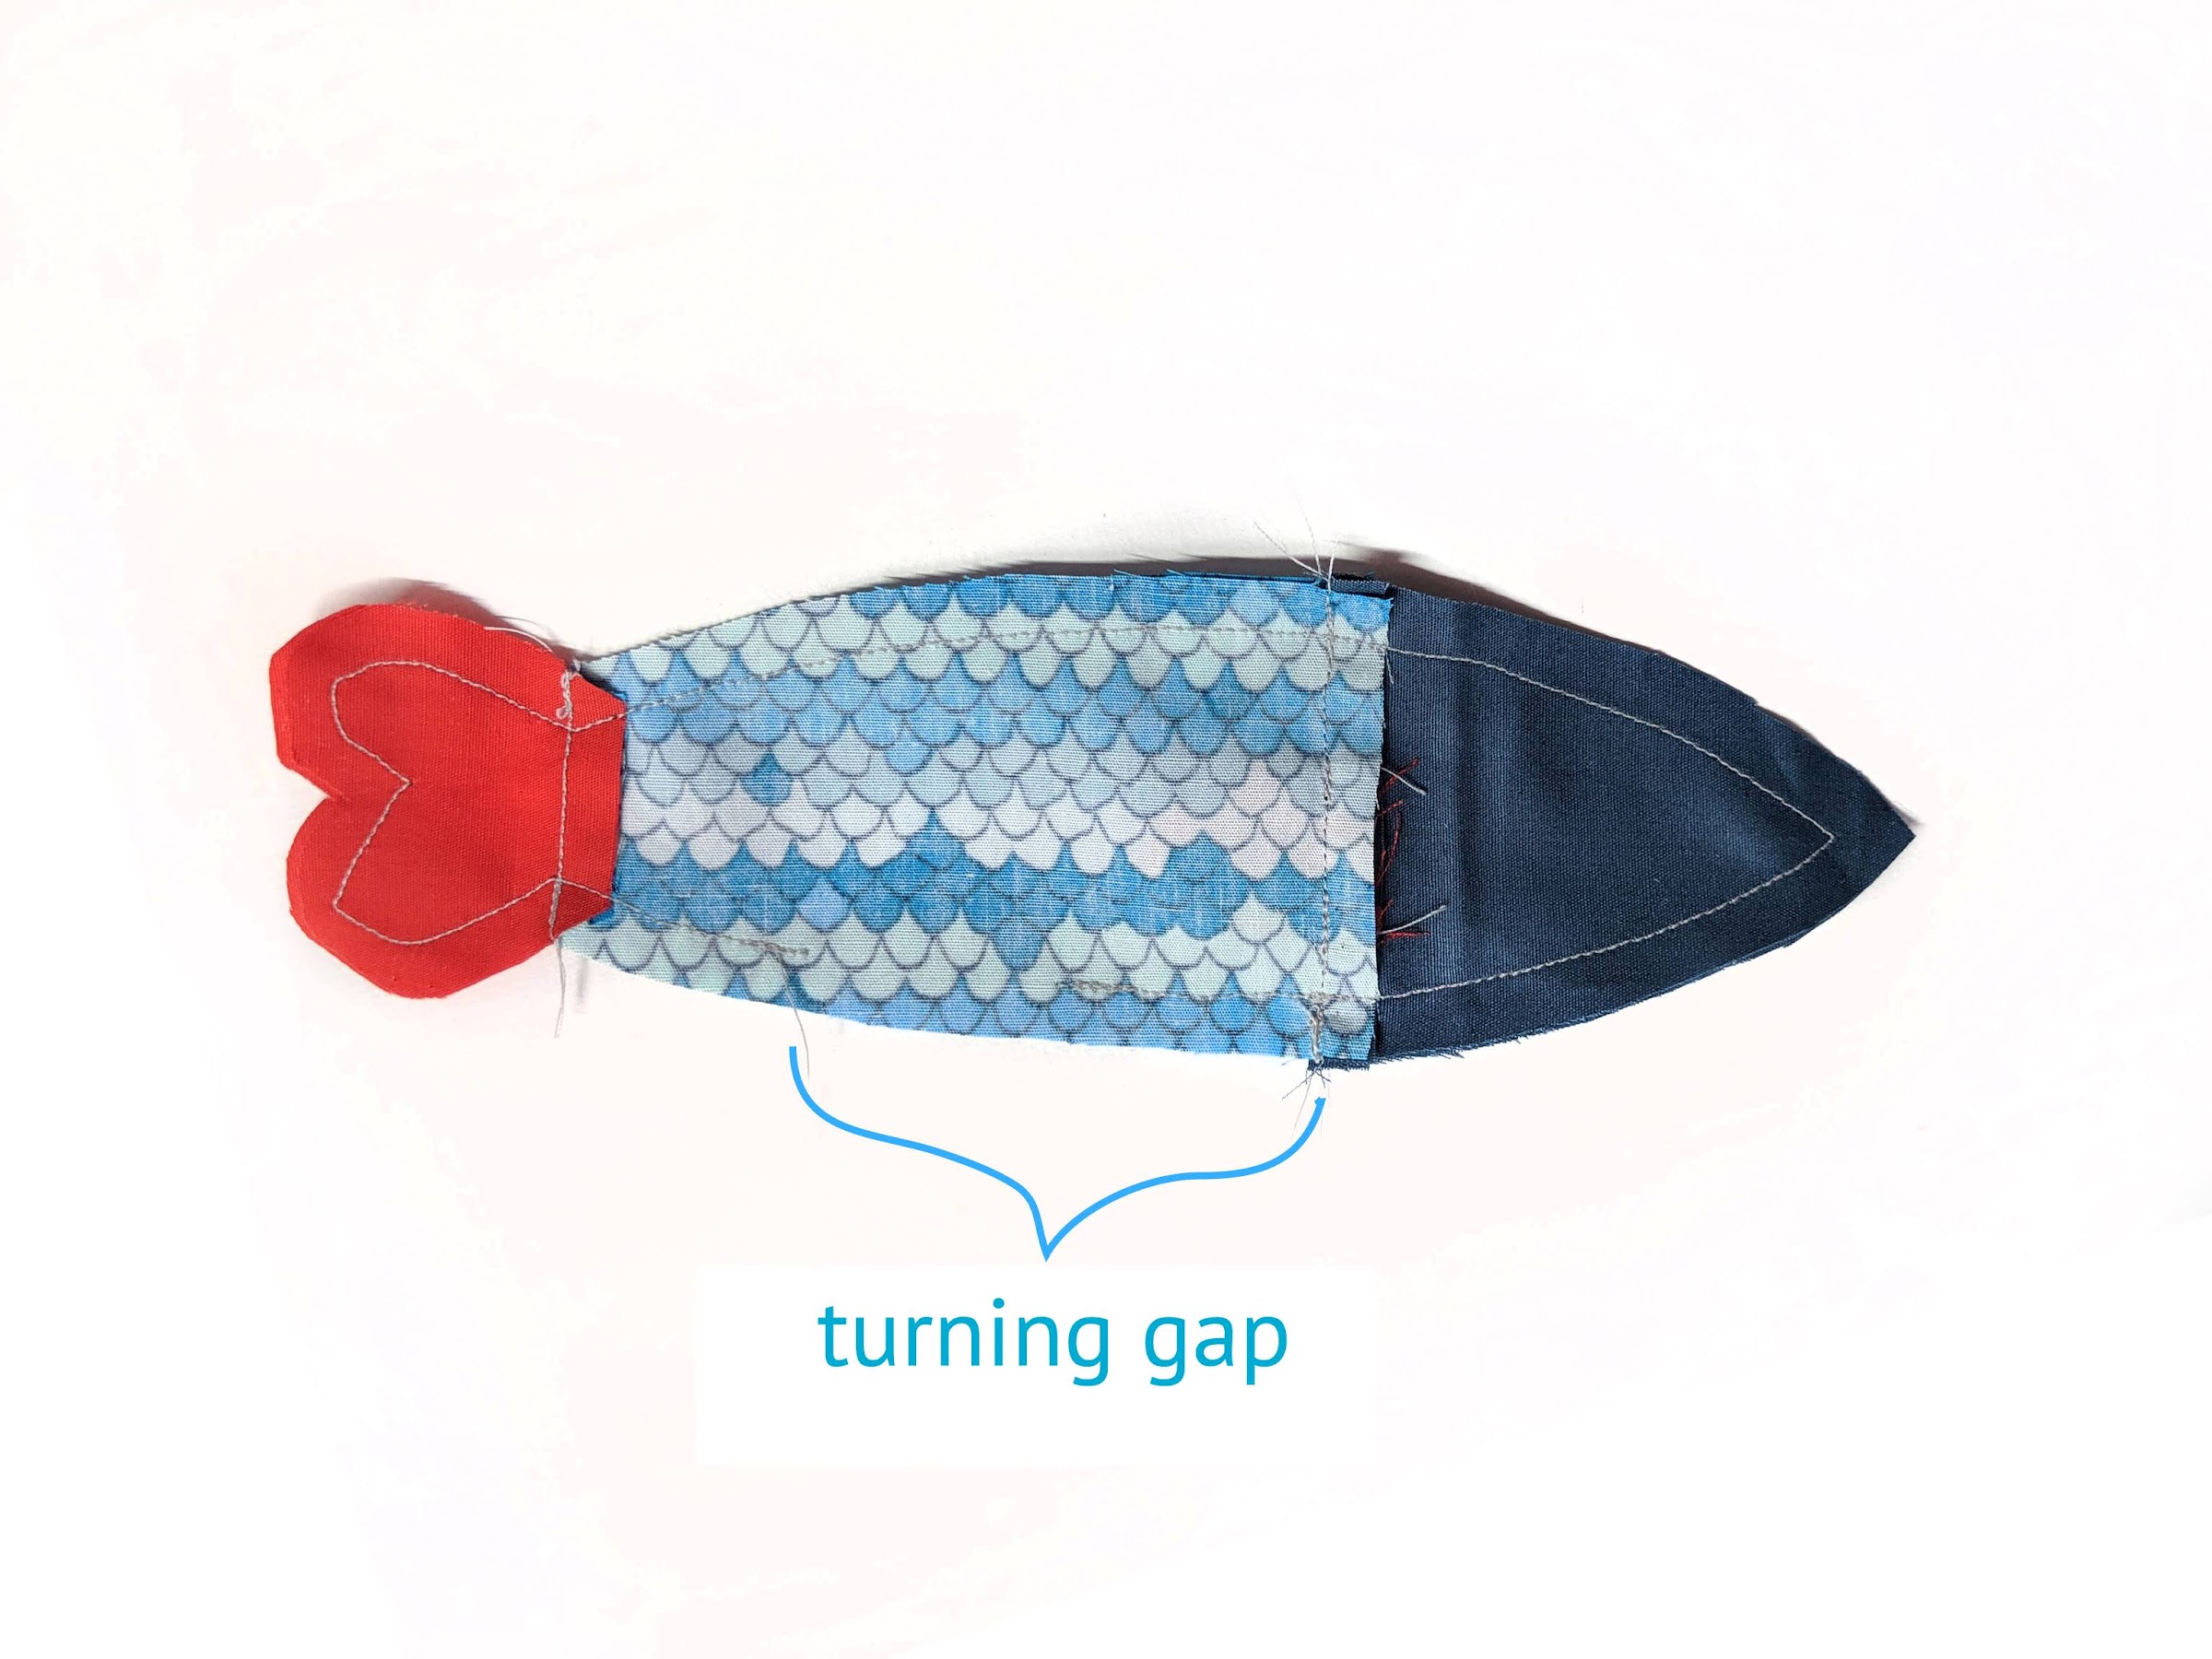
6. Align both fish sides right sides together and pin in place. Sew all the way around, making sure to leave a 2-2.5” turning gap on the bottom belly that should remain unstitched.
*tip- backstitch at the beginning and end to ‘lock’ the stitches so it won’t unravel when turning.
Carefully snip every ¼” or so around the curves and corners of your fish without cutting through the stitching. Then carefully, but with purpose, turn your fish right side out.
*tip- using a chopstick can really help poke out stubborn points.
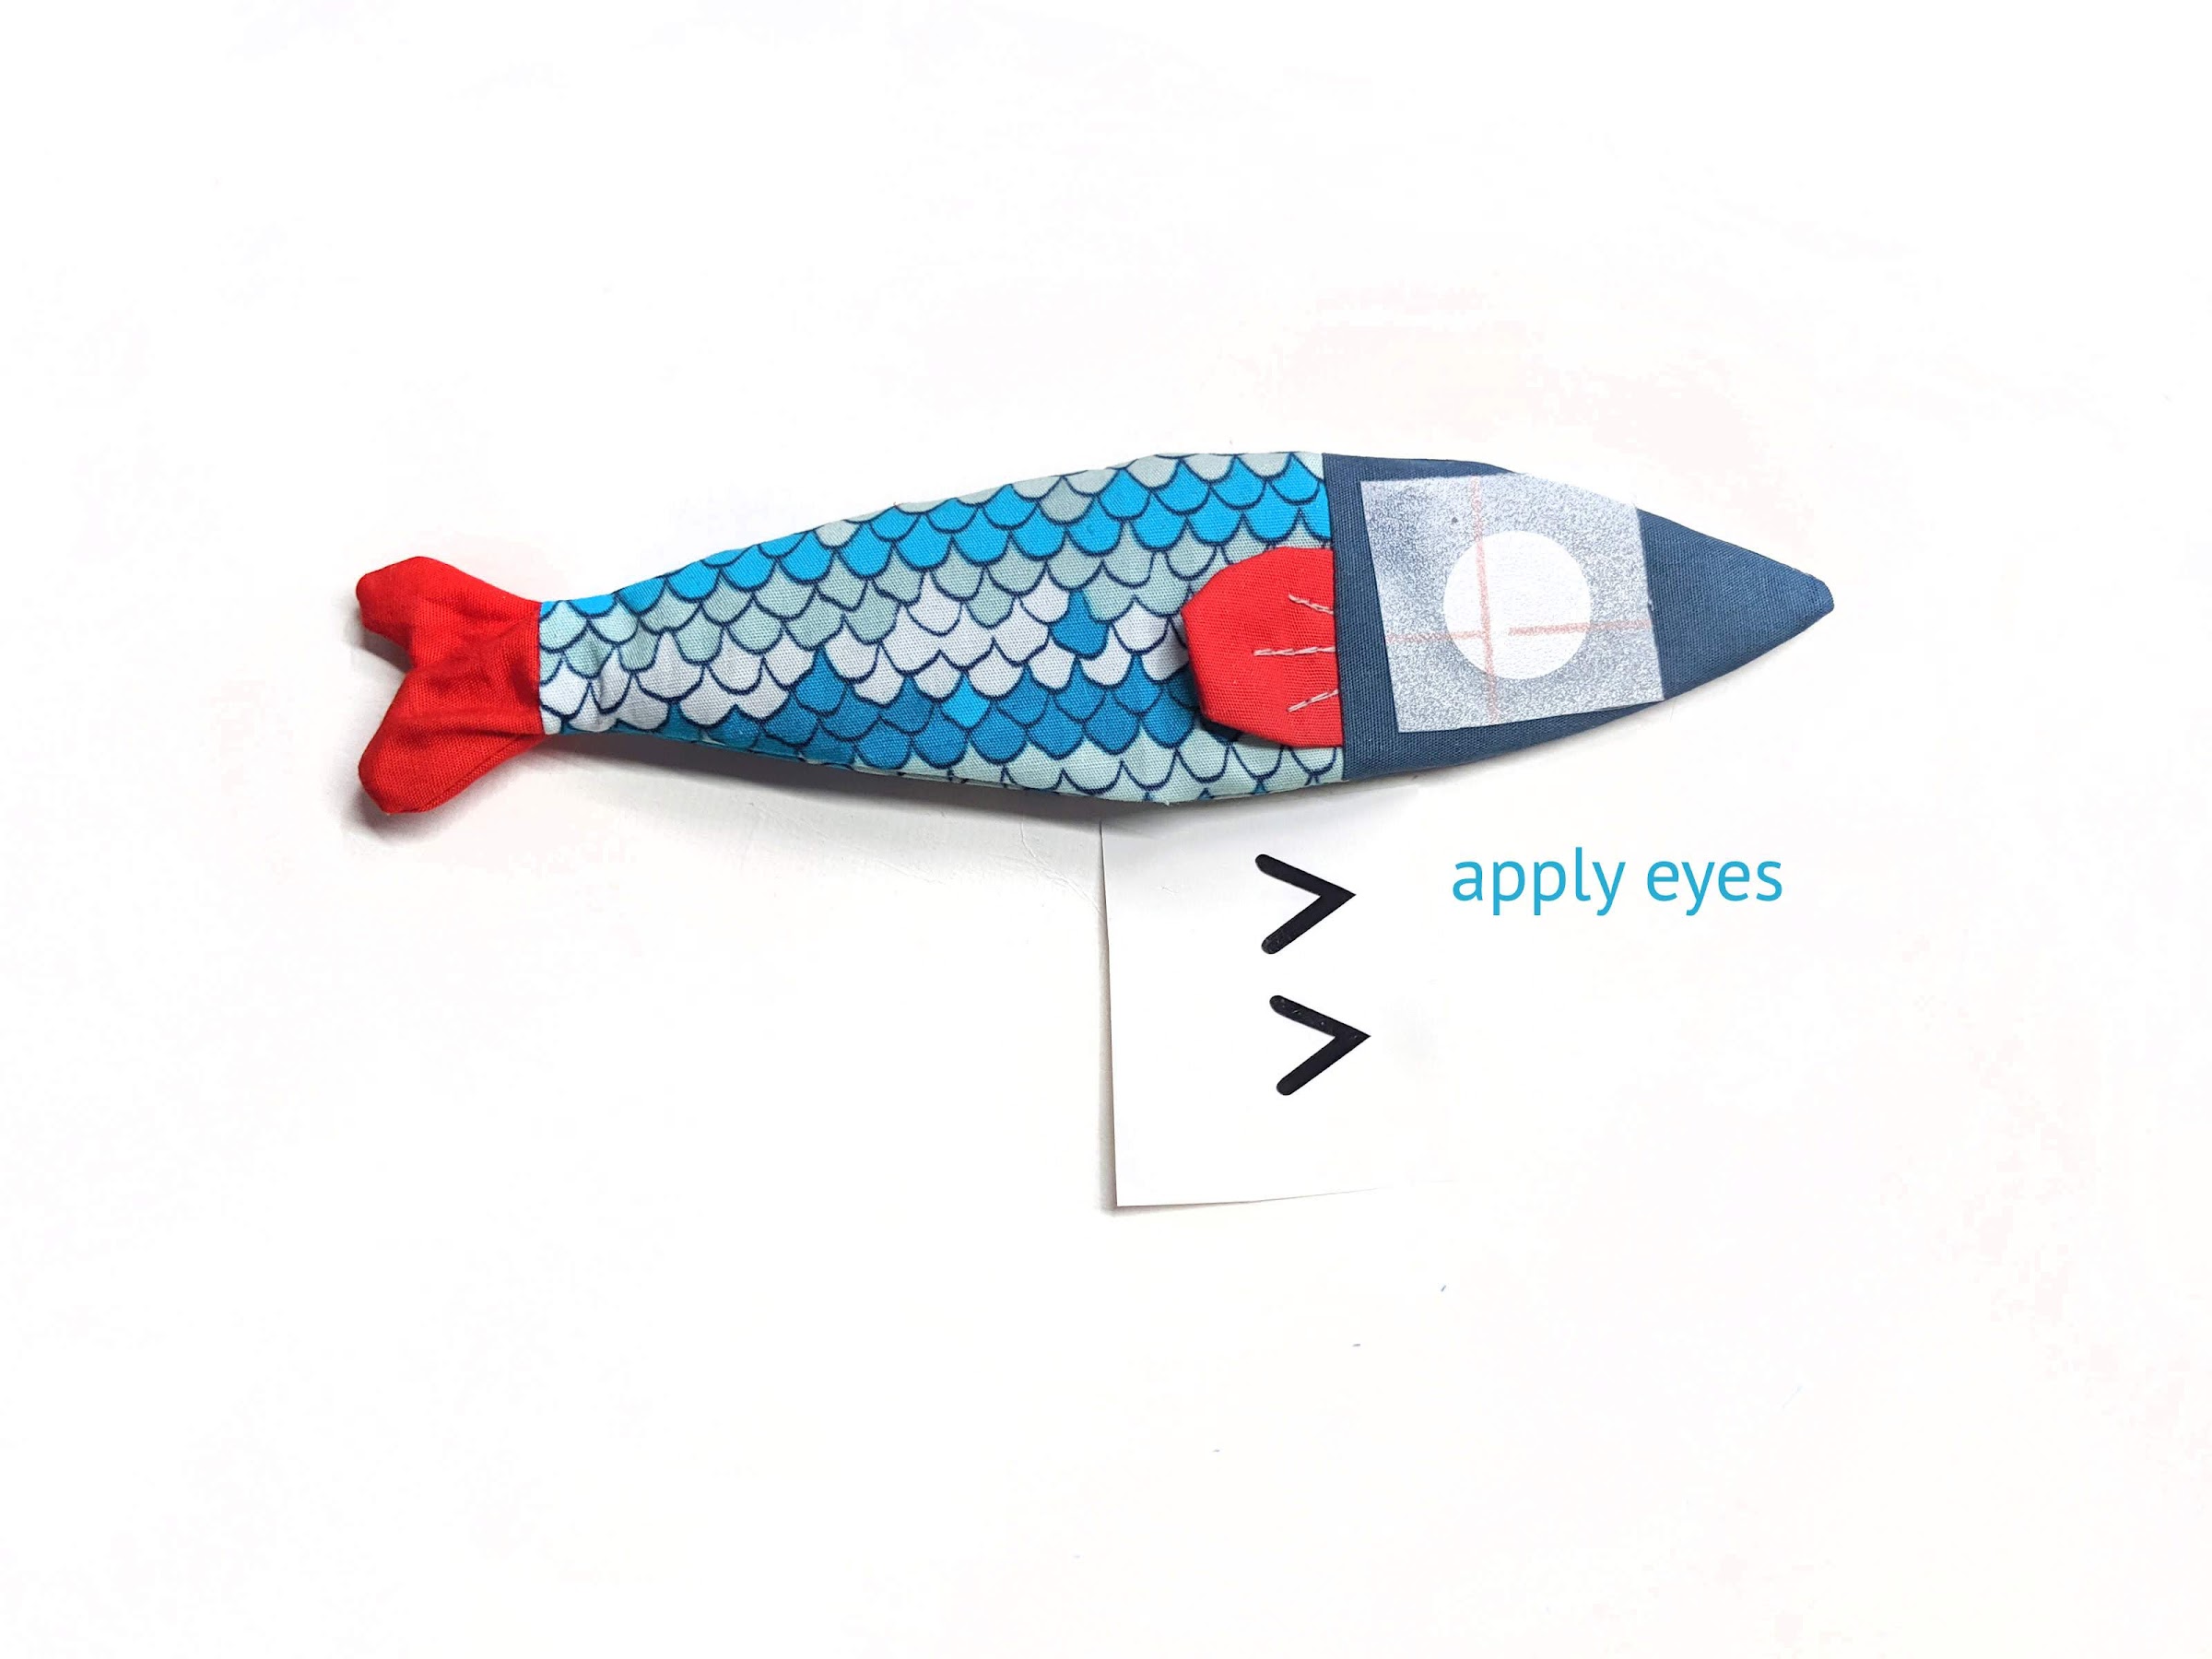
7. Using a Cricut Maker? After importing the SVG file, select the eye of your choice and cut out 2 copies (one for each side of your fish). Weed the excess vinyl to leave just the design in place. Then apply your vinyl according to your manufacturer’s instructions.
*note: for the two-tone eye designs, apply the white first and then black
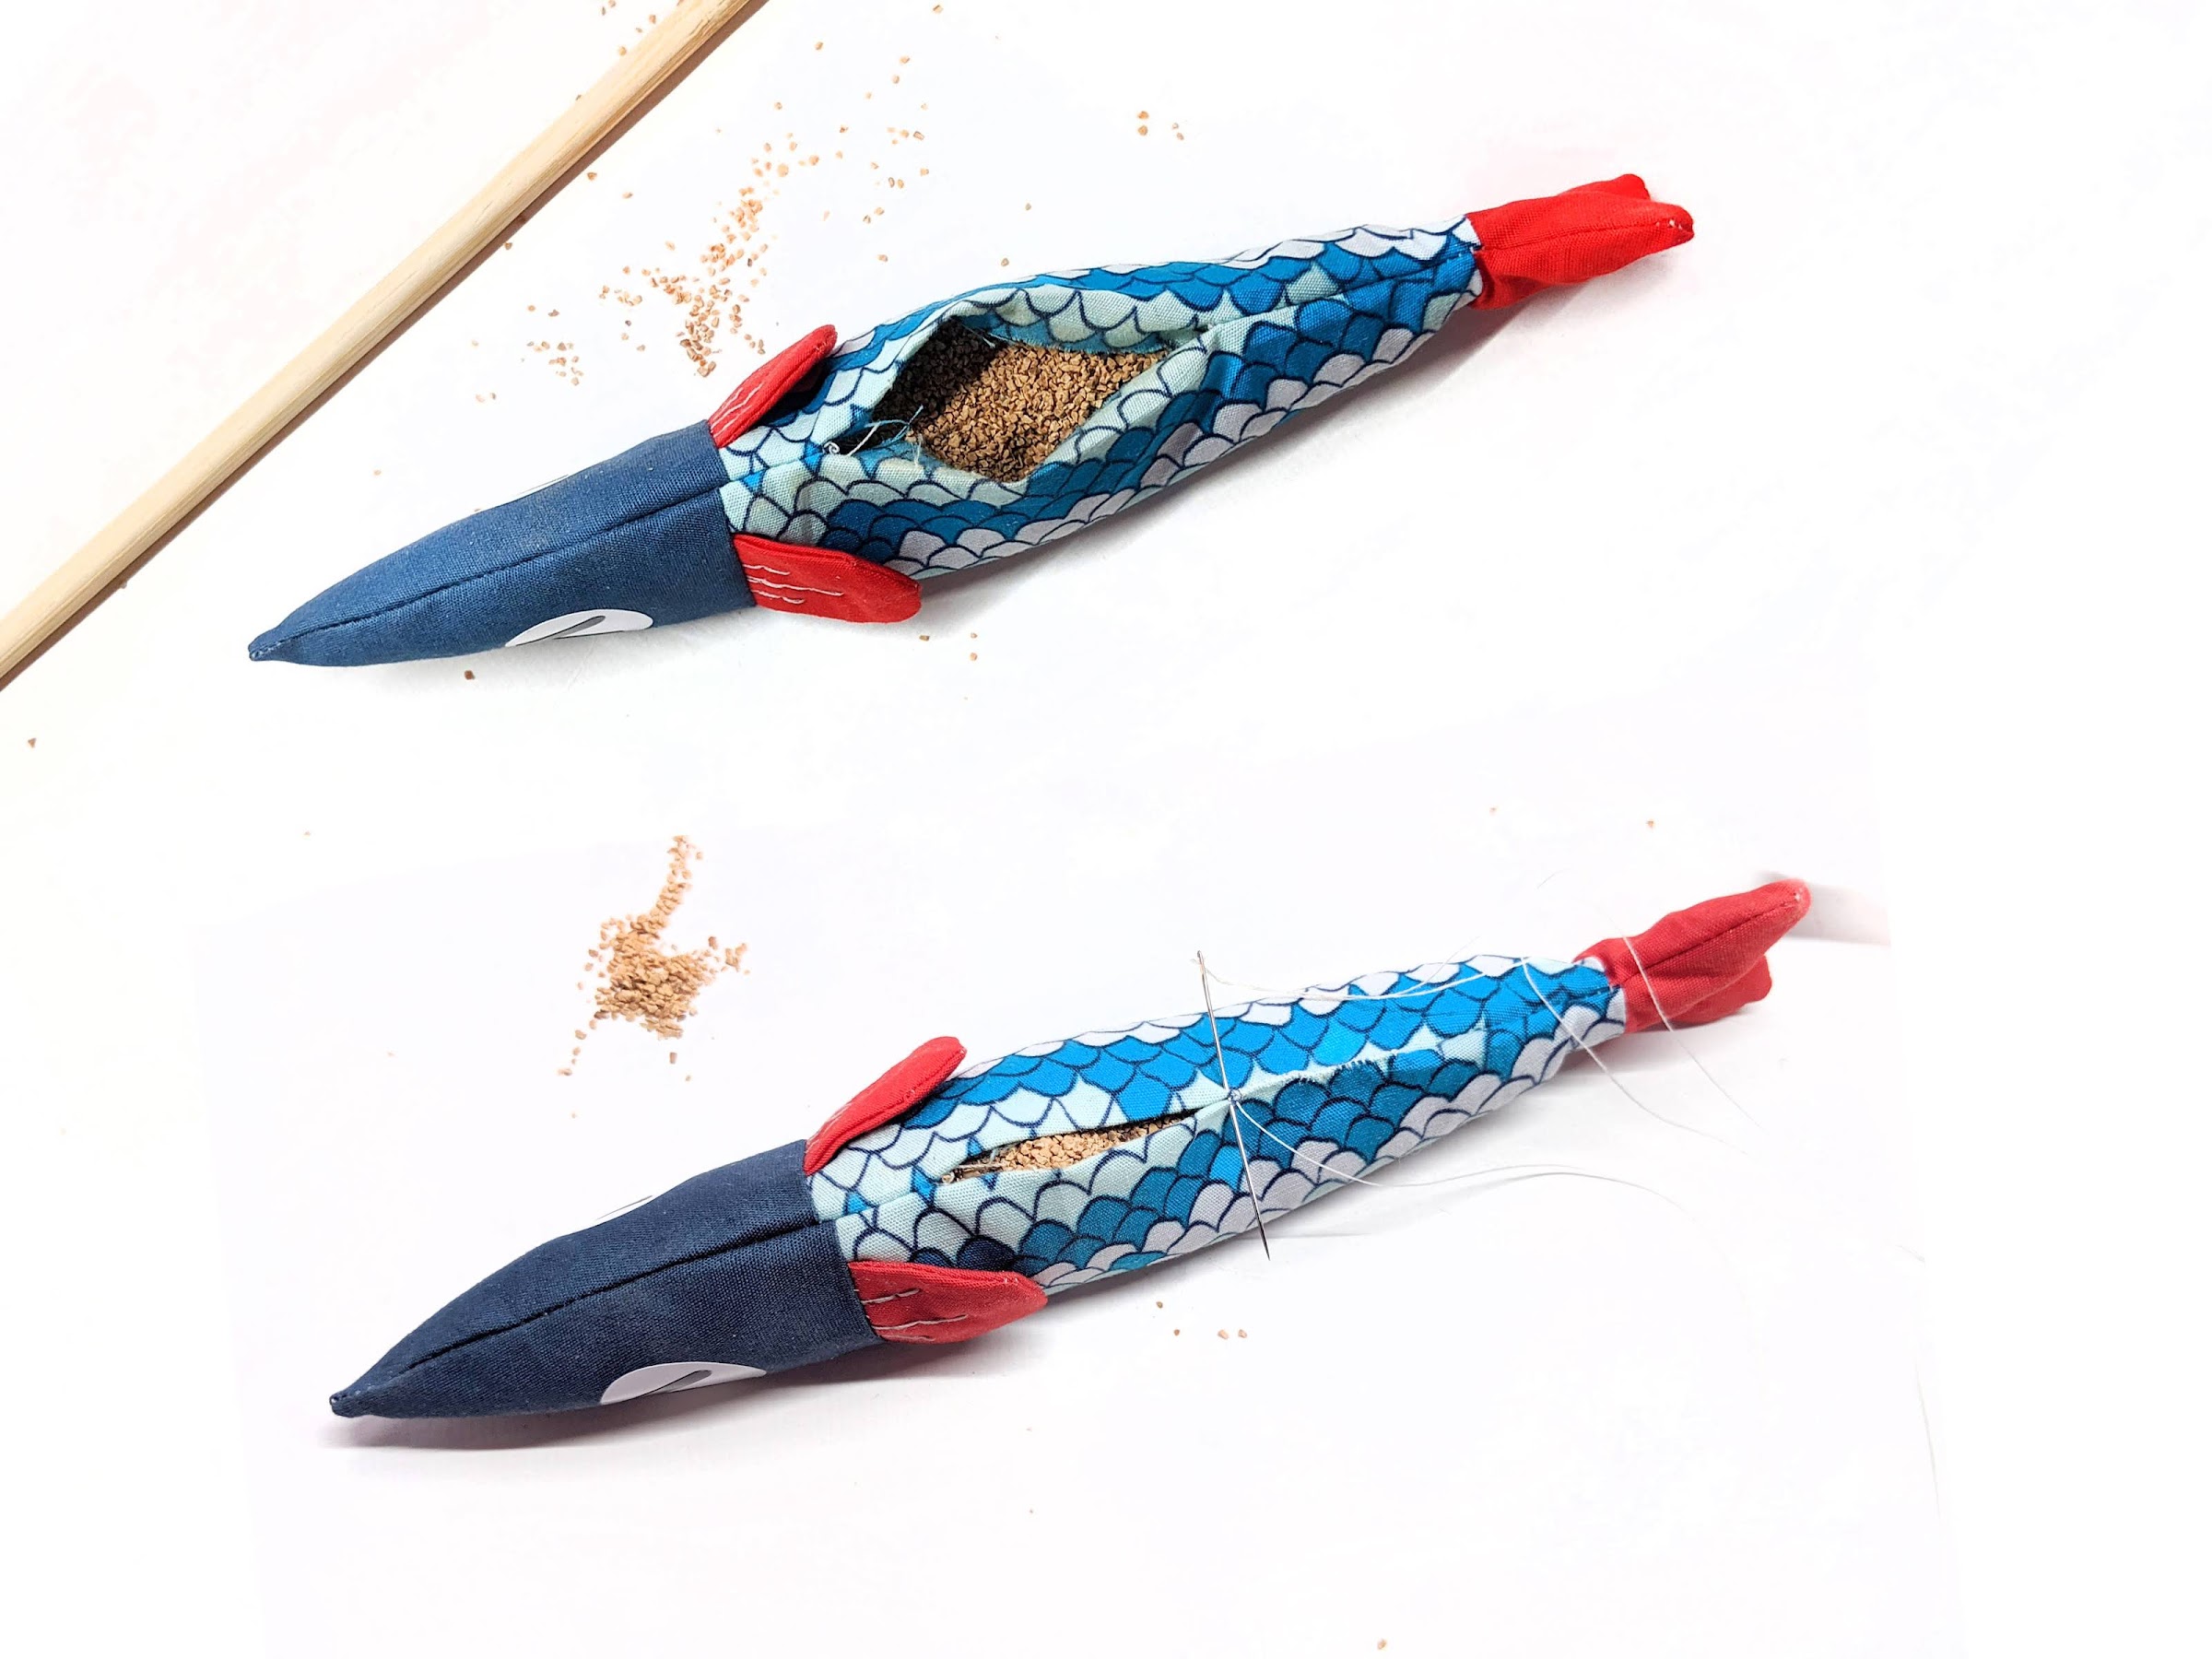
8. Aww, look at that adorable fish! Grab a poker &filling of your choice and get to stuffing. Once your fish friend has reached the fullness desired, close the opening with a whipstitch and your needle & thread.
*tip- using thread gloss can help reduce tangling during handstitching.
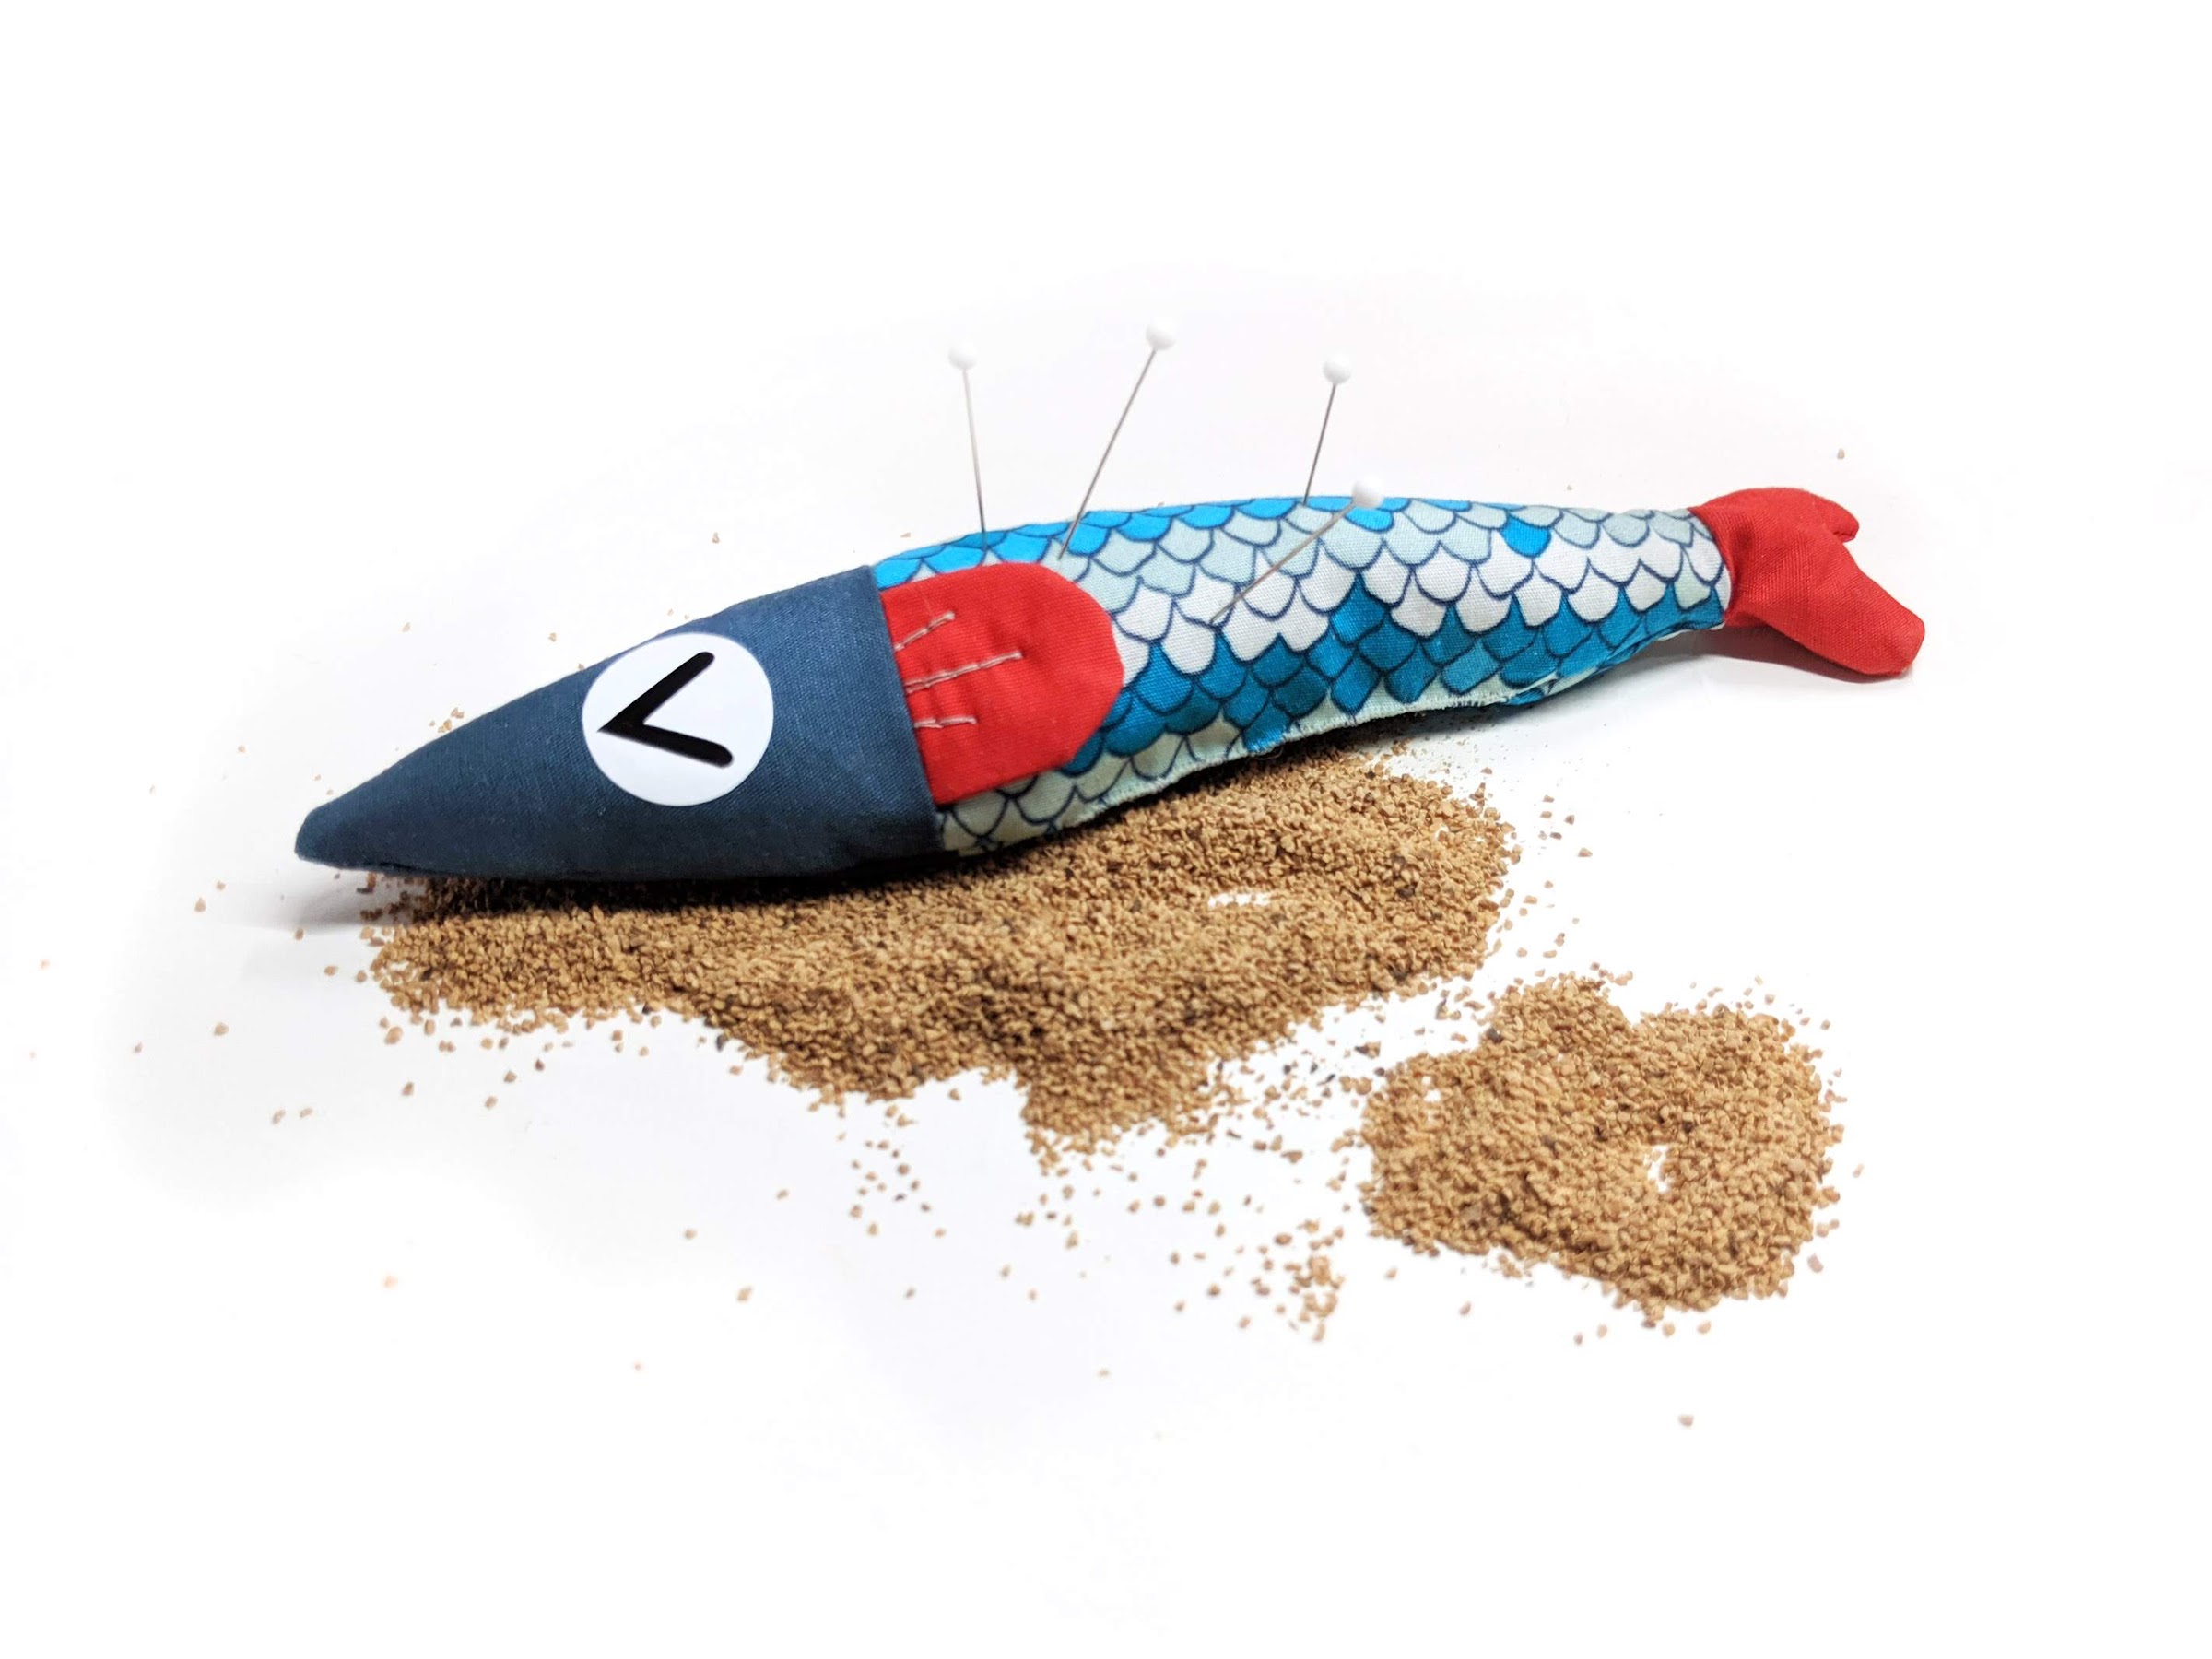
Ta-dah, you’ve finished an adorable fish friend!
Good luck making just one as they’re so cute and quick to whip up that they’re super addicting!
Share your own adorable fish on IG using #bcdfishfriends & #bittercandydesignpatterns and in the Bitter Candy Patterns Facebook Group
**Personal Use Only – As a free pattern I ask that you enjoy your finished creations without profit for yourself, friends, & family.