I’m crazy, inspired, scared, & excited to begin a journey on the most involved item I have ever made! Hundreds of pieces all sewn by hand with the English Paper Piecing method (and supplied by Art Gallery Fabrics yay). I plan on a quilt-sized version of Lillyella Stitchery’s Butterfly Effect pattern! insert *gasp* here
I know, insanity!
BUT it’s for a wonderful friend (who will get her own backstory post in the future) to encapsulate an important period of her life and our years of friendship. Today though, it’s all about the pattern, fabrics, and tools being gathered.
Part One…

Go Big or Go Home!
Okay, So how did you start quilting or learn a new technique? Did you start small to become familiar with the technique? Or did excitement cause you to dive in and figure it out along the way?
I am more of the second, highly motivated when I see something amazing and then realizing ‘well, I guess I’ve got to learn how to do that if I want one of my own.’ It’s how I learned to knit, crochet, sew bags, etc. EPP(English Paper Piecing) falls into the ‘well, I’ve dabbled‘ category. But Nicole’s Butterfly Effect pattern stopped me in my Instagram tracks! It’s definitely no small feat with, what I’m guessing, is around 50 pieces to form this mini. [No, I haven’t actually counted as I’m too scared to know the actual number of pieces in case it’s a lot more than my guess! lol]

The sew along is at its tail end (ending June 30th) so check it & her instagram out to join or get inspired. Butterfly Effect Sew Along #butterflyeffectpatternSAL
The sew along is a bit too late for me, but when analyzing this pattern I thought to myself…
THIS IS AHH-MAZING!
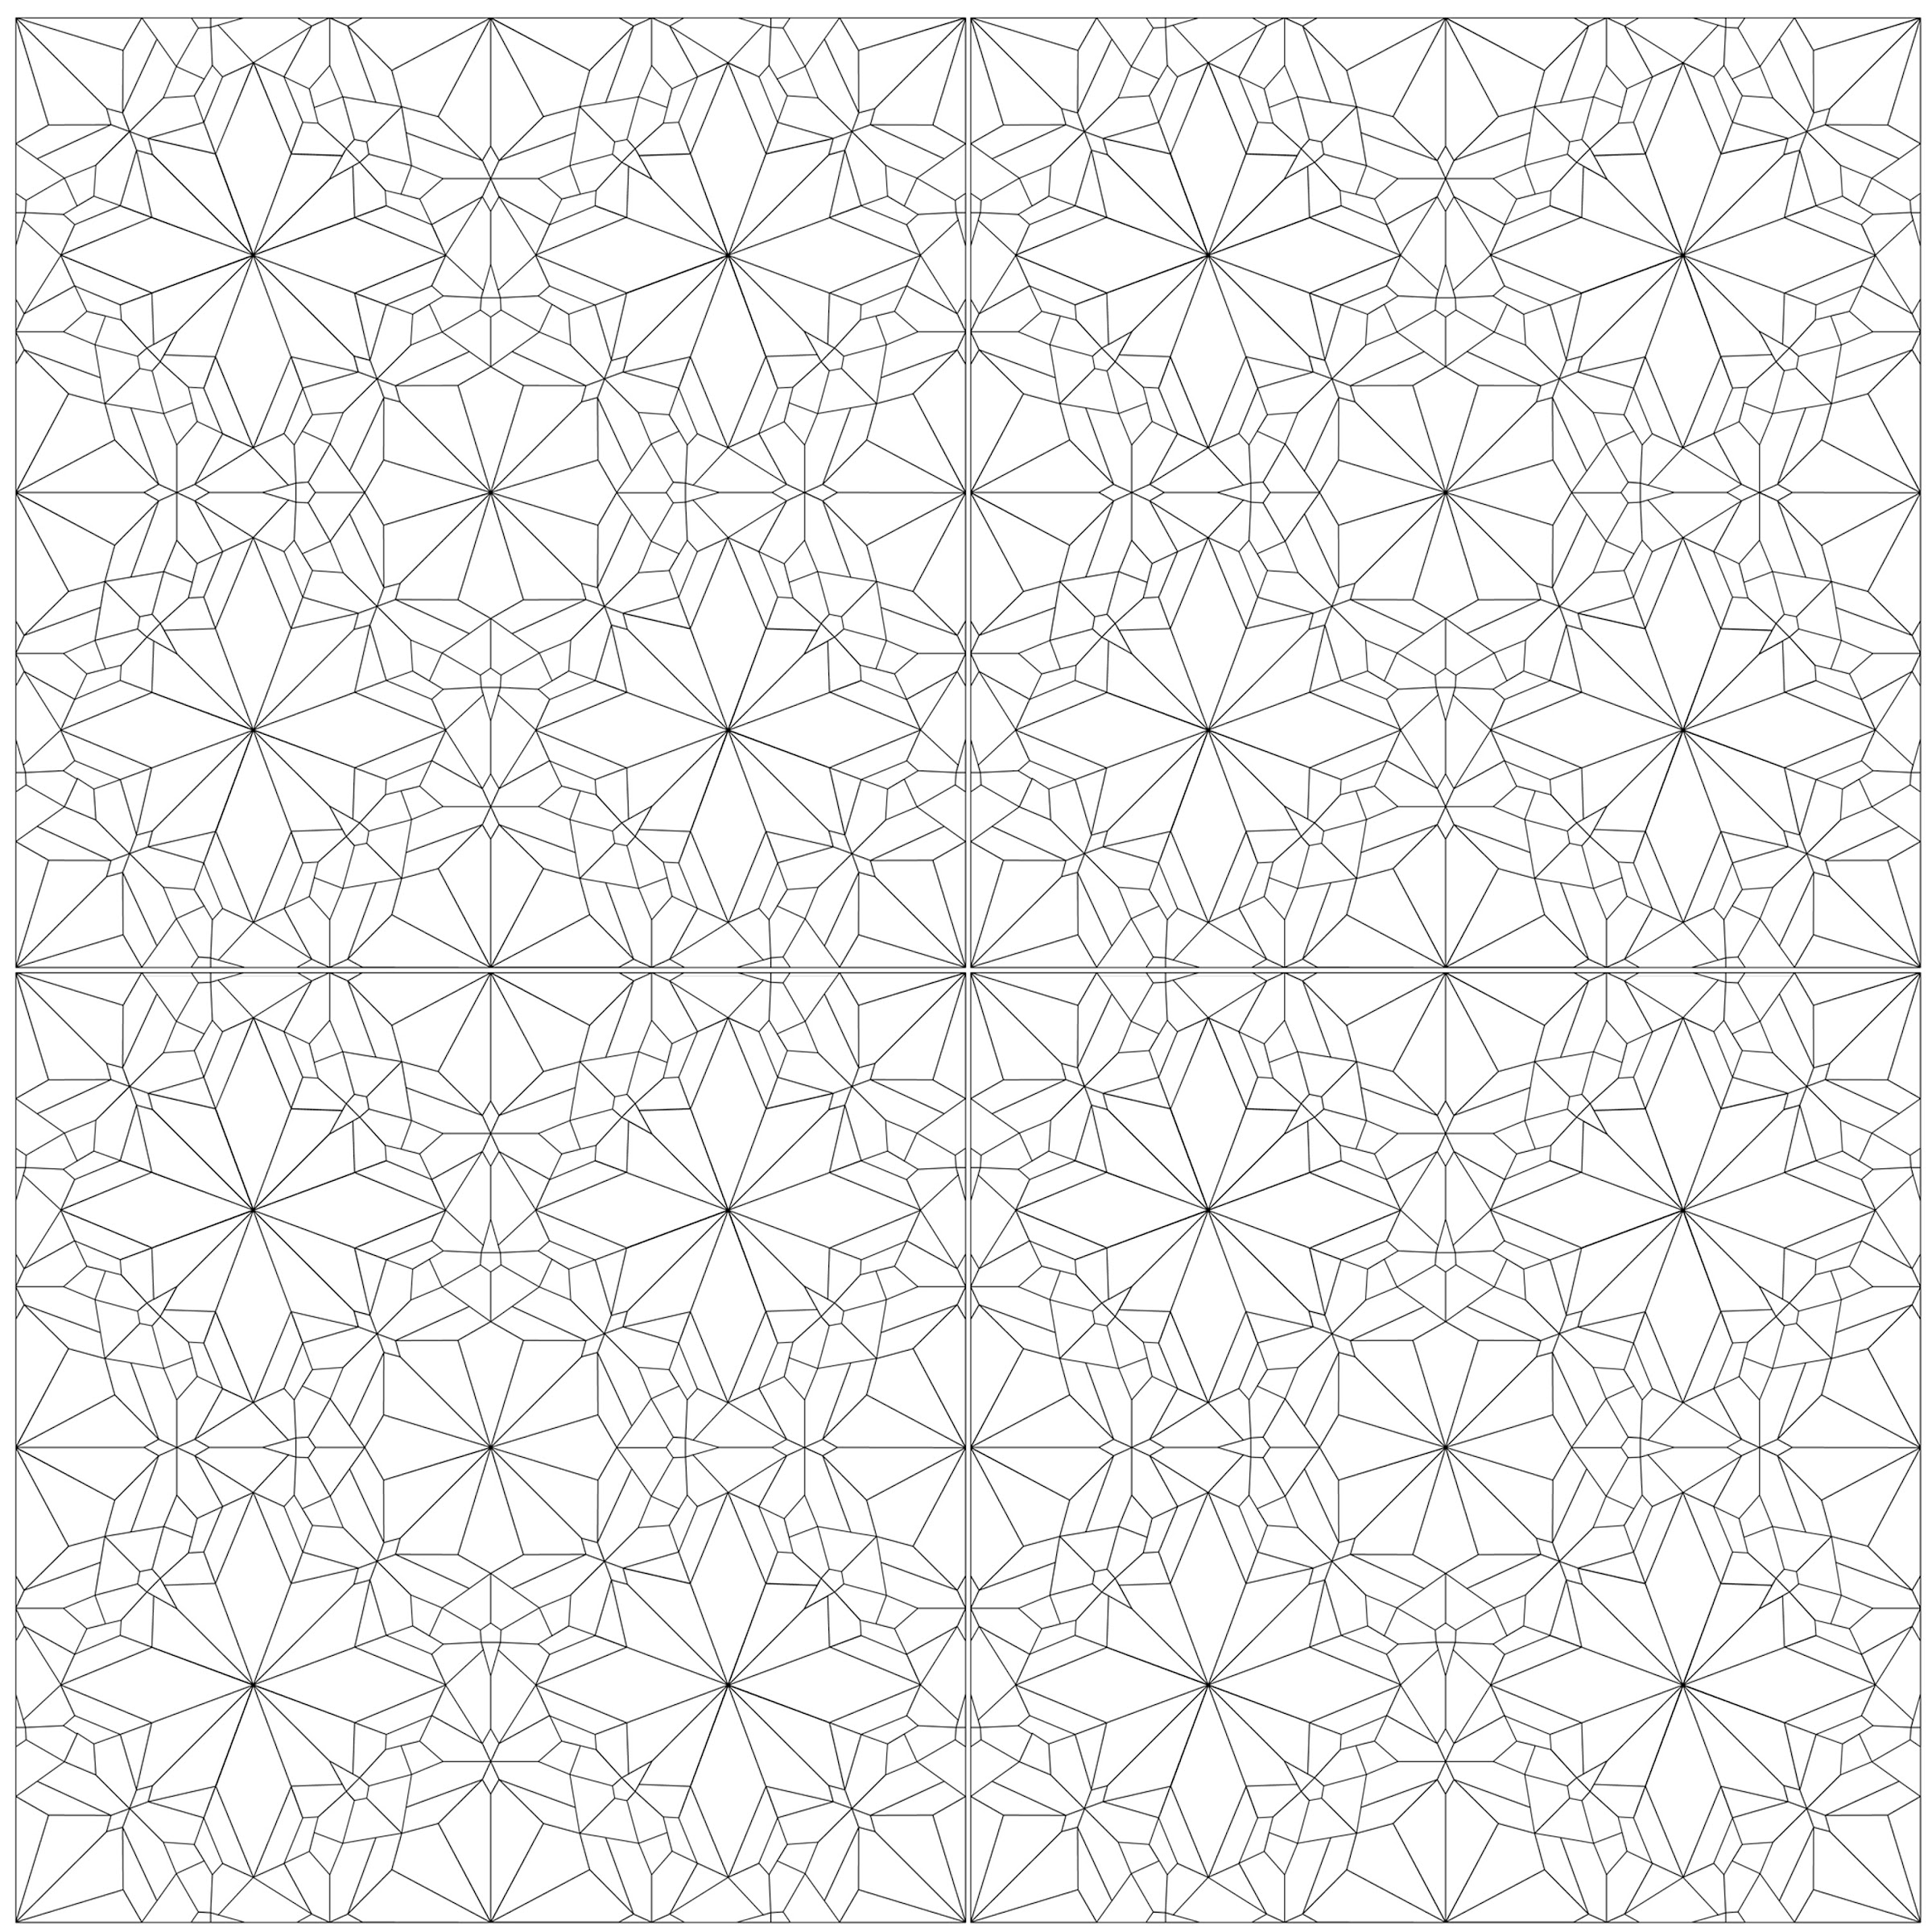
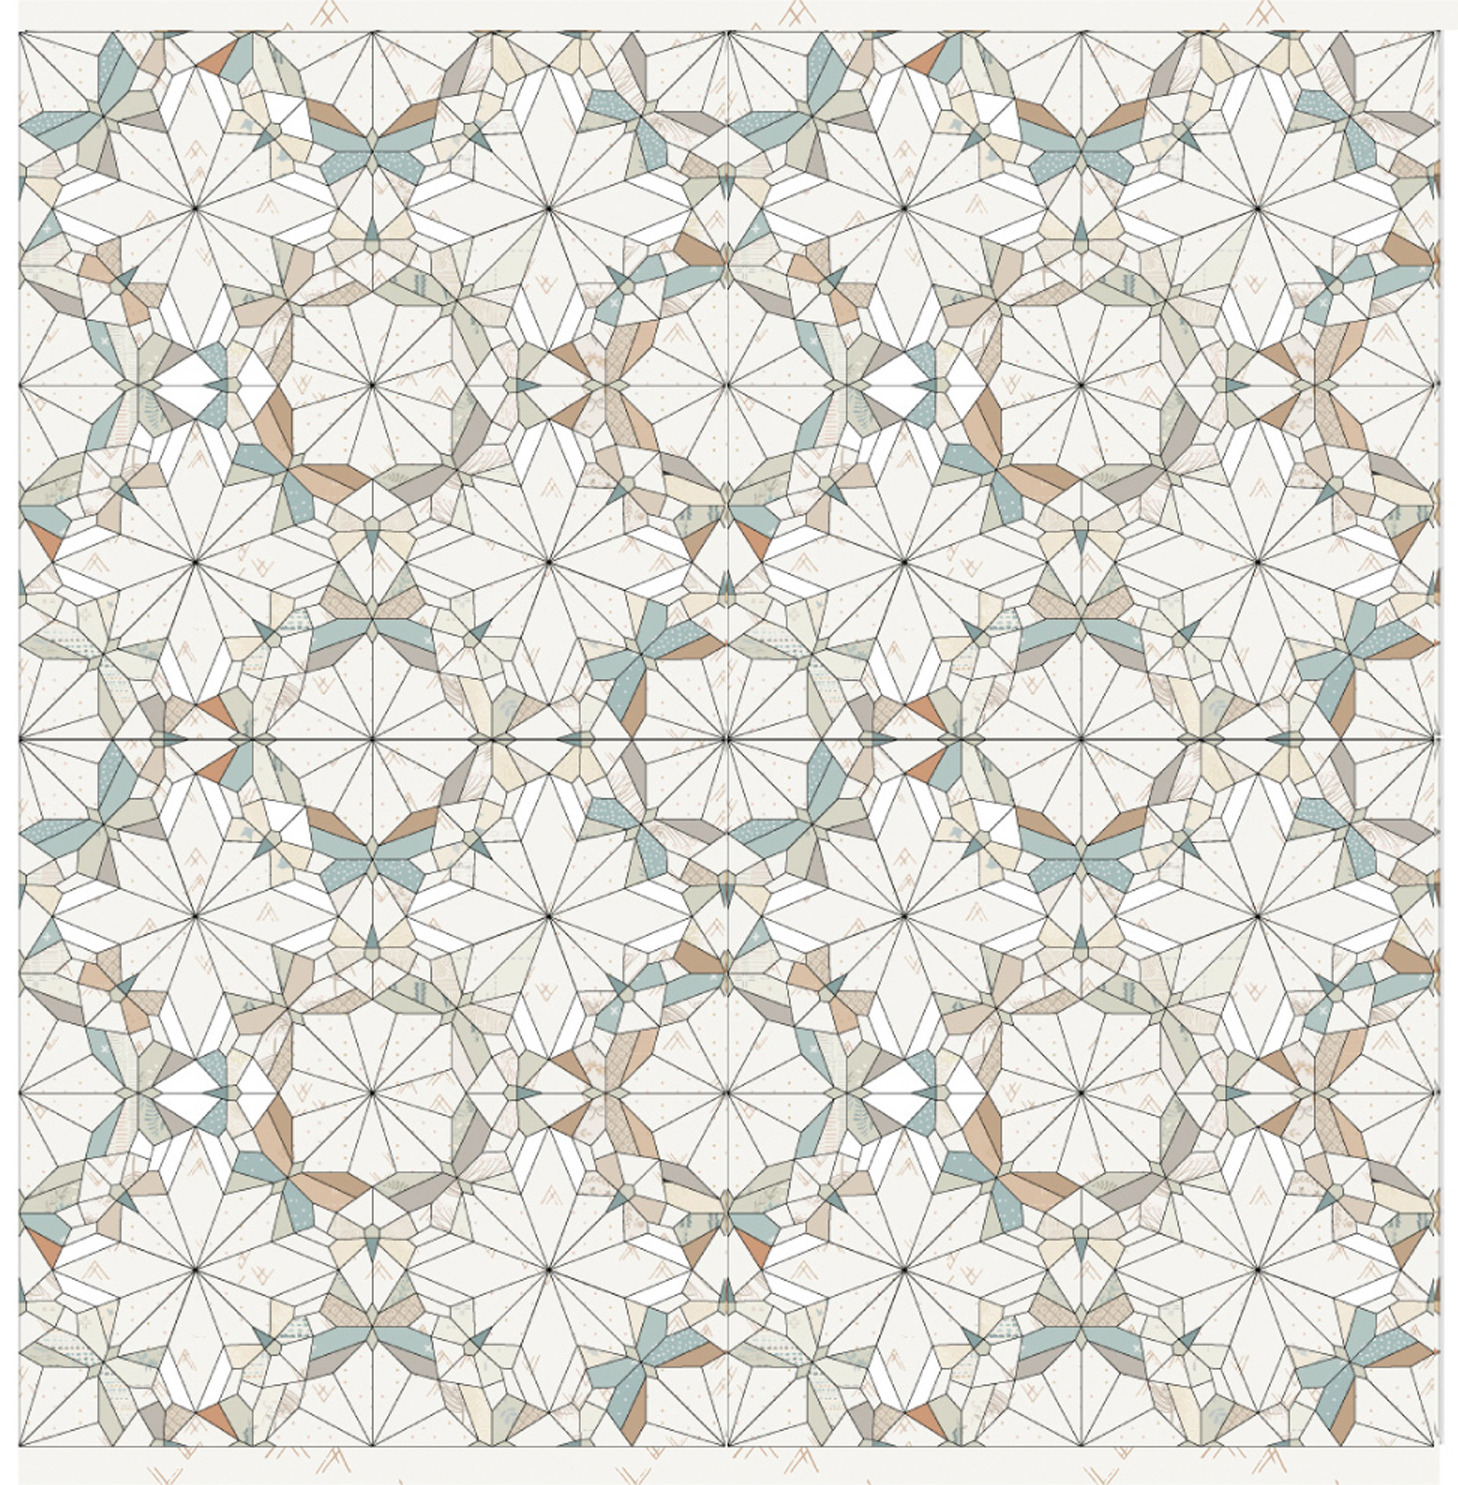
… but it needs more …… it NEEDS to be a quilt!
I could just magnify it to a quilt size …
… NO, for perfection how about…… multiplying it?
Twice?
Thrice?No… No…
We need to tile it 4 times!!
Ah, now we’re getting somewhere.
Feel the Difference
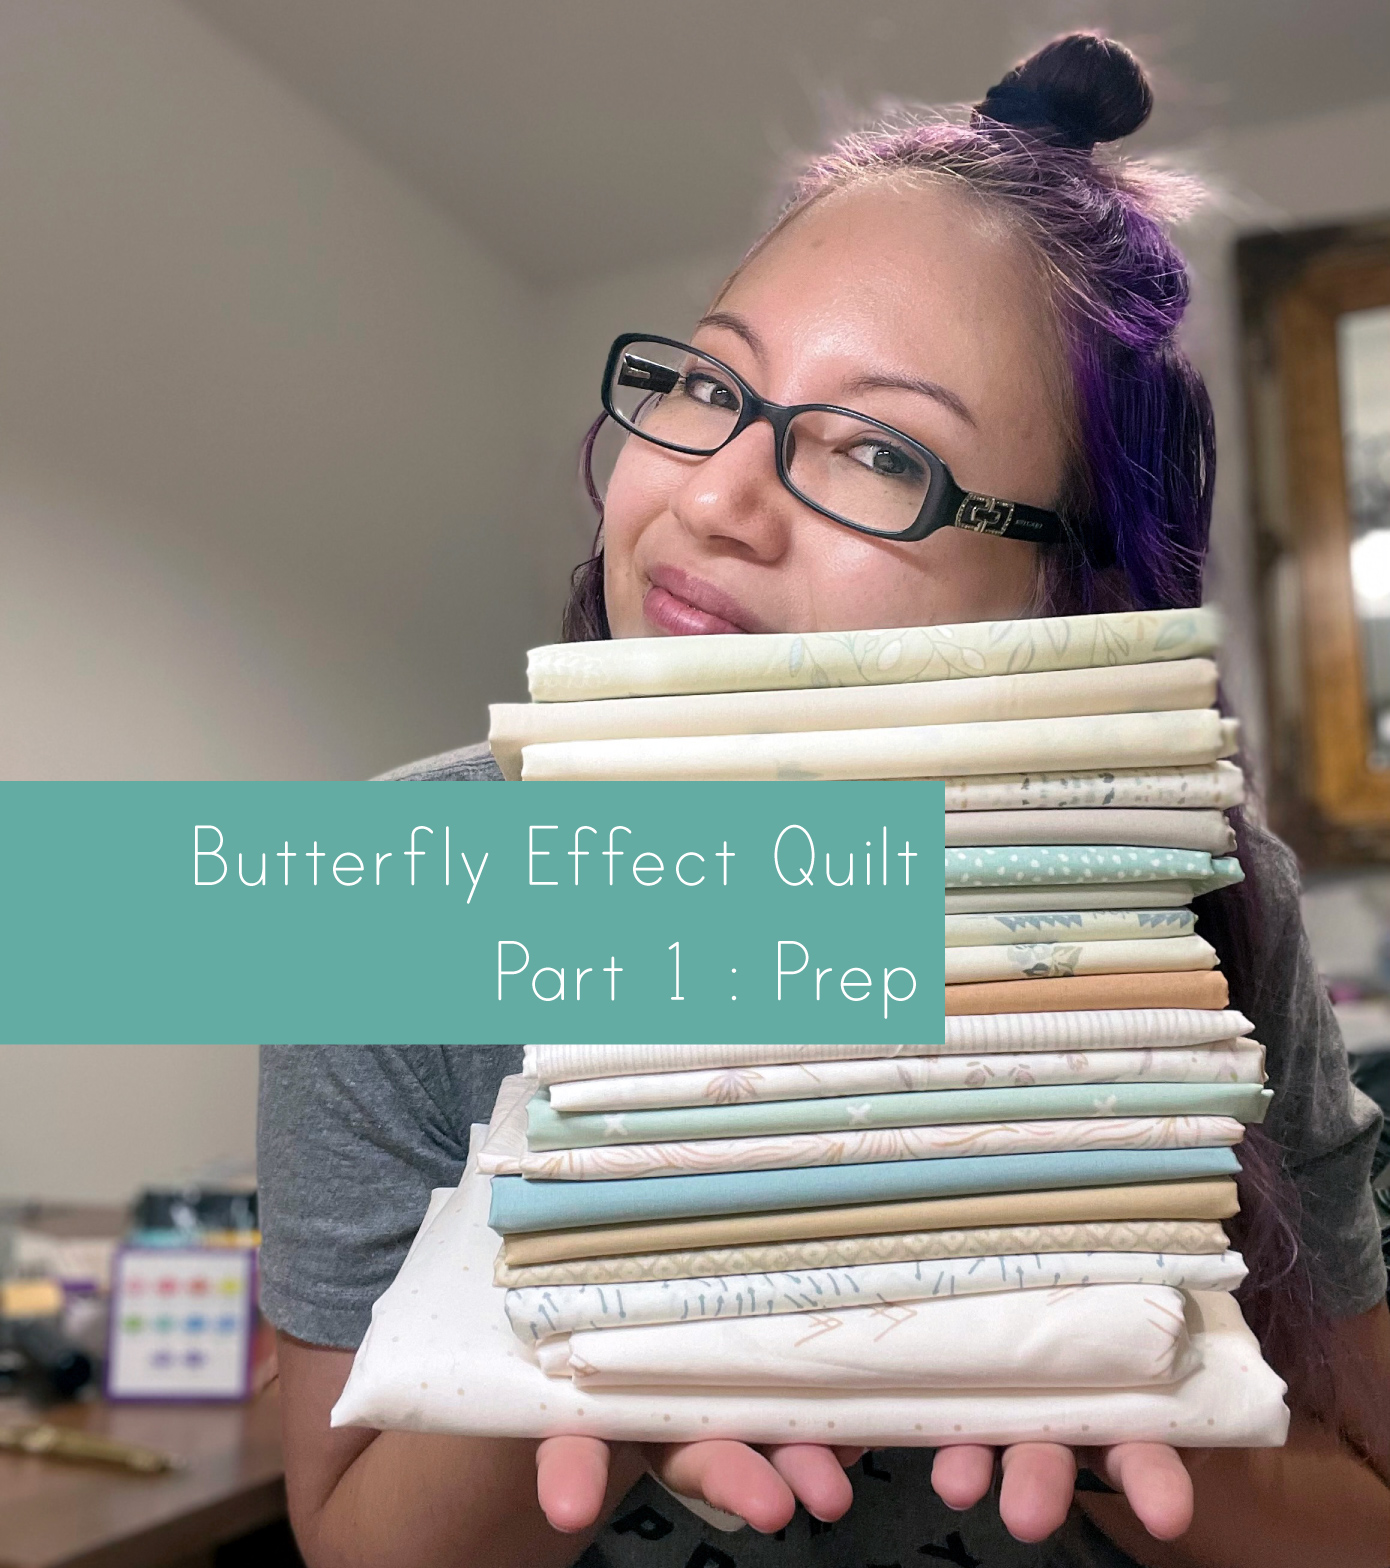
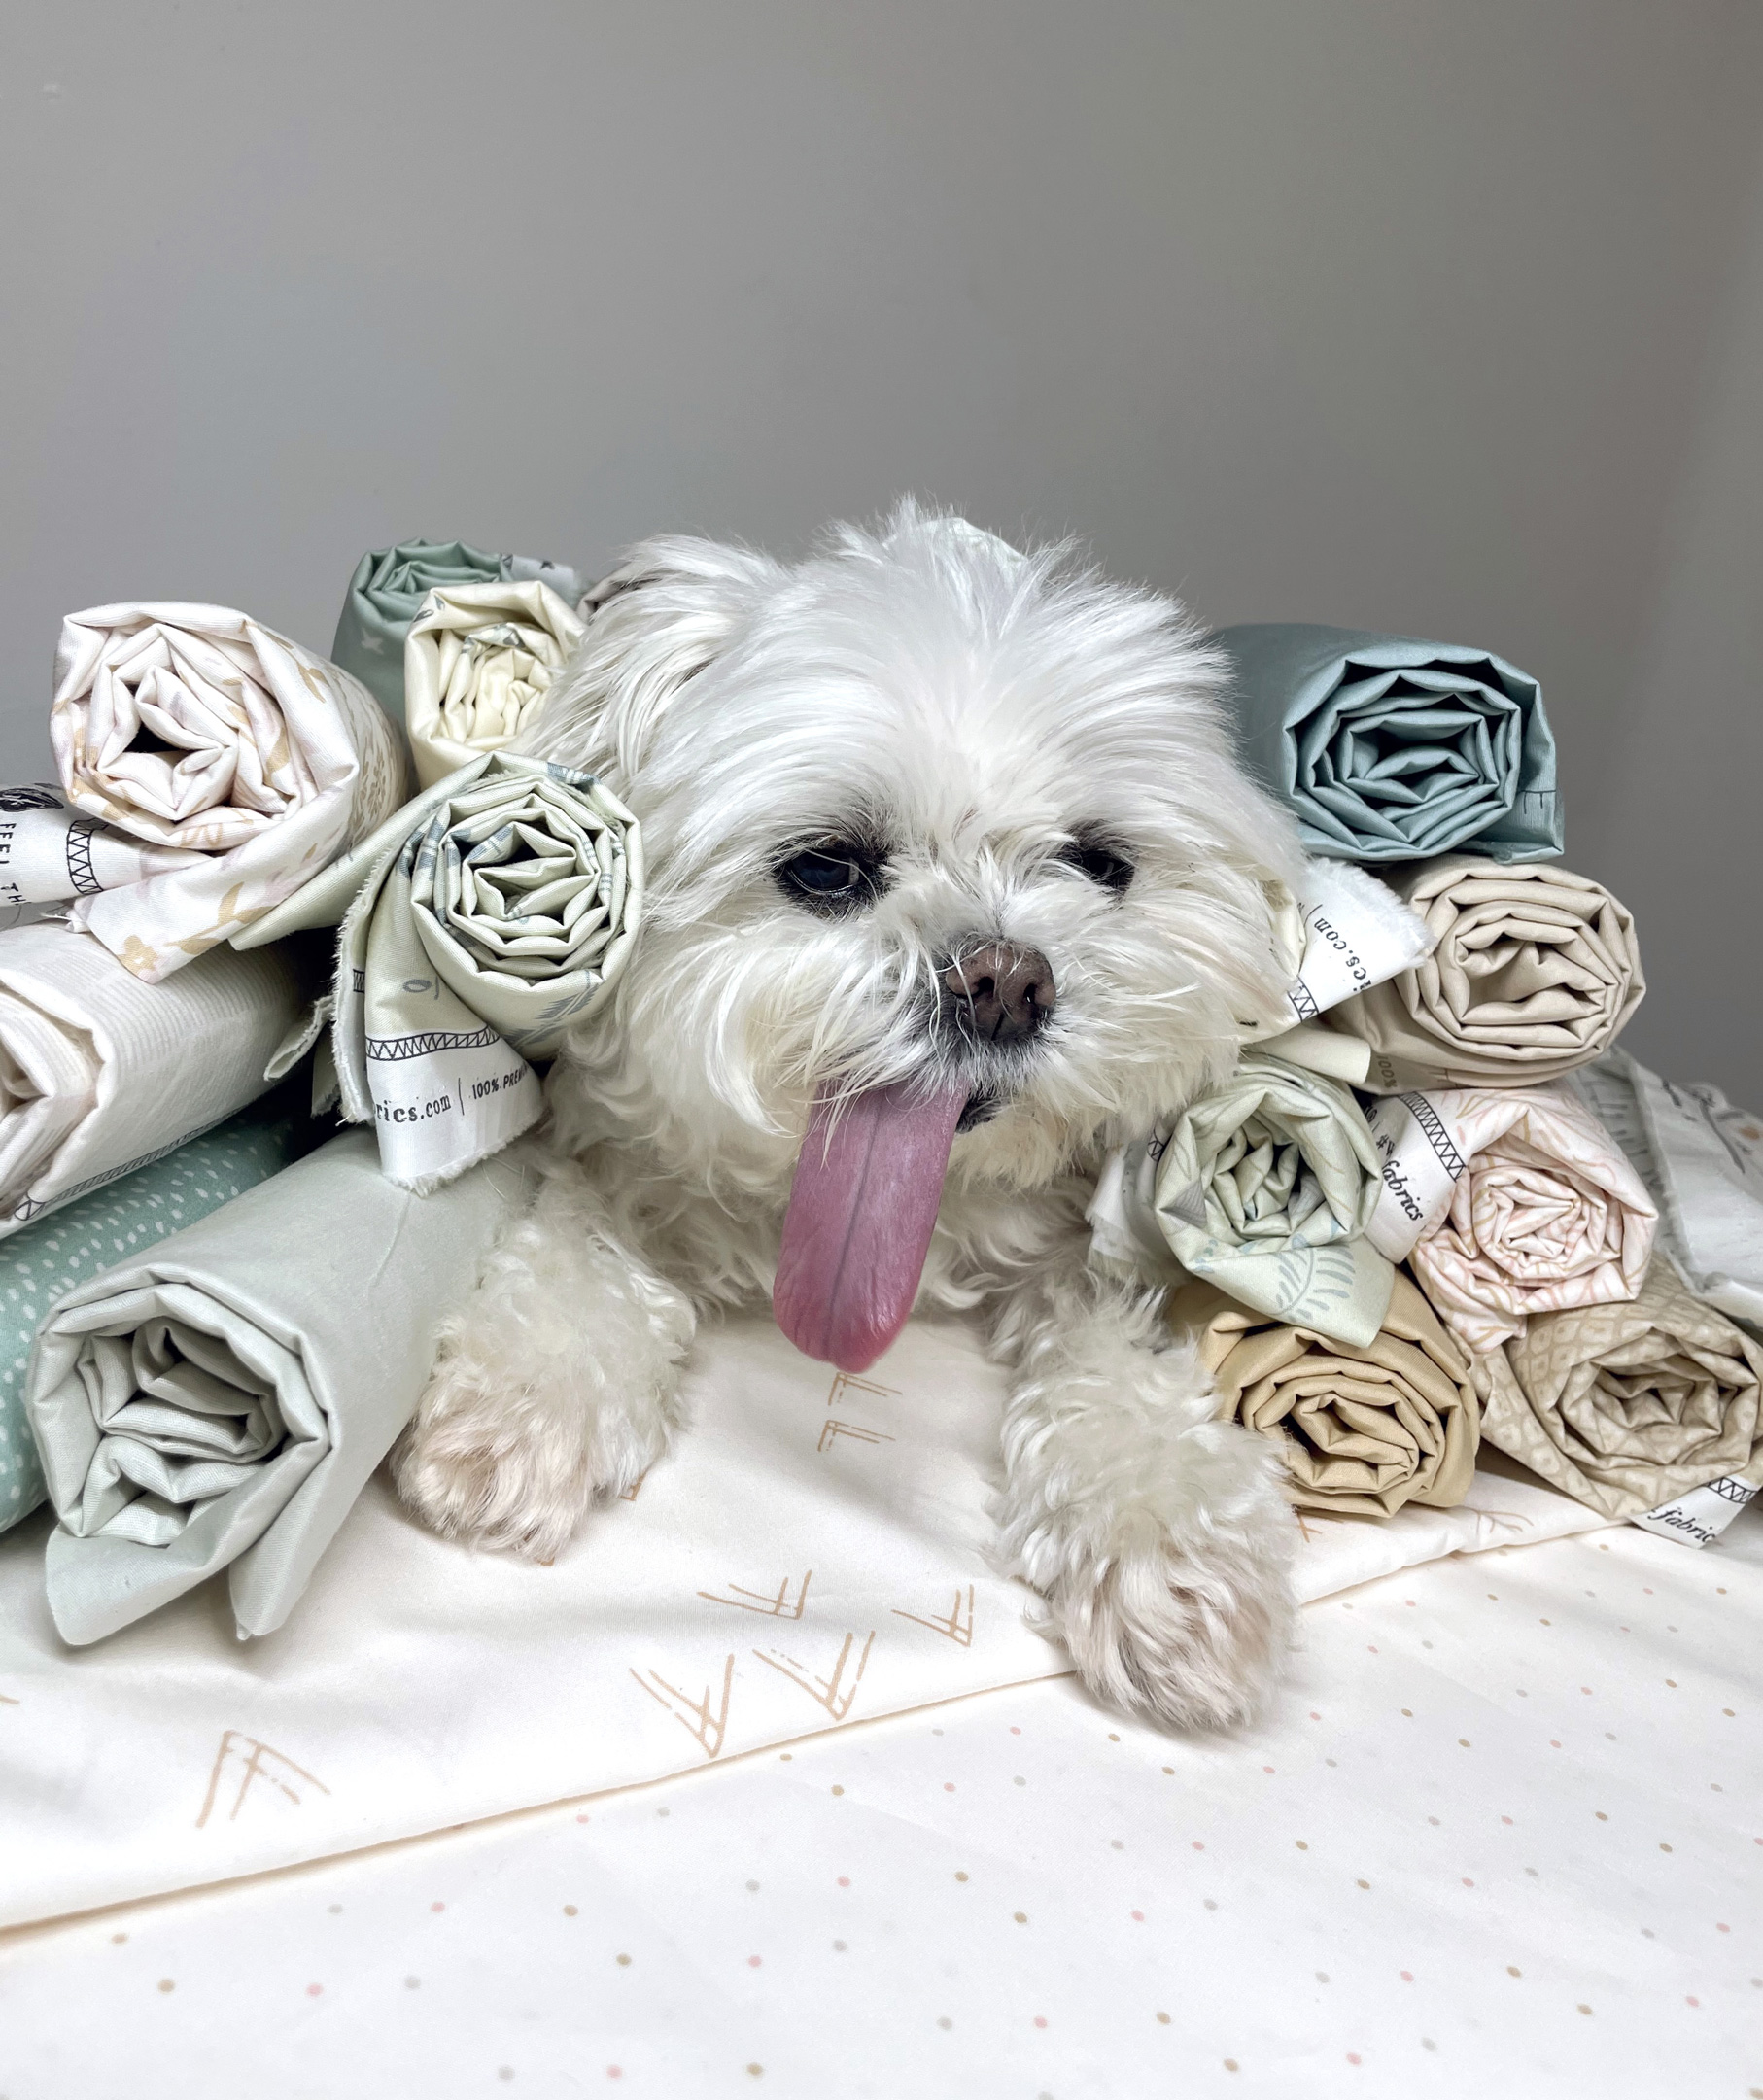
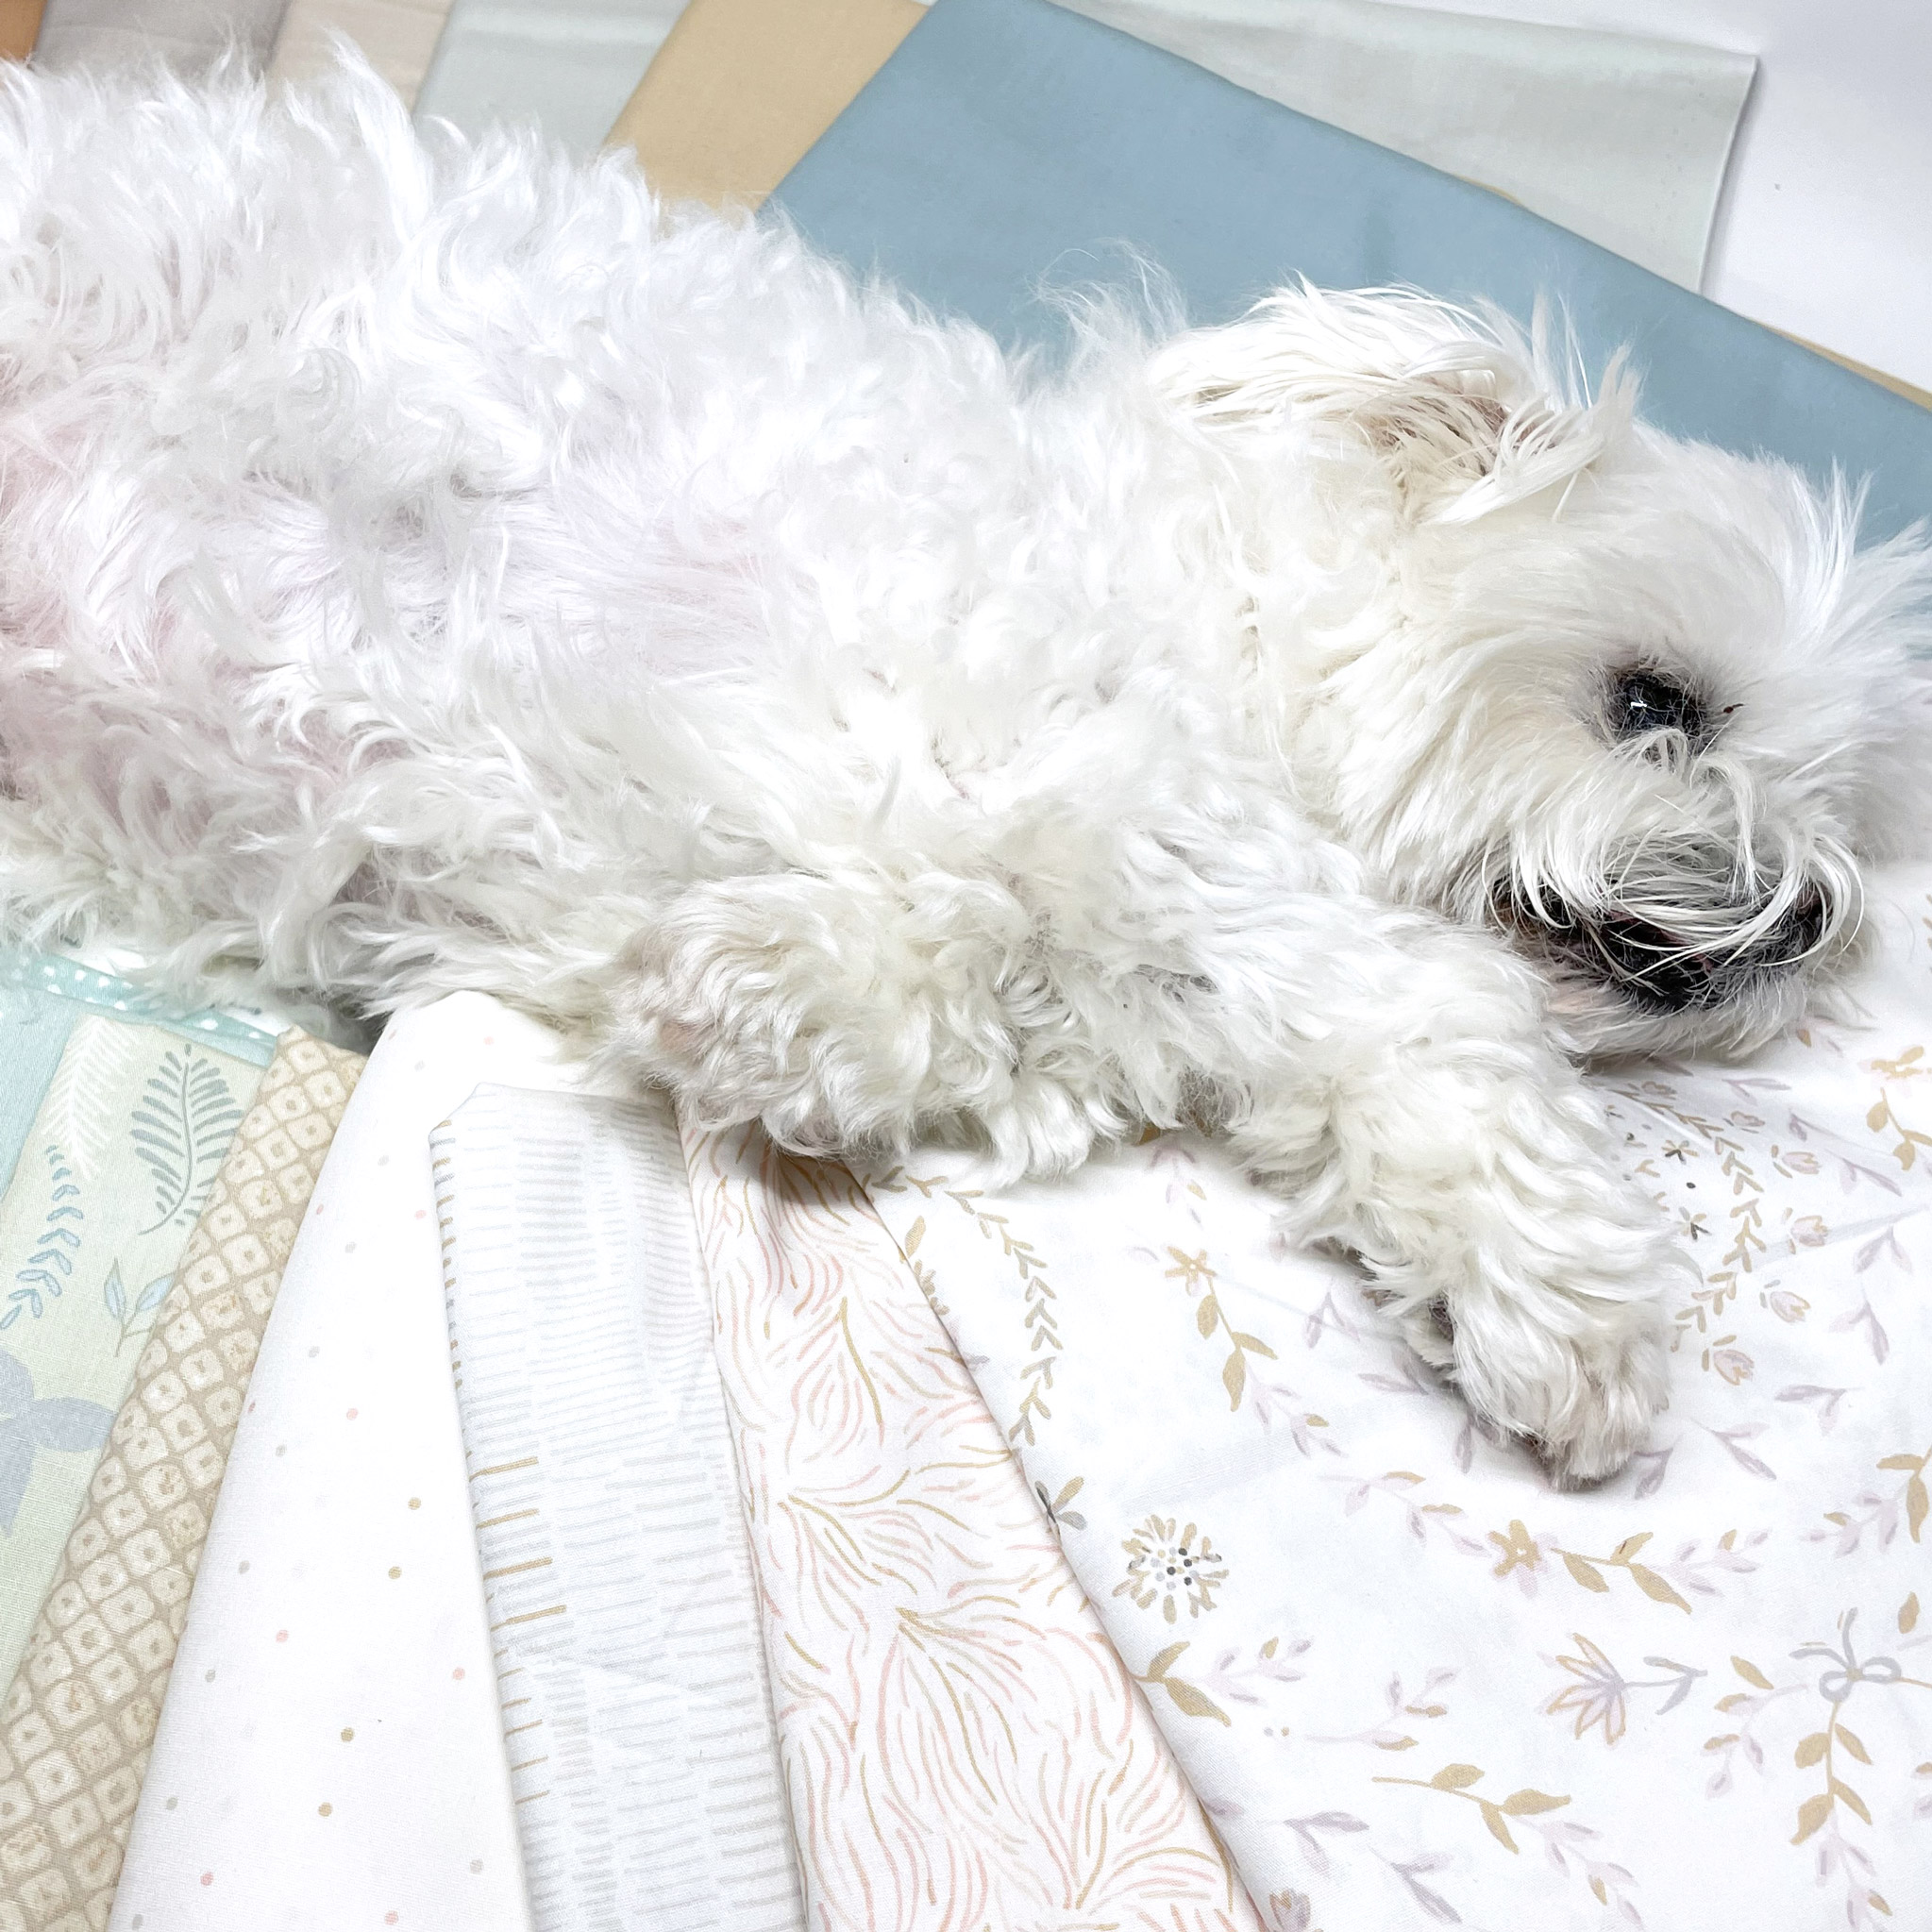
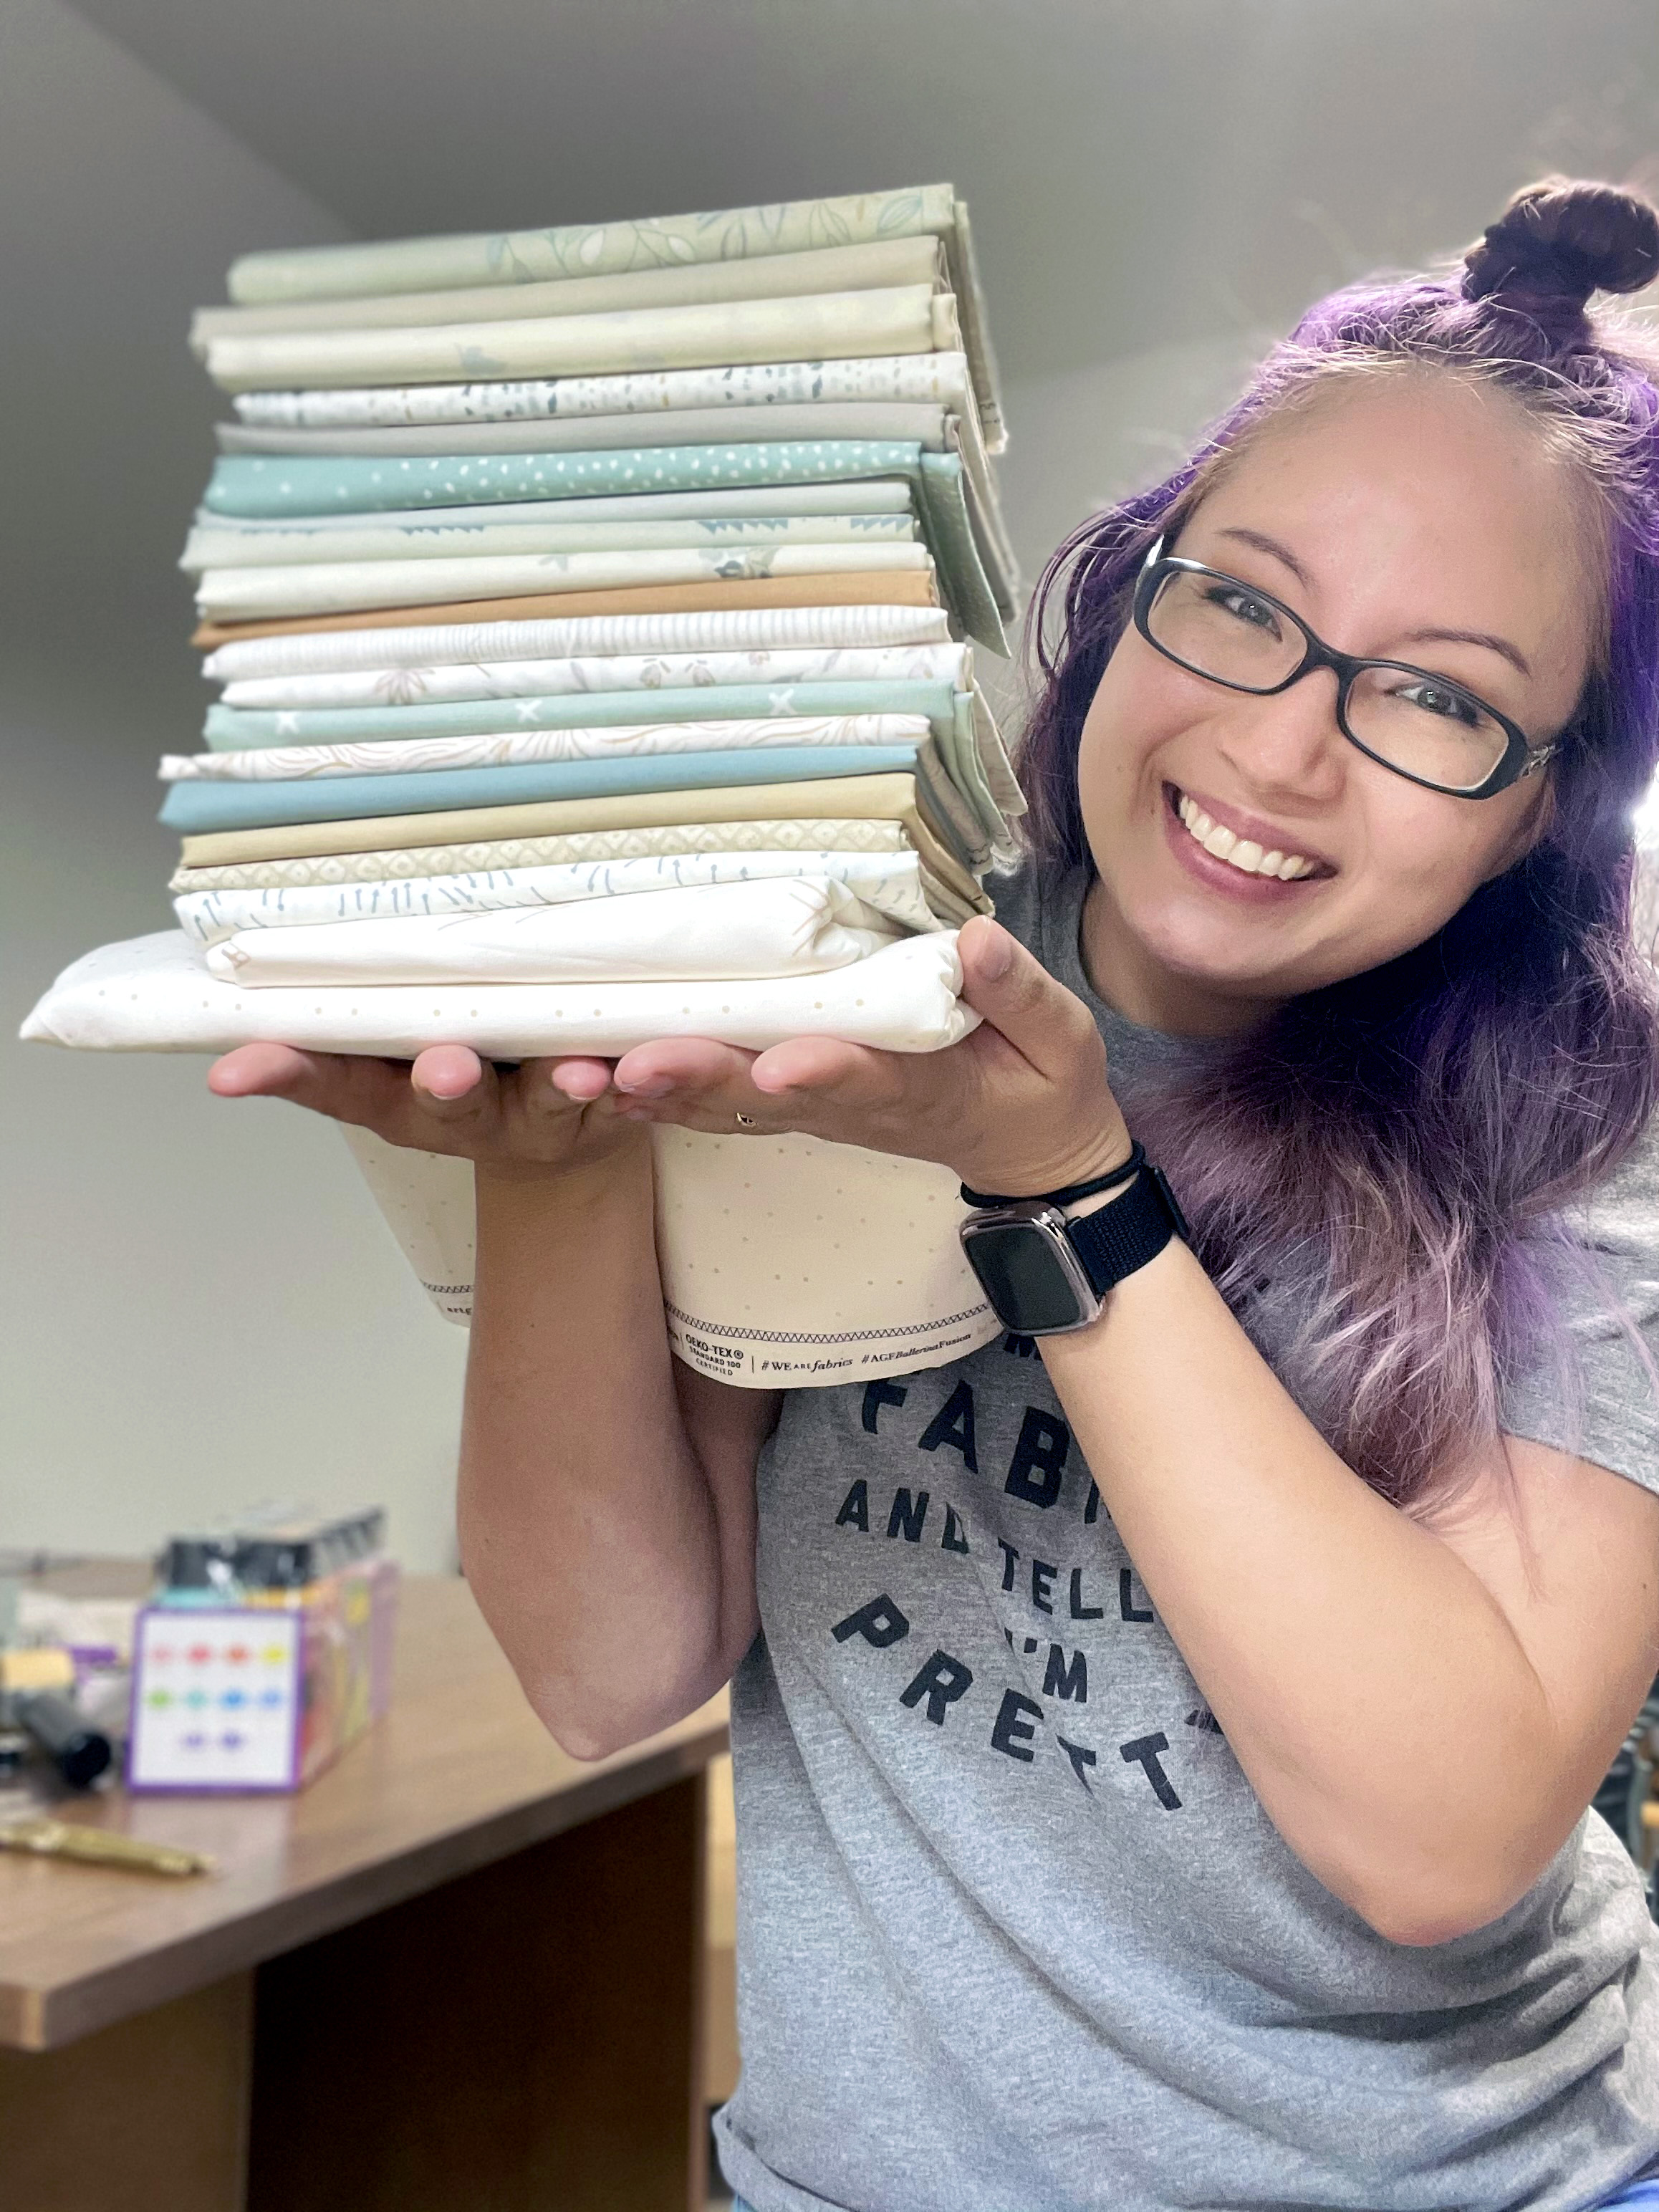
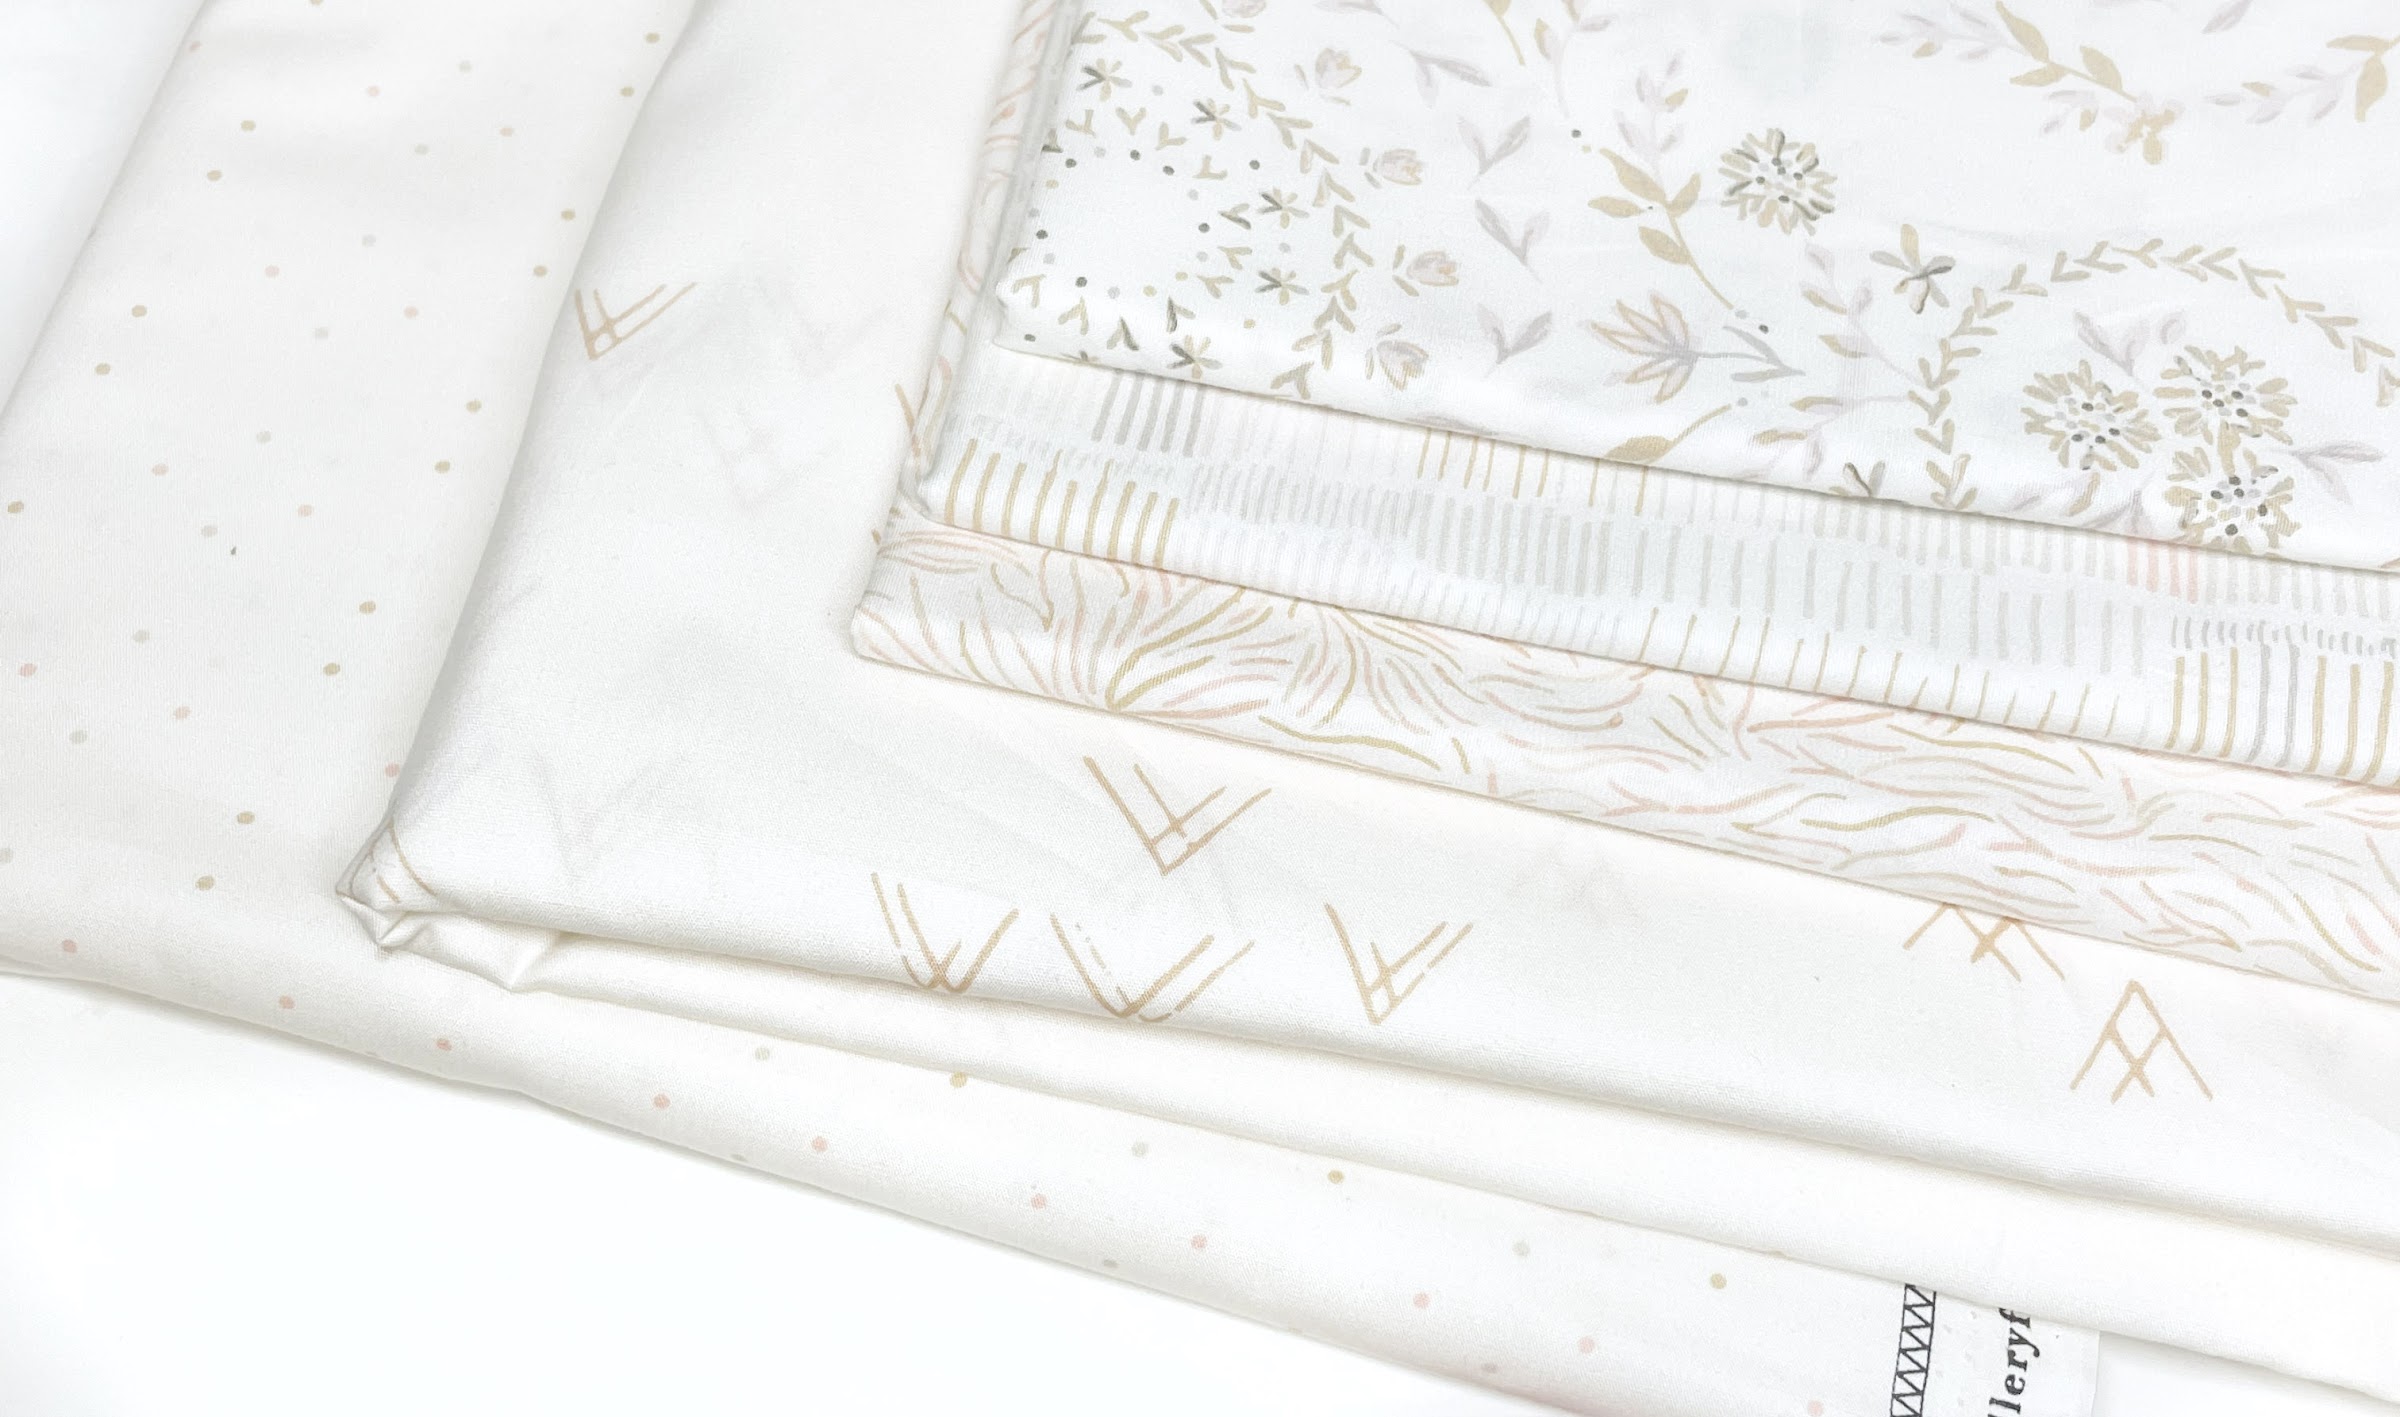
Now let’s talk about fabric. Sometimes it’s all about that perfect design or iconography that you just fall in love with! But often with quilting it can be more about the shades, tones, or whether there is minimal or expansive spacing on the fabrics. And that is when I realized I was focused on – ‘low-volume’ fabrics. Subtle tones with a gentle transition of colors, where the design is more about the ‘texture’ it adds rather than the actual imagery.
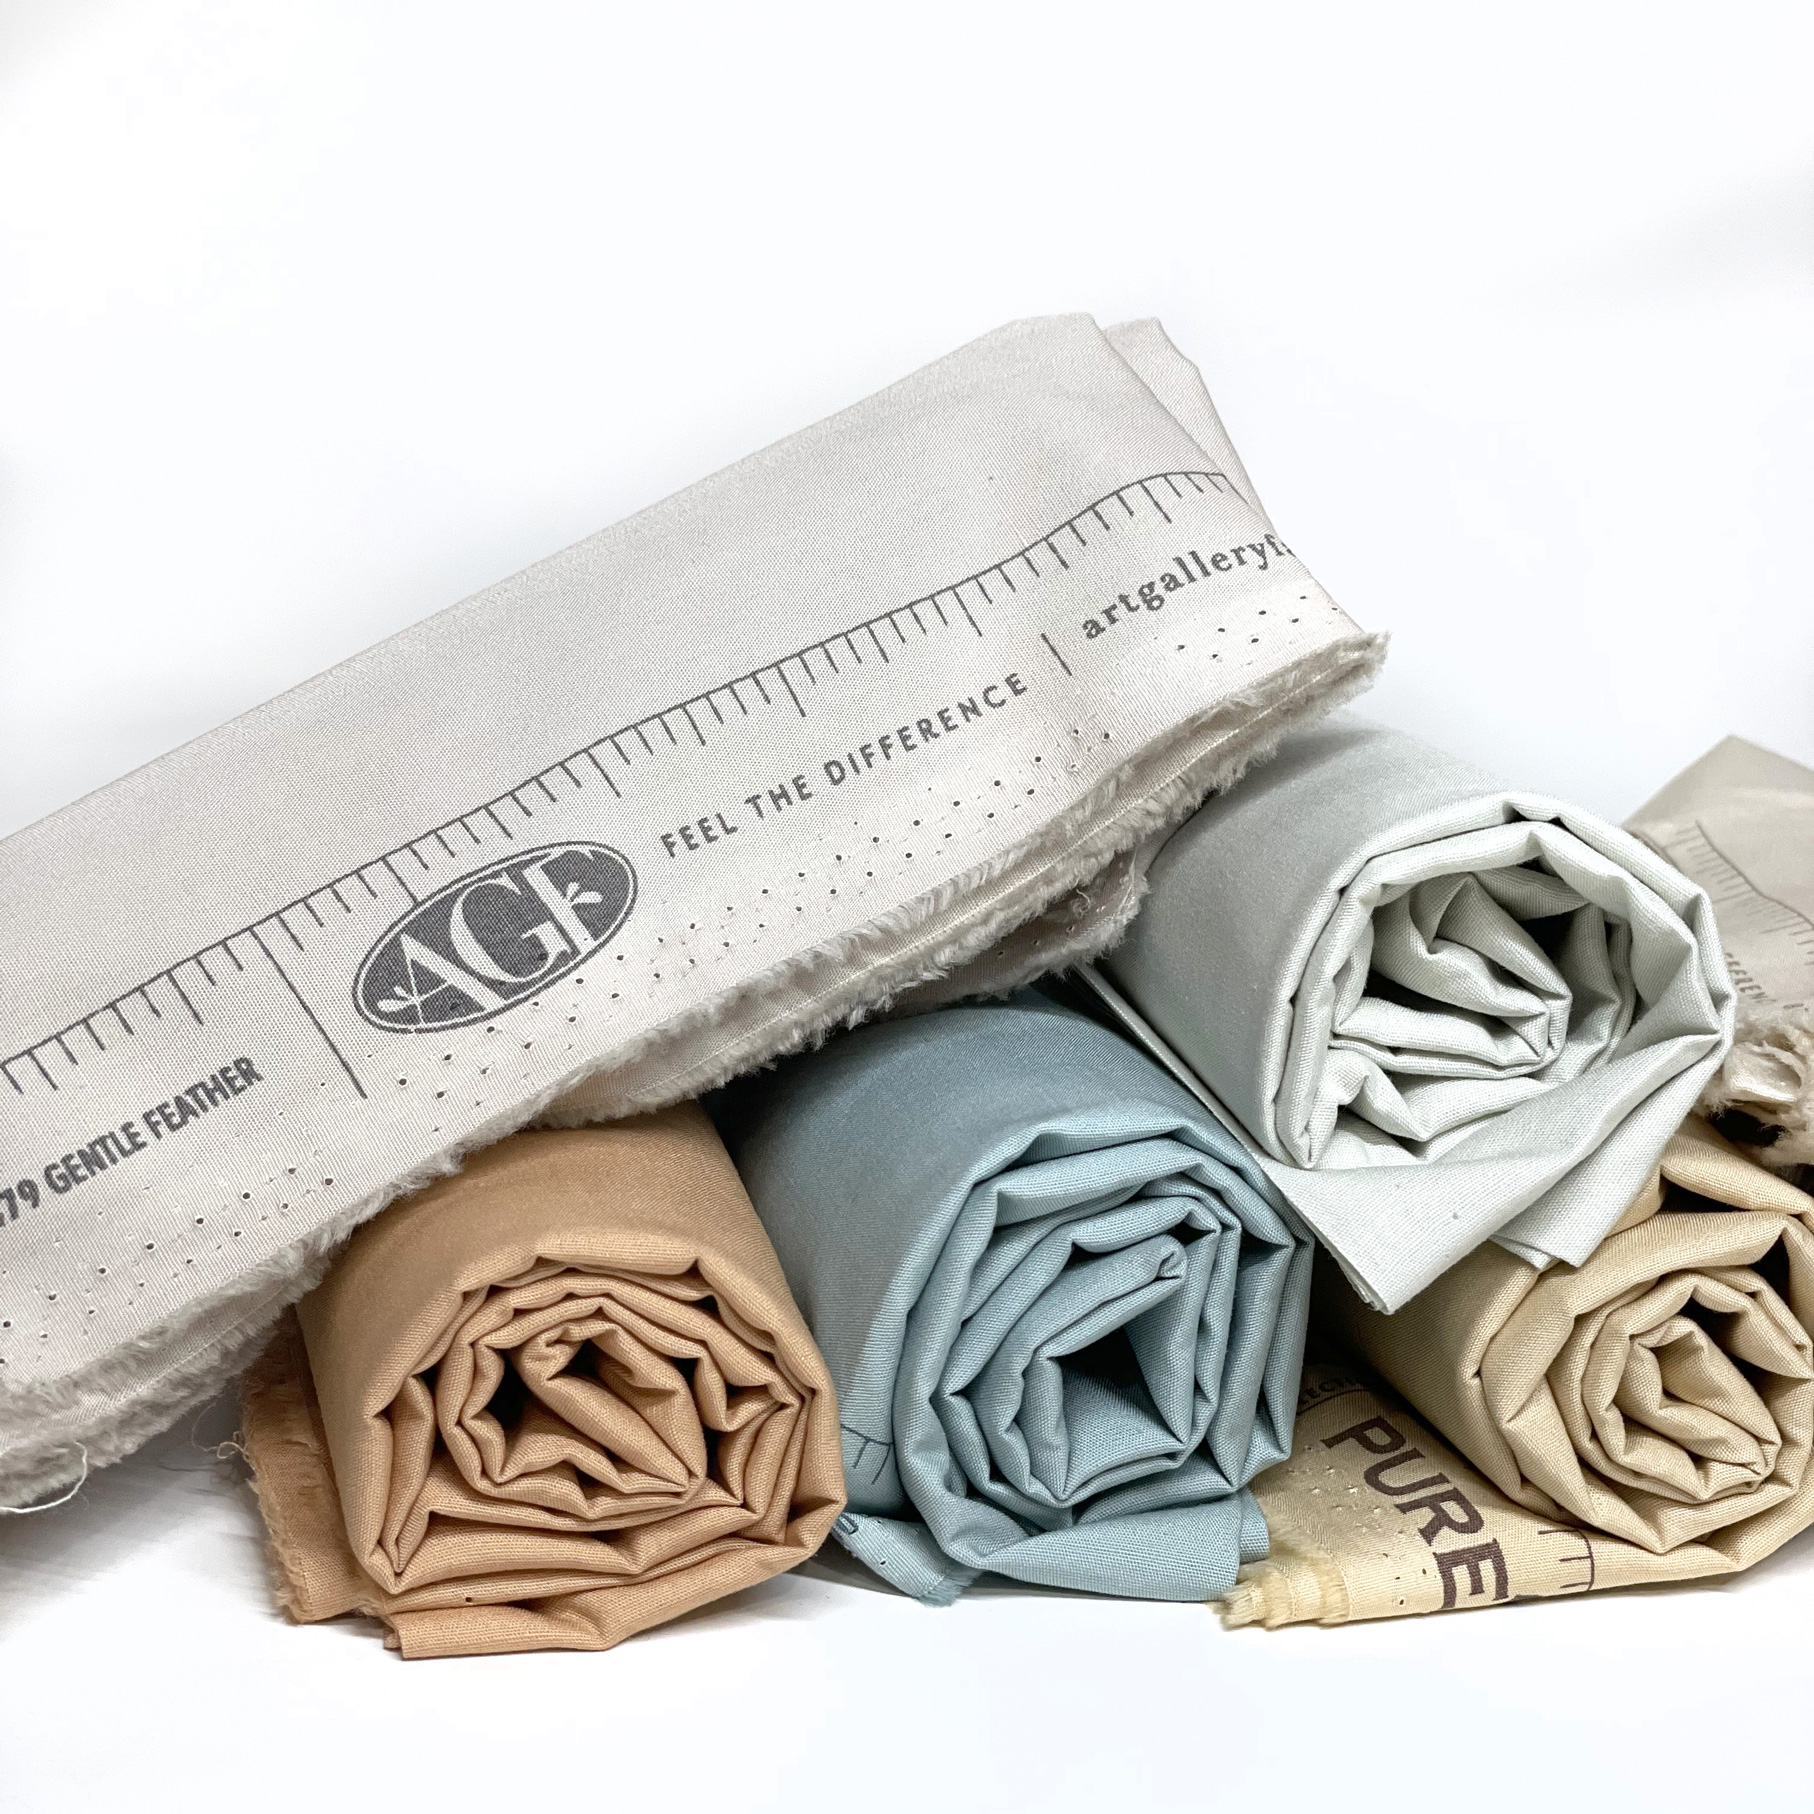
And with that decided, next was which line? Surely something of quality, because it’s only the best for my bud! With the amount of work that is going to be put into this, I wanted it to become an heirloom. And as such, it needed to stand the test of time with still feeling amazingly soft. Art Gallery Fabrics hit all the marks!

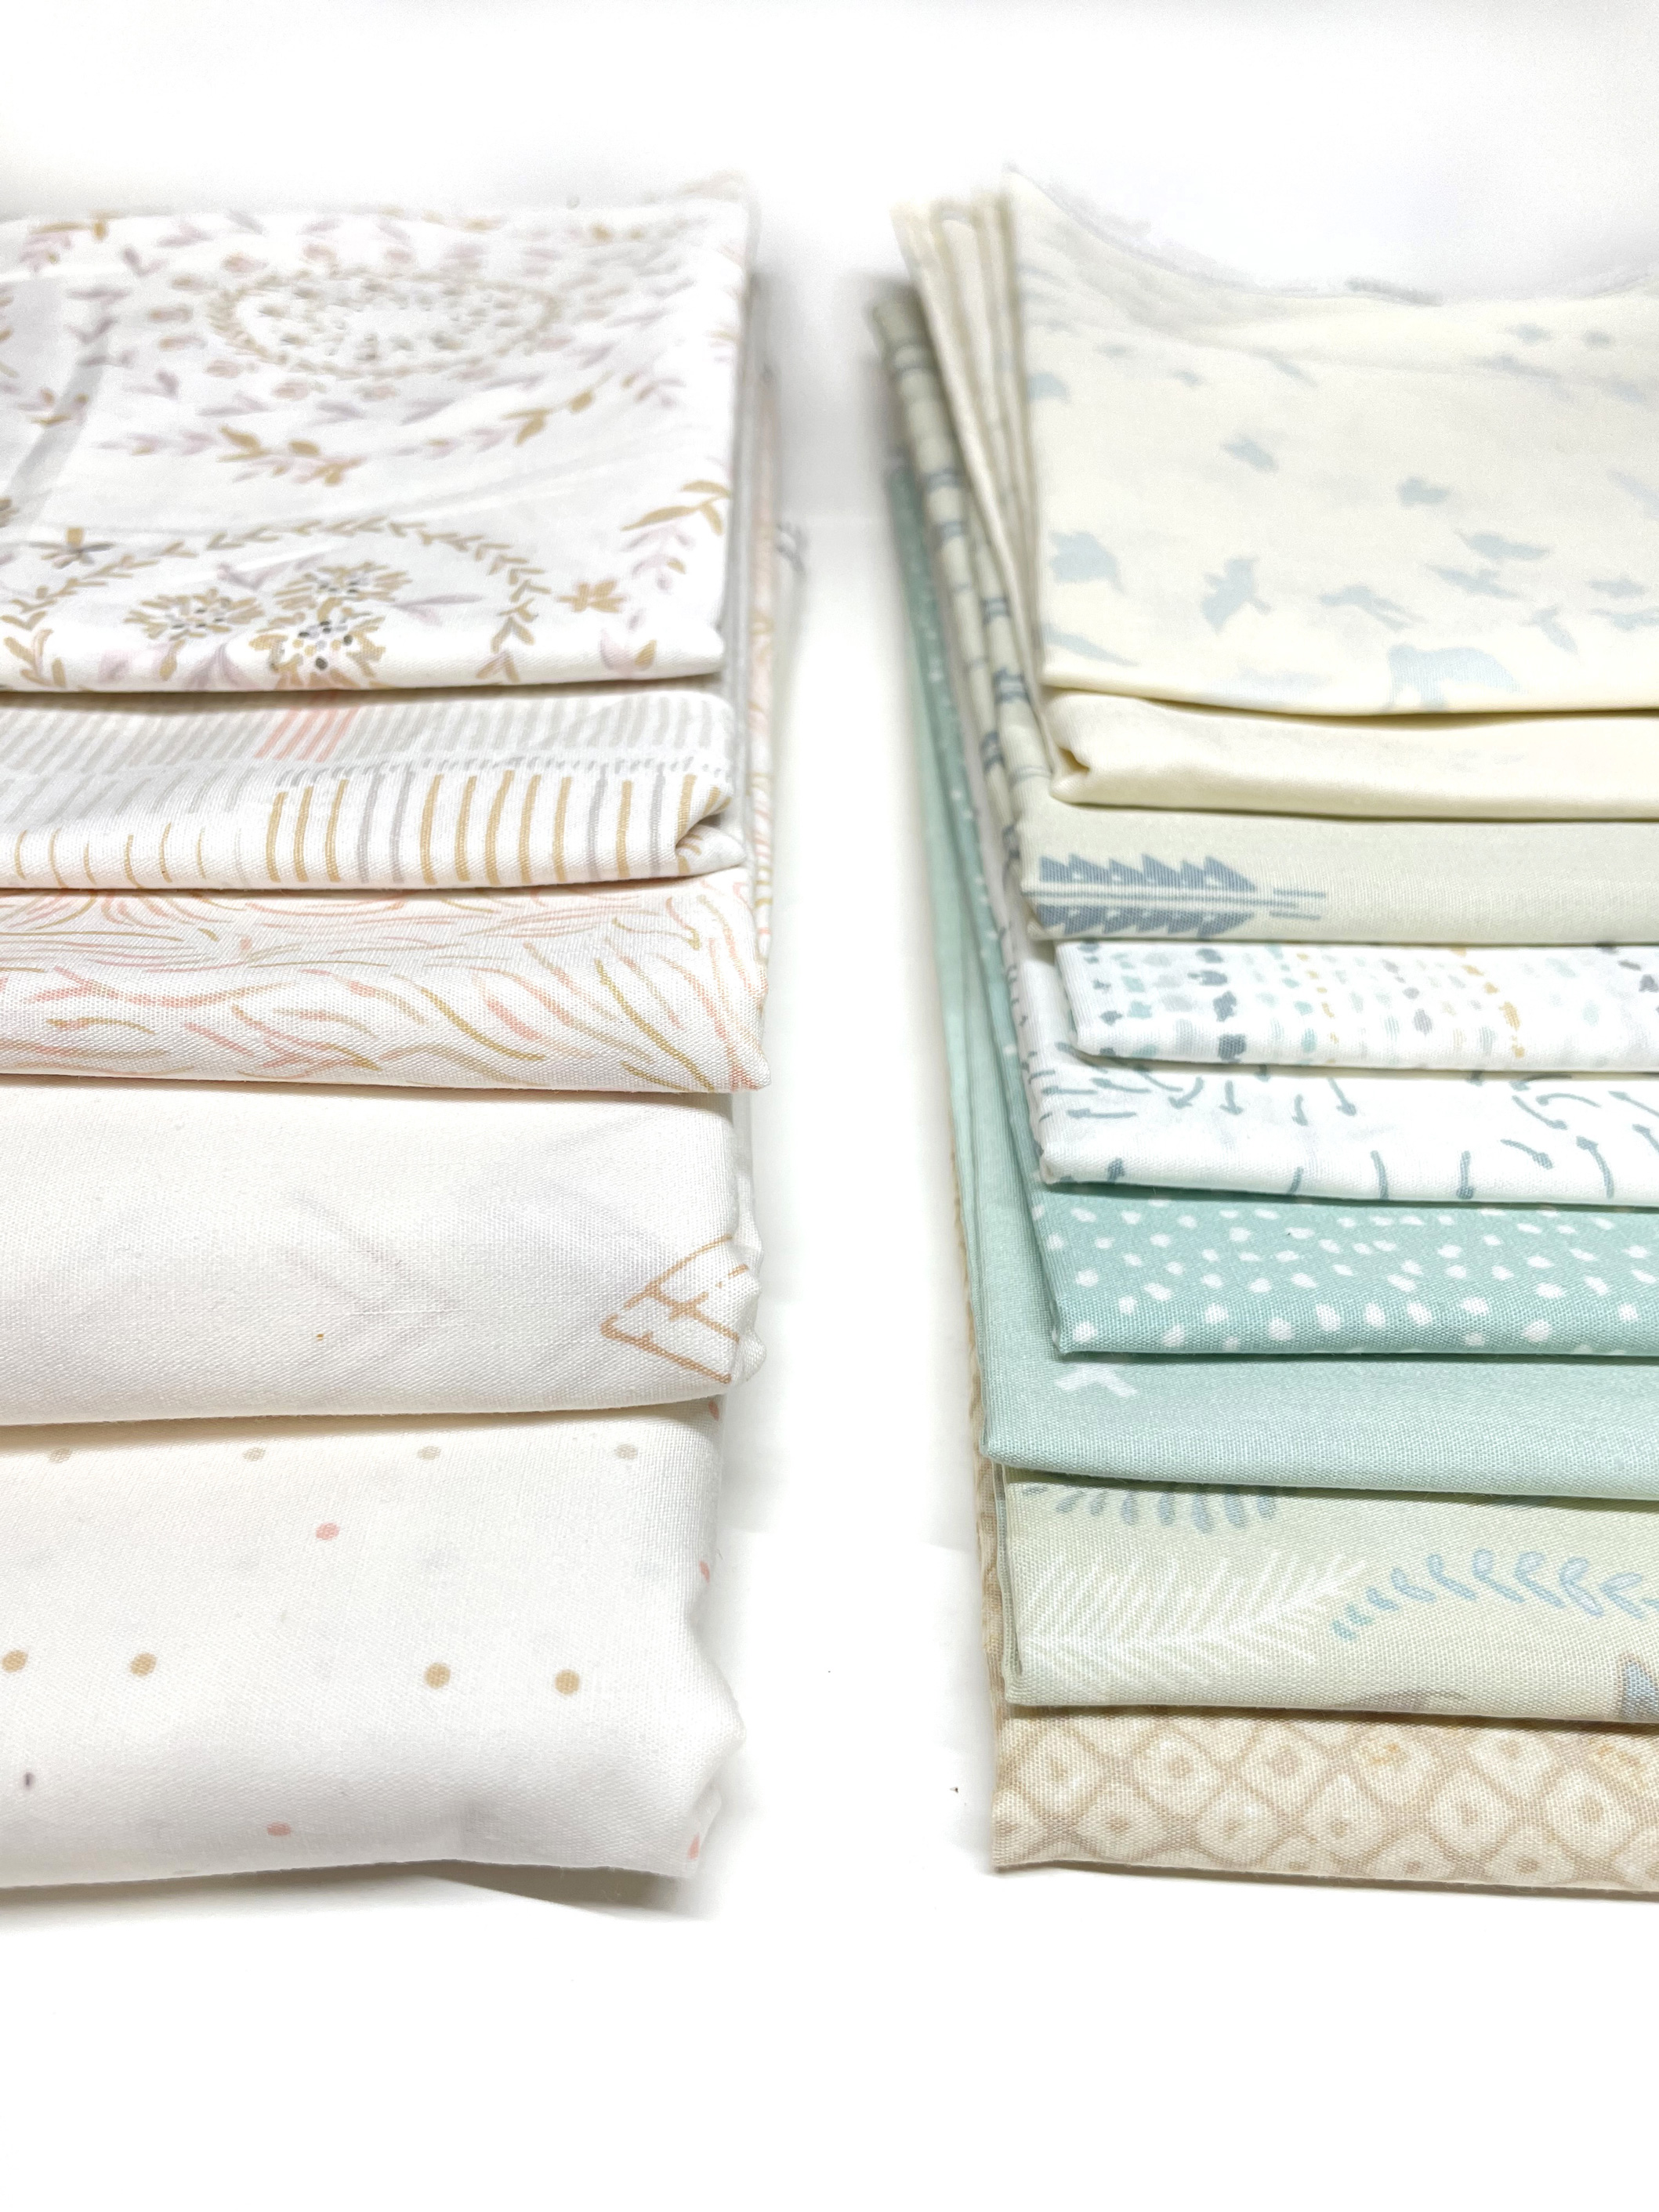
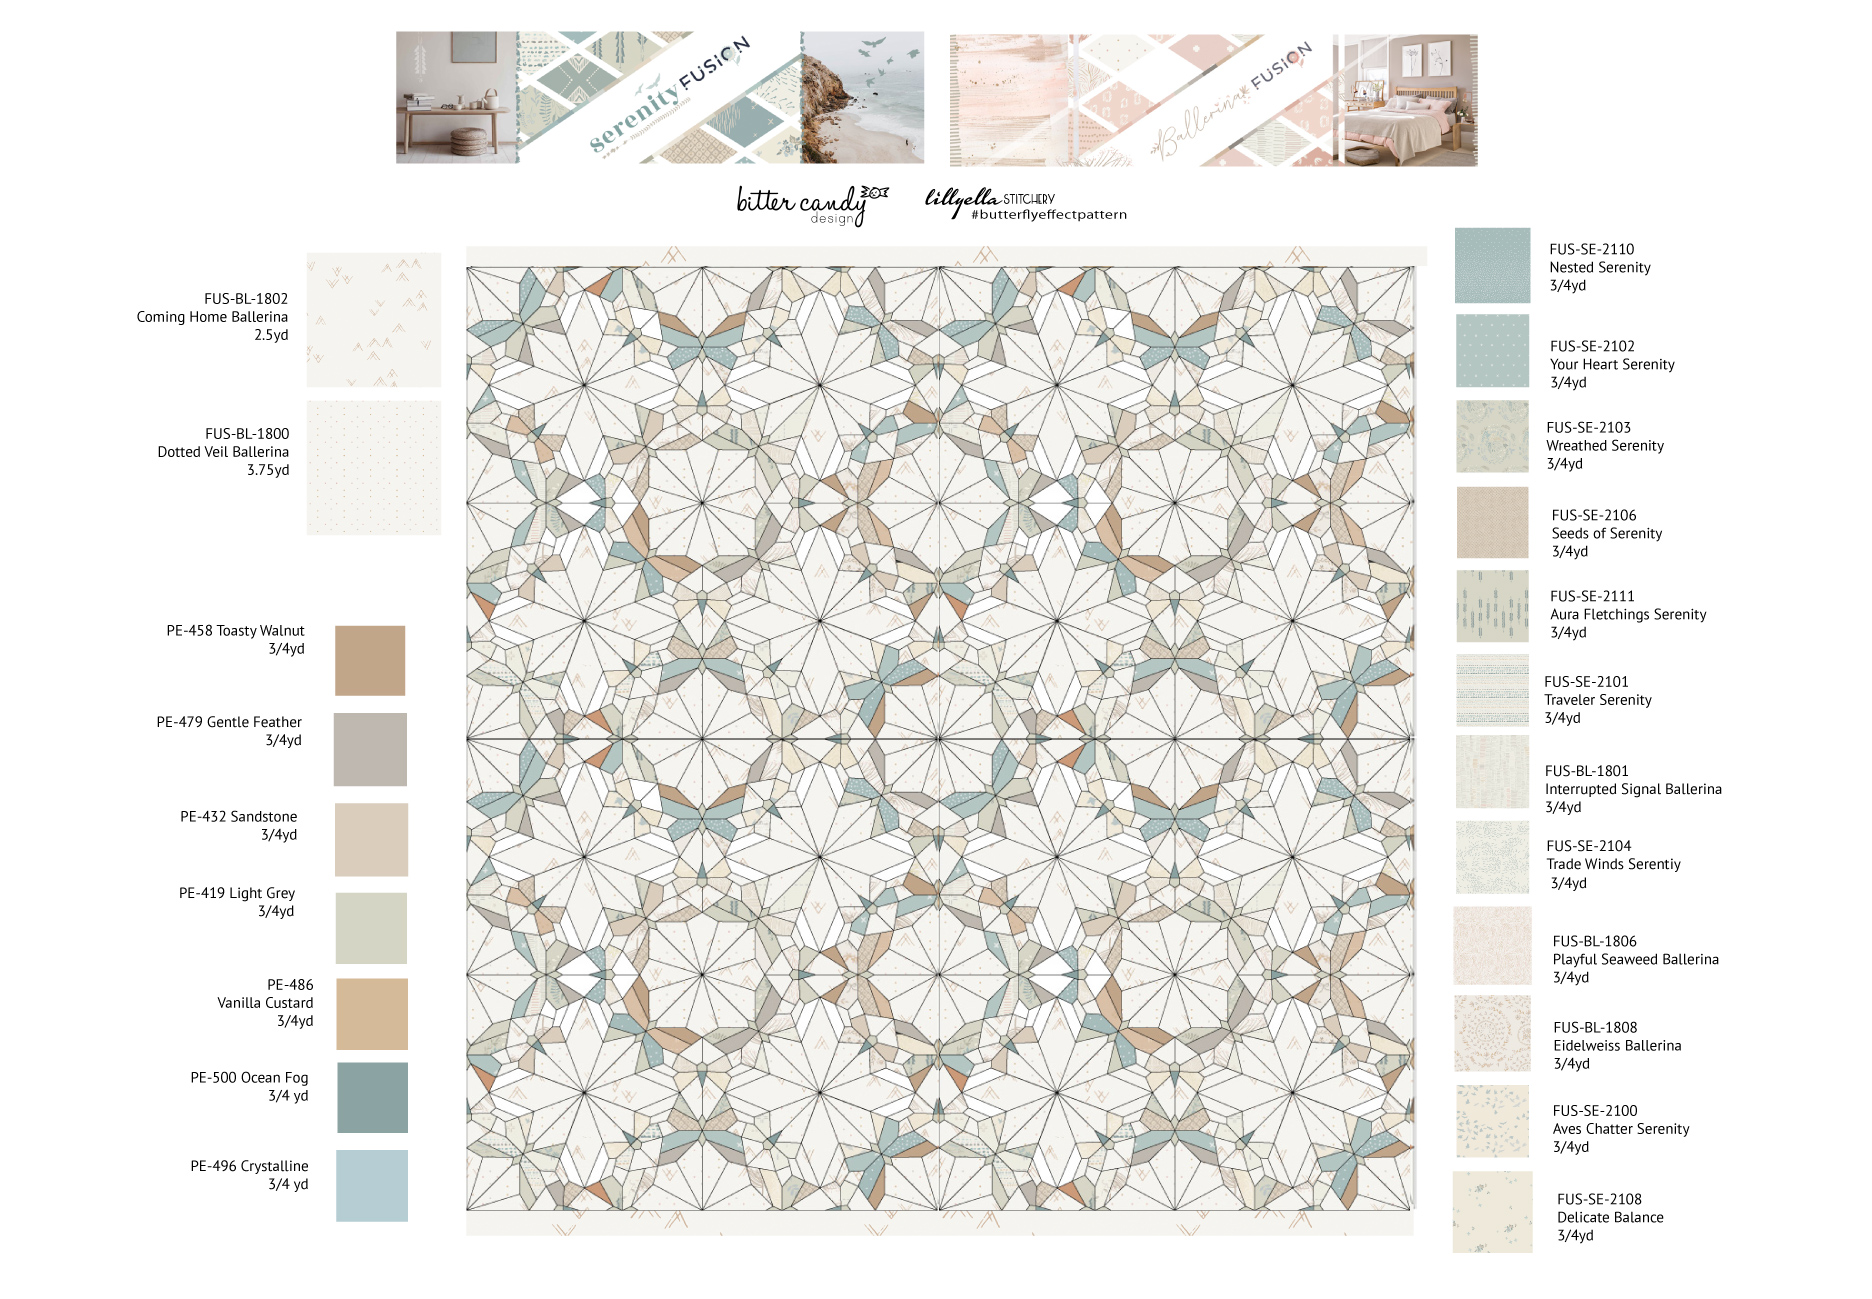
And could I ask for more when AGF also loved the mock up and idea?! So I pulled from both Ballerina Fusion and Serenity Fusion (plus a few solids) to make this –what I might call– ultimate bundle. A range of neutrals with splashes of light teal and caramel. What do ya’ll think? It gives me a relaxing lakeside vibe…. but vintage. [Is that a thing? Vintage lakeside vacation? It should be lol]
Check out each line in full, along with their amazing look books for extra inspiration!


Armed to the Teeth
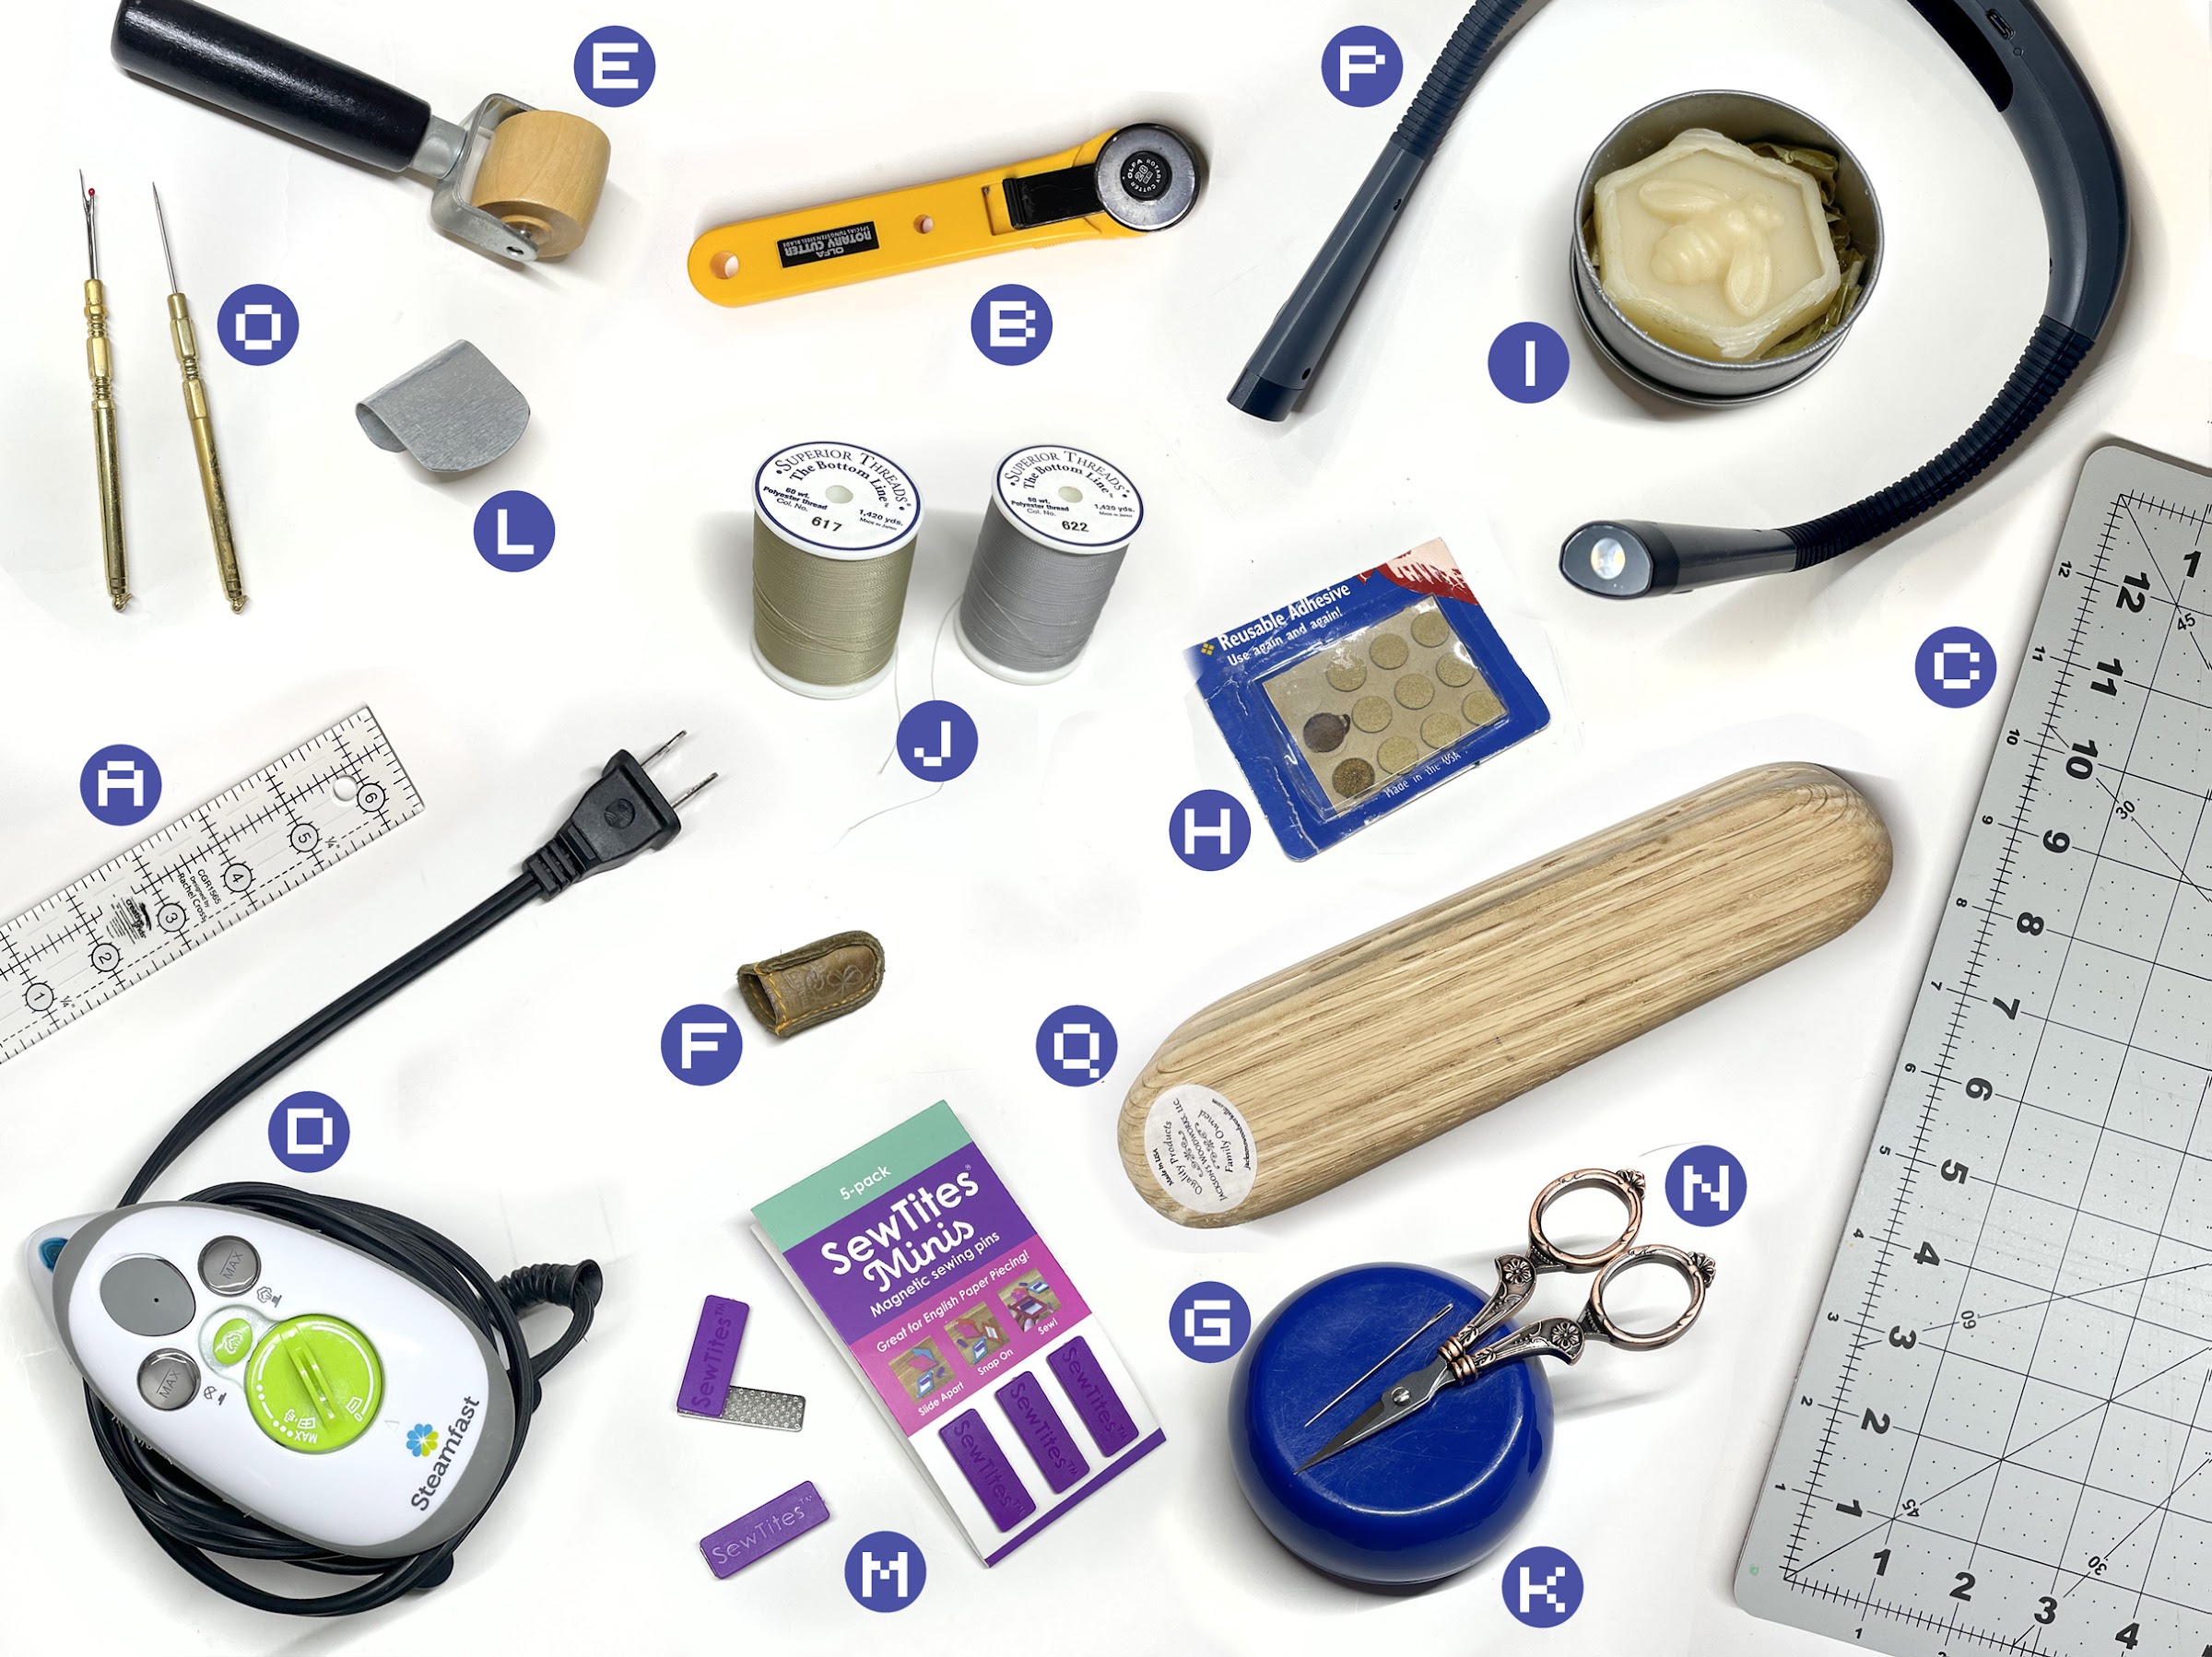
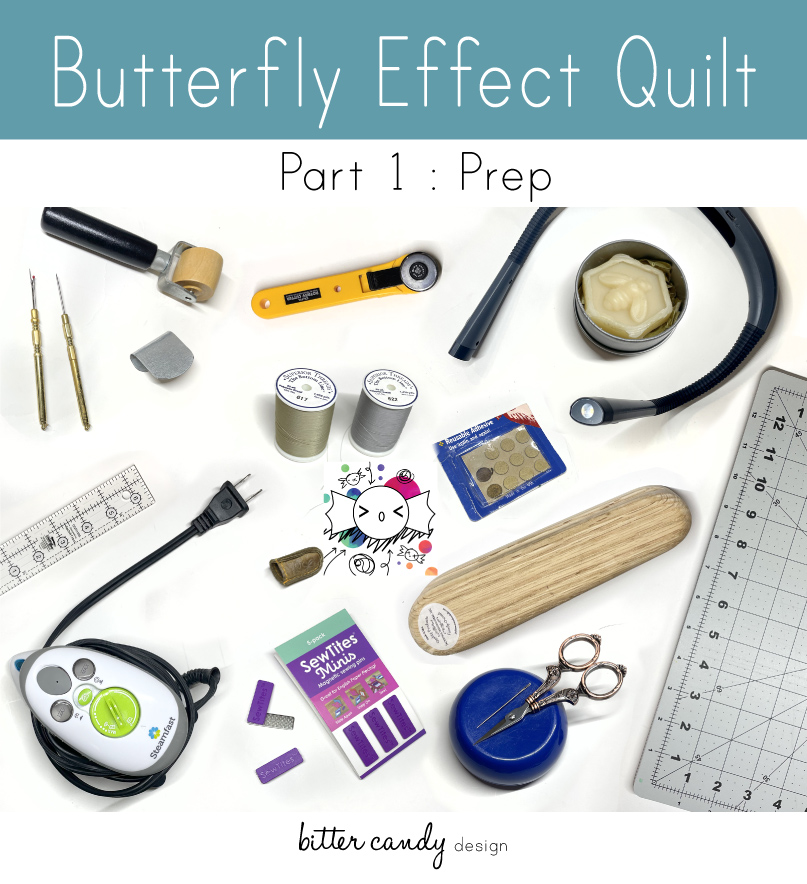
Prepping Tools
A)1.5×6.5″ creative grids ruler : great size for travel kit with grippy bottom & perfect for quick cuts
B)28mm OLFA rotary cutter : so cute for travel and makes quick cuts easy
C)14×14″ fiskars rotating cutting mat : being able to rotate the mat saves time & effort when cutting out all those EPP pieces!
D)steamfast mini steam iron : perfect lil guy to set glue bastes & press those tiny seams!
E)oval hardwood roller : rolling over seams on the go makes them extra flat, esp if you don’t have the iron in reach
unshown 67lb bristol/cardstock : printing your own pieces? make sure the paper has some heft so it can hold up through the work
unshown hole punch : whether glue or thread basting, a hole in each paper makes removing them later so much easier
unshown wool pressing mat : works great & it can stay right by my cutting mat for an efficient workspace
Sewing Tools
F)clover leather thimble : just get it! it’s amazing! it darkens & looks half chewed as you use it but it protects while still letting me ‘feel’ what I’m doing
G)clover gold eye embroidery needles : dependable, solid, & sharp. need I say more?
H)colorbok thimble pads : stick ’em on and you won’t have to worry about clunky, sweaty, disappearing thimbles! but warning, these don’t work for everyone
I)robot mom sews thread gloss : running the length of my thread with this makes sewing smoother & without tangles. mine is lemon verbena scented
J)617 & 622 bottom line threads : talk about FINE! these colors are near transparent so they nearly disappear in the seams. one matches with warmer fabrics, the other with cooler ones.
K)mini grabbit magnetic pincushions : love these! I’m super paranoid about losing needles, especially when sewing on the couch and this puts me at ease. but fyi the mini version may still be too bulky for your travel kit
L)finger guard : ya’ll will have to help with the name of my inspiration (I’ve forgotten the name)! but this protects the hand under my handwork from getting poked with the incoming needle. this will be my first project really using it!
M)mini sew tites magnetic sewing pins : this is another new addition to the pack and I hear they’ll be great for flatback stitching. anywhere I can reduce needle pokes, I will!
N)warm crochet embroidery scissors : who doesn’t love cute lil scissors?! these sharp scissors have good heft, and with hand sewing there will be lots of threads to snip
O)seam ripper * stiletto : I hate to say it but mistakes happen and this small duo can fold safely away for a travel kit
P)glocusent LED neck reading light : there’s nothing special about the brand, but I love that it lights up my work and wearing it means it will follow me wherever I am! the bendable arms have different levels and a warm tone to reduce eye strain in the evening
Q)tailor’s clapper : who knew a block of wood would be so worth it? but it flattens seams like nothing else which is great to re-flatten & set seams after removing papers
Looking for more tools, tips & how-to’s?
These resources helped me when I was diving in…
•Suzy Quilts
https://suzyquilts.com/category/blog/sewing-tools/
I trust her judgement on so many tools & she’s got lots of posts on them! She really hasn’t steered me wrong… ever. And over the past couple of years with her sew-alongs she has given so many tips & tricks that are all worth checking out too.
•Mister Domestic & Pat Bravo’s EPP Party
https://misterdomestic.com/epp-party/
Old news I know but it’s laid out perfectly for new EPP-ers. The first block has tools & prep info, and each block after has helpful tips, videos, and links to print out your own blocks to try out, FREE! And while it’s a great way to learn at your own pace, if you finish each week you’ll have a small quilt by the end of the party!
•Lilyella Stitchery
https://lillyella.com/2021/03/02/a-beginners-guide-to-epp/
https://lillyella.com/tutorials/
Beyond the pattern that I’m using, she has others along with some free ones using the quicker machine-made Foundation Paper Piecing technique. There are even patterns for holding all your new found tools.
Say When!
So now I guess that means I need to start printing, cutting, & basting this behemoth of a project!
With EPP, speed is not the goal. If it was, this would NOT be the way to put it together! It’s time intensive, eye-strain intensive, and attention intensive. While I love the monotony of those repetitive stitches I can’t say that I’m not a bit scared by what all this will entail of me. [is it possible to get bed sores from sitting & stitching all day? I’m asking for … a friend… lol]
But as sewing really has become a part of my ongoing self-care, I’ll just take it one stitch at a time. We’ll see how long it takes to finish but as with most great things, it’s about the journey & I hope you’ll stick with me on this LONG one! ❤
There will be at least a couple more posts over the course of this quilt, but to see my progress (especially once the stitching starts) follow me on Instagram @bittercandydesign.
Be sure to join the mailing list to keep in touch with new posts, makes, & shop news!